
DIY Highlighter Birthday Cards
/This is such a fun art idea, perfect for those days when you just want to have a play with some art materials and maybe make something useful at the end.
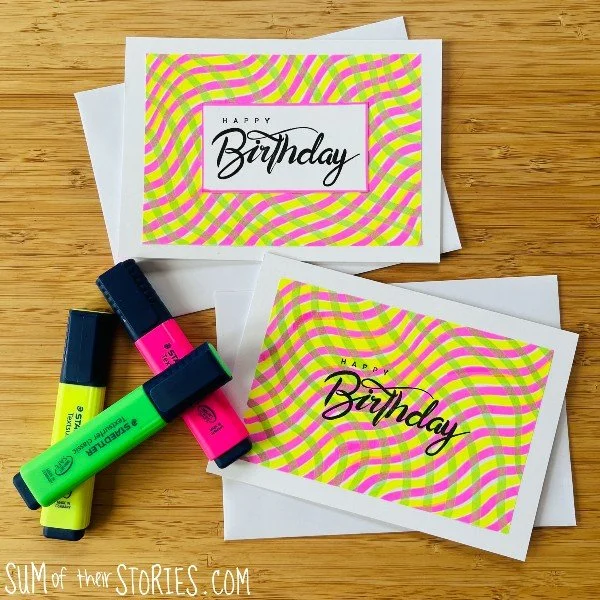
I have always loved highlighters. I’ve been reading up and apparently they were invented in 1963 but I feel like they really didn’t take off here in the UK at least until the late 1970s/early 1980s. I remember my friend having a yellow highlighter in her pencil case as we started secondary school in 1981 and being very envious! I saved my pocket money and bought myself one asap. Then when all the other colours came along we all got any many as possible. They really fitted well with our 1980s love of all things neon!
Because of their translucent nature highlighters are perfect for overlapping to create new colours, the underneath colour will show through and change the colour you put on top.
I’ve had a little play with just 3 highlighters and made some fun patterned paper which I then turned into a couple of birthday cards. This art idea would be really fun to do with the kids, but the results are not childish so it is also a lot of fun for adults too. Let me show you how:
How to create fun background paper with highlighters
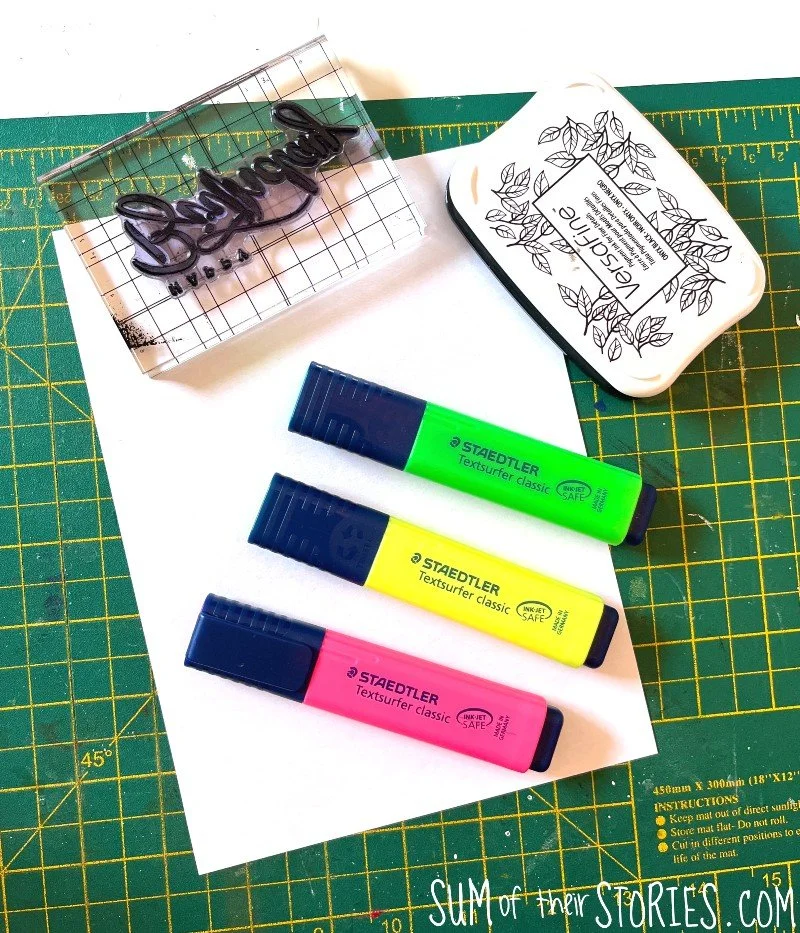
What you’ll need to make your highlighter patterned paper:
Paper - just regular copier paper is fine, that’s what I used
Highlighters - at least 3 colours ideally but you can go wild and use as many as you have
To turn your patterned paper into greeting cards you’ll also need:
Blank greeting cards and envelopes
Paper glue - I used a Pritt stick
Guillotine or scissors, ruler and pencil
Happy Birthday stamp and ink
A scrap of white card
Take one of your highlighters and hold it so the full width of the nib is on the paper and the line is as wide as possible. Draw a wiggly line centrally across your paper.
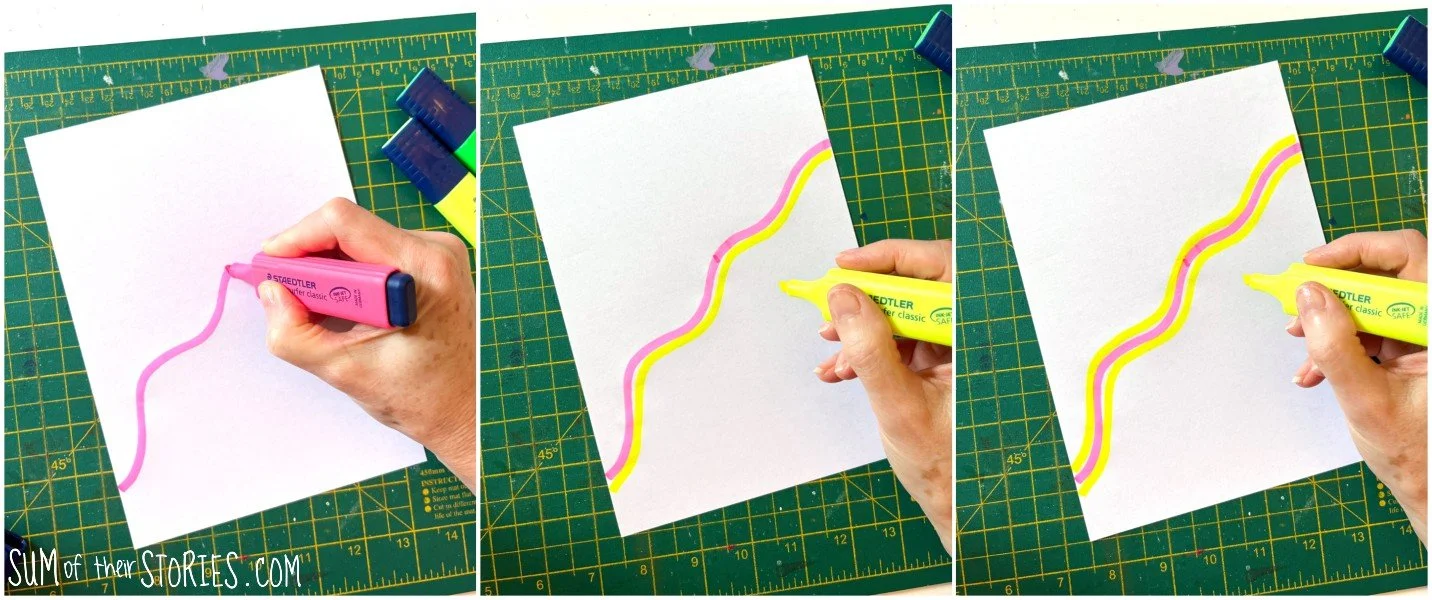
Take another colour and draw another line, following the wiggles of the first, just underneath.
Continue drawing alternate wiggly lines until the paper is full.
I found it quicker to draw 2 lines each time, one above and one below the previous lines. I am however obsessed with not leaving pens without their lids. And when I say obsessed I’m not joking, I’m sure my poor kids can tell you that when they were younger I was always banging on about putting the lids back on pens.
If you are a crazy, wild kind of person who can bear to leave a highlight lidless for more than 1 minute then you would probably find it easier to just draw your lines alternately coming down the page first, then just swivel the paper around and repeat on the other half.
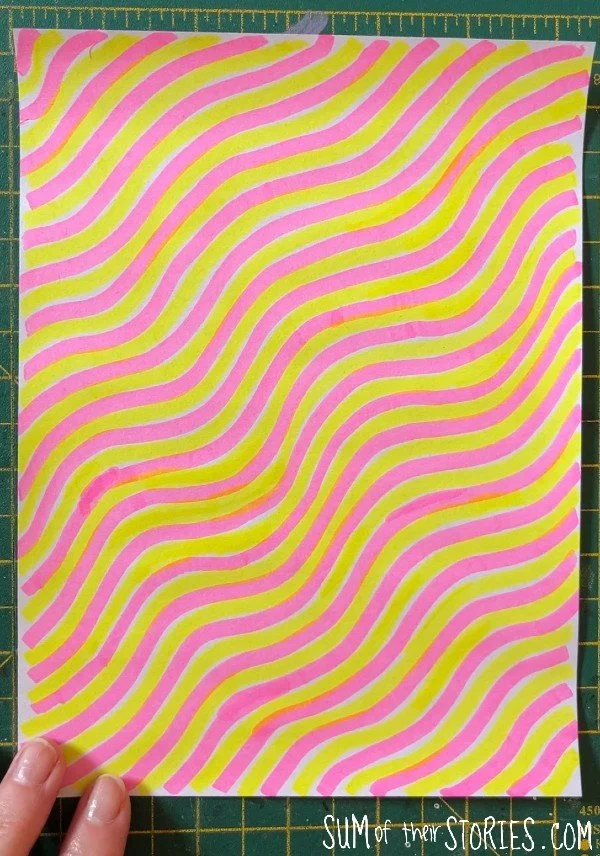
I’ll leave that decision up to you, no judgement here, whichever way you choose!
Your page will now be all covered in lovely highlighter stripes. It already looks great, you could stop here if you want to. But the next step is a little bit like magic.
Take another highlighter in a colour you’ve not used yet and draw a wiggly line across the paper, perpendicular to the lines you’ve done in step one.
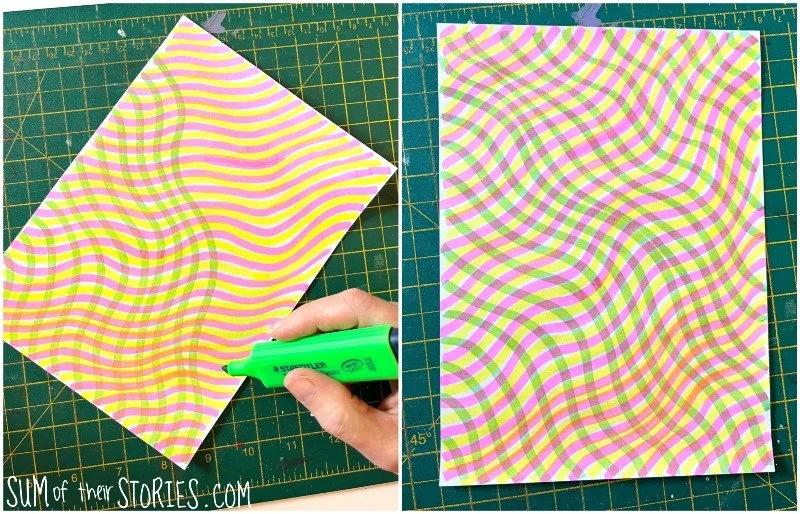
Leaving a gap between each line, draw more wiggly lines across the whole page.
Notice how the colours of the pens underneath change with the new colour on top.
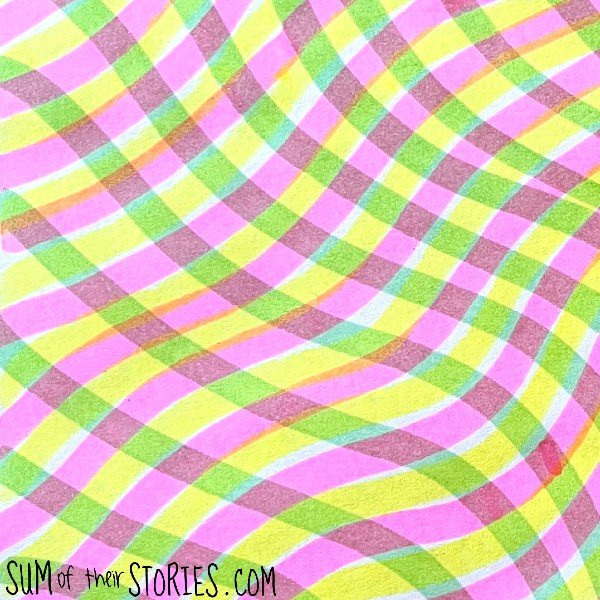
The pattern I’ve done to demonstrate this technique is really simple and done with just 3 colours, yellow, pink and green.
Experiment with the highlighters you have, see what different combinations of colour make. Leave gaps so a little of the paper shows through or cover everything completely.
I really like the wiggly lines but you could do yours straight or in concentric circles, or zig zags, the options are endless.
Turning your highlighter patterned paper into a greeting card
Trim the edges off your patterned paper and trim it to fit a blank greeting card. My paper was just the right size to cut into 2 so I was able to make 2 cards.
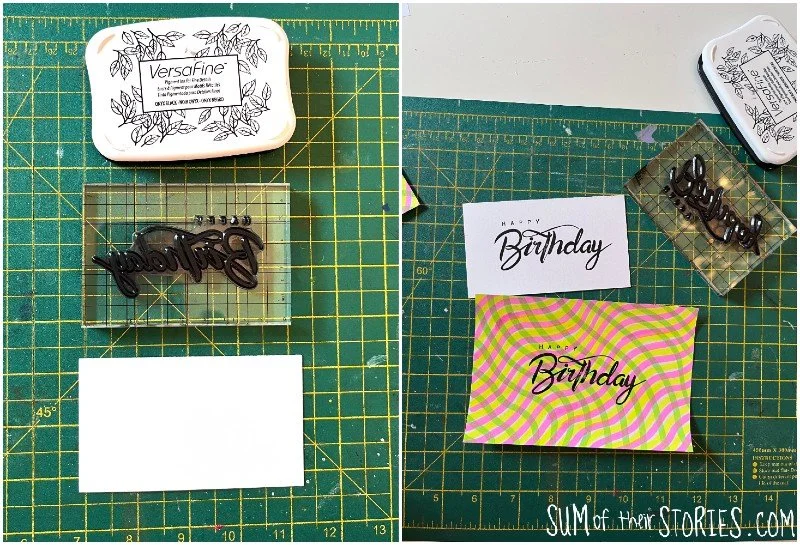
Card making idea 1:
Stamp your greeting onto the patterned paper and then glue into onto your blank card. It doesn’t get much simpler than that!
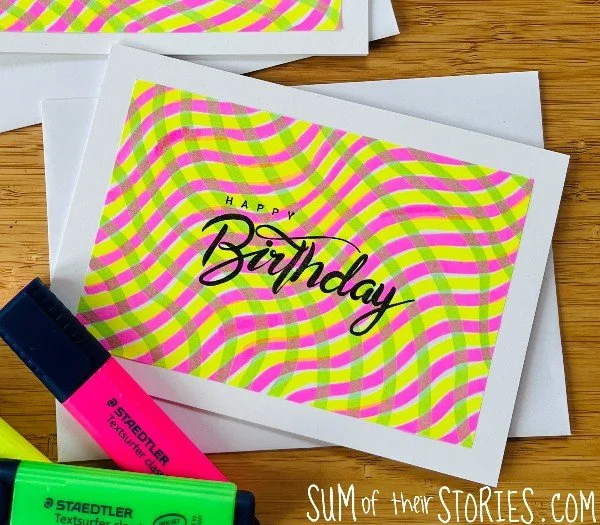
Card making idea 2:
Stamp the greeting onto a scrap of white card, trim and then colour the edge of the card with one of your highlighters. To do this place the card onto a piece of scrap paper and draw along the edge with the highlighter half on the card and half on the scrap paper. The trick is to do this in a confident bold motion, if you tickle about with it then that’s when your highlighter slips and makes a mess. Maybe practice on some card scraps first if you’re not sure. The thicker your card, the easier this is.
To complete the card, glue the patterned paper to the front then glue the stamped greeting on top.
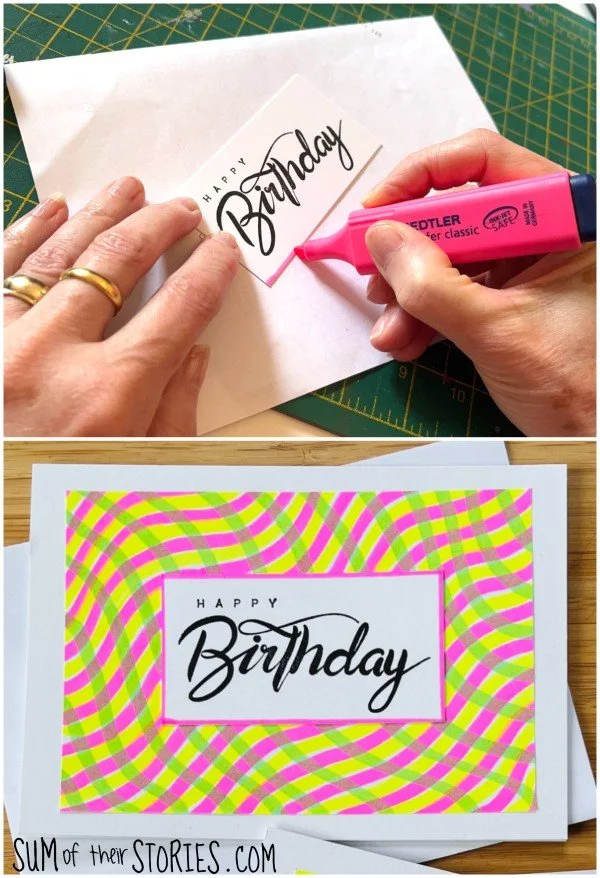
You could attach the card with the sentiment using foam pads or even glue dots if you’d like to raise it a little. I did a comparison of the two a little while ago which might be interesting for you - Foam pads or 3d glue dots.
The results are simple and effective.
Your card doesn’t have to say happy birthday of course, this kind of card could be for any occasion.
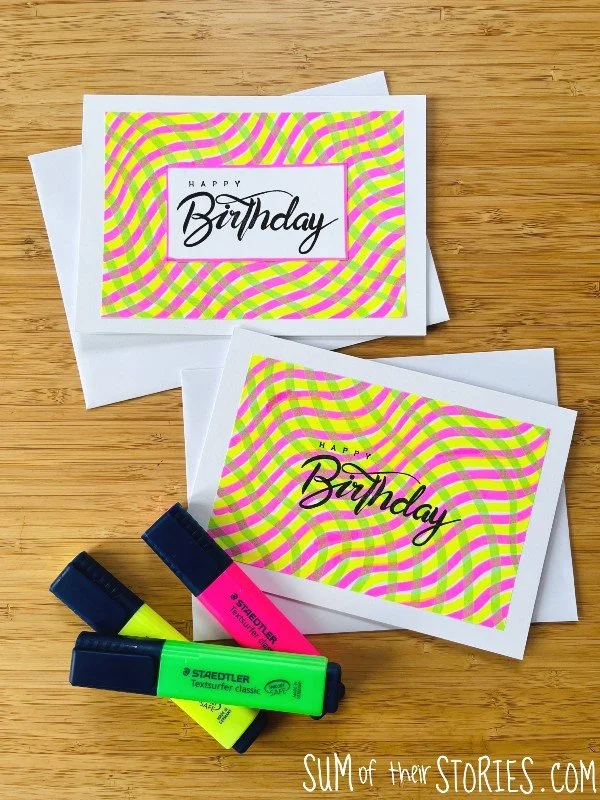
Using highlighters limits the colour palette but layering them adds a whole different dimension. Honestly this is such a fun technique to play around with. It’s so inexpensive too so you can go mad and make loads of designs, experimenting to see what you like best.
On my first attempt I tried drawing all the yellow wiggles first, then filled in the gaps with pink afterwards. I didn’t like how this turned out as much. I wasn’t great at leaving even gaps so there was a lot of overlap in some areas. It’s not awful but not my favourite, but that is the nice thing about art like this - you can do it however you like. Plus you’ve not spent a fortune on anything so if it doesn’t work you can throw it in the recycling without worrying too much. Actually, I take that back. Don’t throw any of your patterned paper attempts away, even the hottest of hot messes can be cut up for collaging.
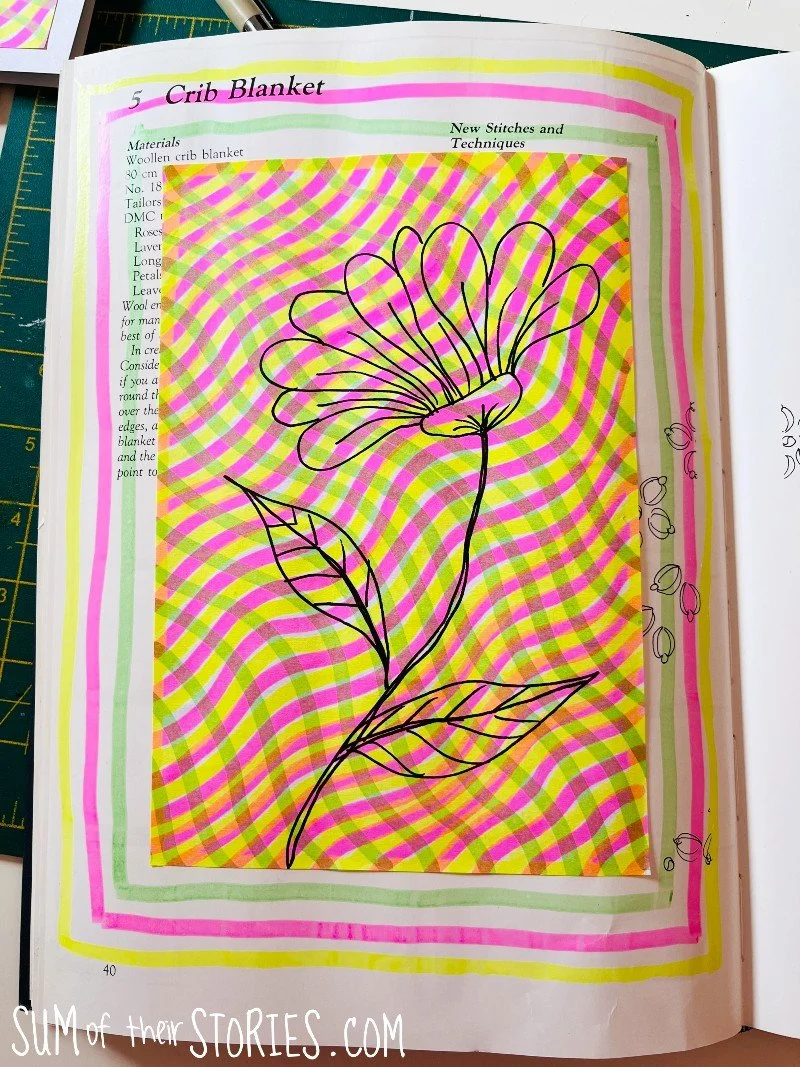
I doodled a large flower over my “mistake” version and have glued it into my old book art journal - waste not want not and all that.
Have I tempted you to grab a few highlighters and a sheet of paper to try this fun art idea?
Julie
You might like to check out these other DIY art ideas:







A fun art technique using highlighters. Plus tips to turn your art into simple greeting cards.