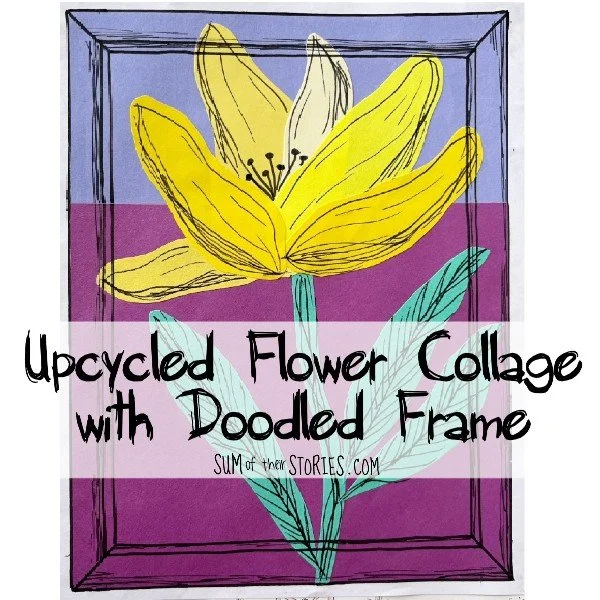
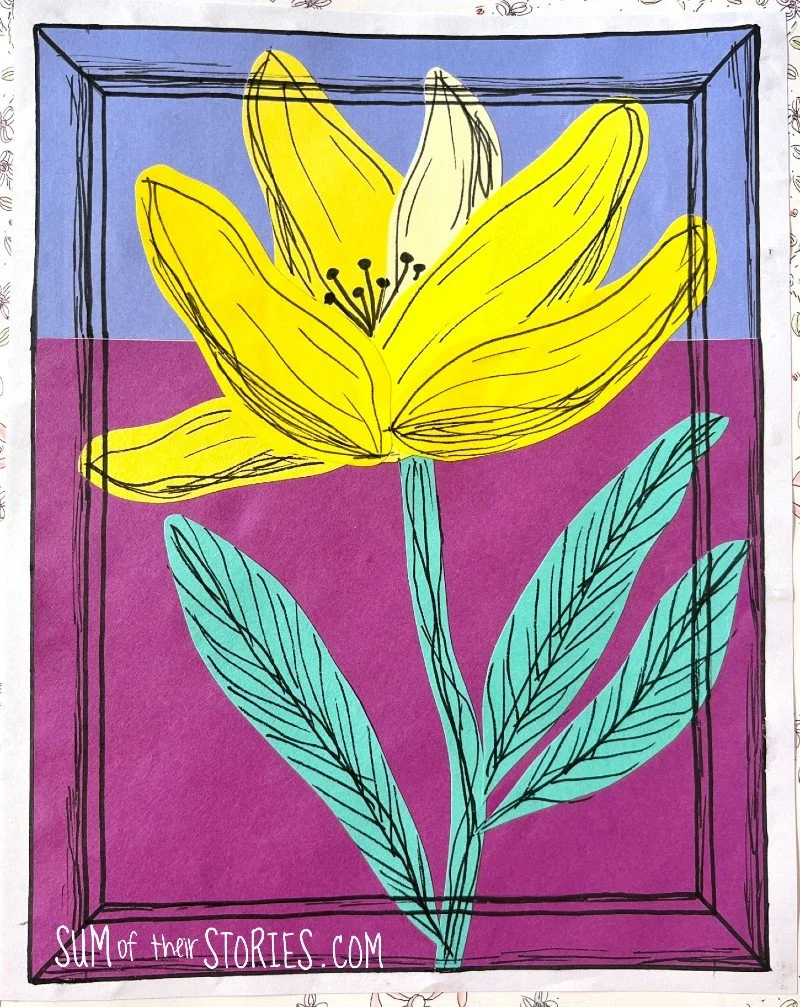
Upcycled Flower Collage from Colourful Envelopes with Doodled Frame
/Save colourful envelopes from old birthday cards and use them to make paper collage art.

Sometimes when I have too many things I should be getting on with I actually find it helpful to take 30 minutes out of my day to do just a little arty something. I can then come back to my less exciting work jobs refreshed and more focused after doing something completely different. (I do acknowledge that I may just be saying this as an excuse to spend a little time making some art!)
On the walls of fancy coffee shops and over on my Instagram and Pinterest feeds recently I’ve seen a lot of framed art that spills out onto the frame. The frames are painted the same colour as the background of the art, sometimes colour blocked.
It’s a little like that dipped art trend from a few years ago but the art is on top of the background colour instead of being covered by it. It’s just a fun art look so I thought I would give it a go and a paper collage seemed like a quick way to try it out.
It’s quick, cheap, easy and fun so if you want to have a go let me explain what I did.
How to make a flower paper collage from old coloured envelopes
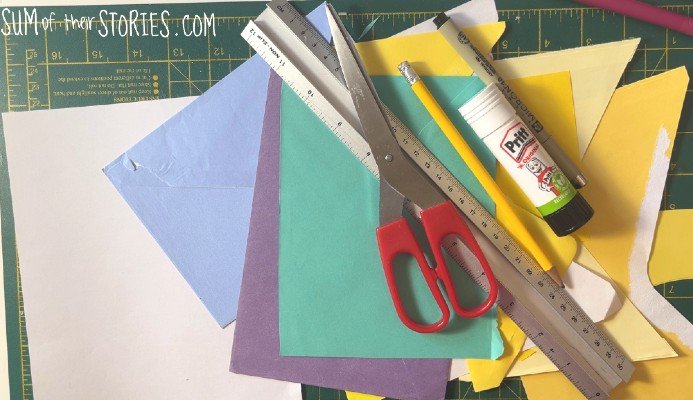
What you need to make your flower collage
Colourful envelopes (I get all the family to save them from birthday cards each year, they are such a great source of coloured paper)
A plain piece of paper for your base - copier paper is fine, I just cut a piece in half
Paper glue - I used a pritt stick
Scissors
Black pen - I used a 10 Pigma Micron pen but any black marker will work as long as it’s not too thick
Pencil
Ruler
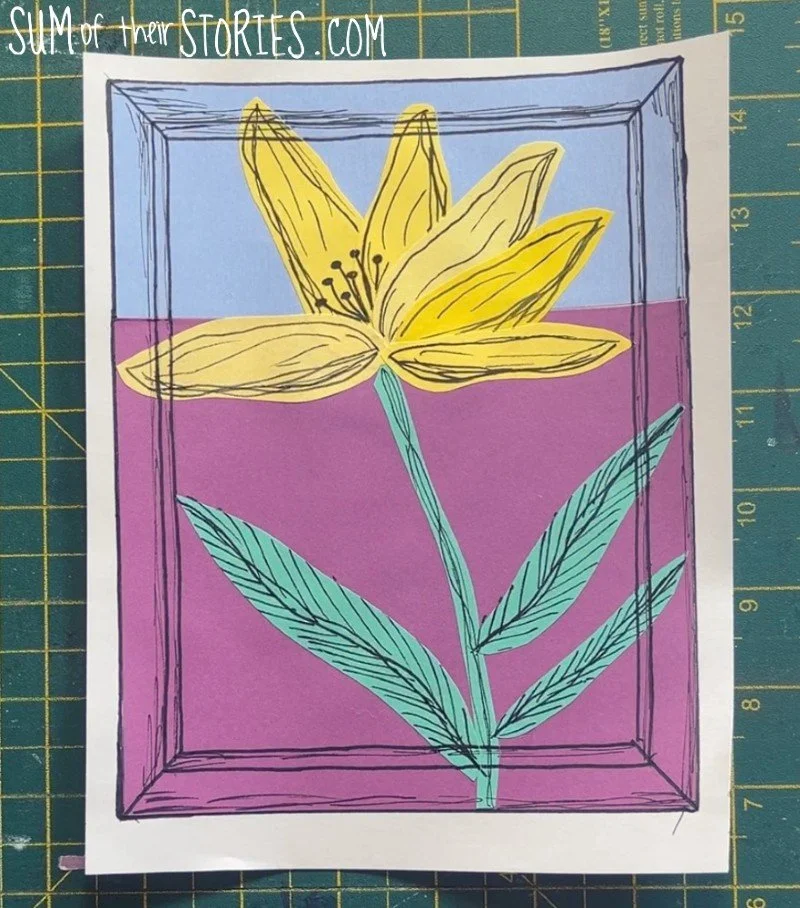
Start by deciding on 2 colours for your art background, I’ve picked blue and purple but of course you can pick anything you like.
Cut 2 pieces, one more square and one more rectangular and glue them to your base paper.
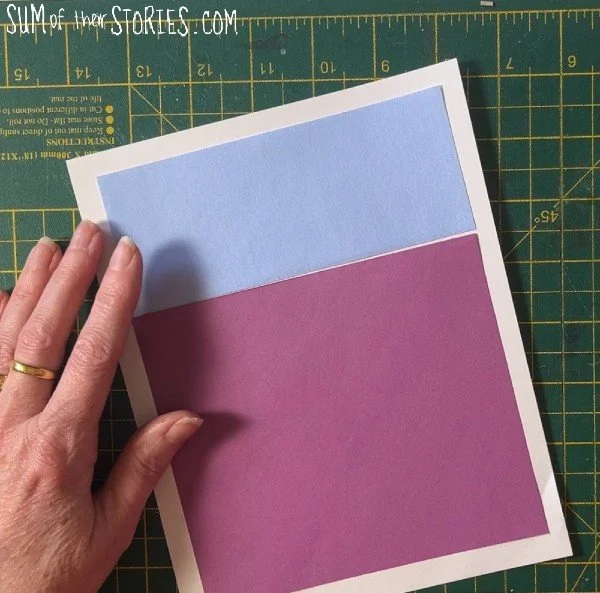
Your collage can be any size of course, just to give you some idea my base paper was 16cm x 20cm. The purple paper is 12.5cm x 14.5cm and the blue at the top is 6.5cm x 14.5cm.
Once your base is ready you need to cut your collage pieces. I just went for it with the scissors, cutting some long wiggly shapes. You could plan more and draw shapes first if that’s how you like to work.
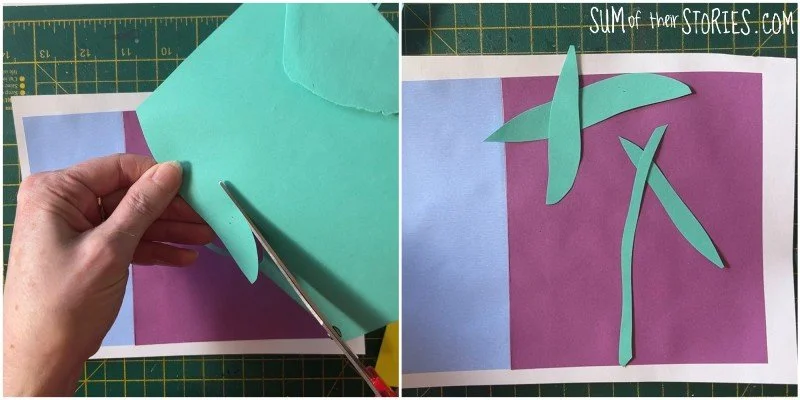
Cut some leaves and a stem from green paper.
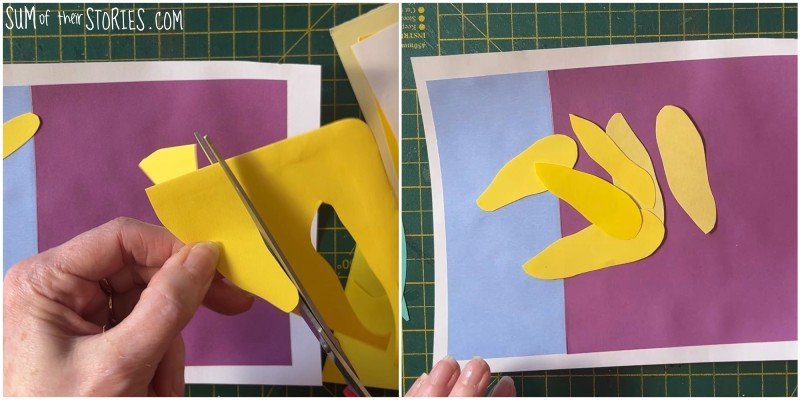
Next cut some petal shapes. I used a few different shades of yellow but once again this is where you can mix things up and use any colour or colours you like.
Play around with the shapes you’ve cut, arranging them on your colourful base. This is a good chance to trim the shapes you’ve cut if they don’t work quite how you want them too.
When you are happy with the arrangement, take a photo so you can refer to it as you glue the pieces in place.
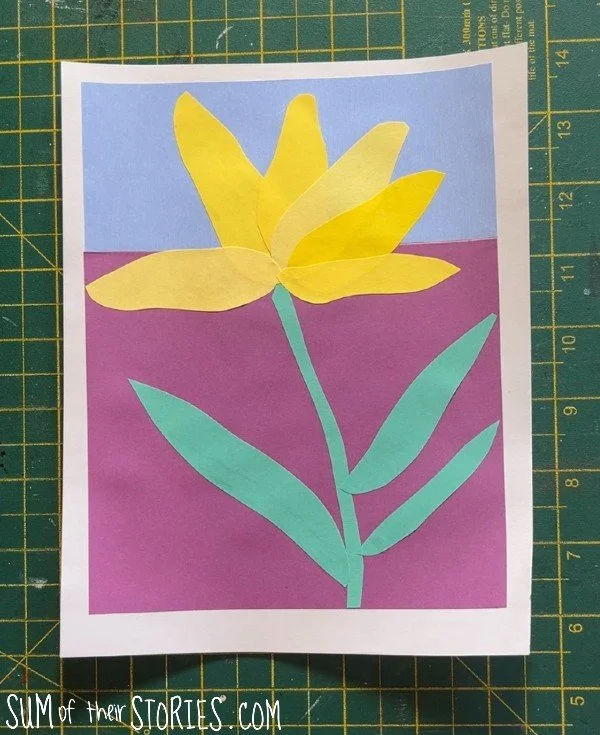
You’ll have to remove all the pieces first, then glue the shapes in place one at a time starting with the underneath pieces. Refer to your photo to get things roughly in the right place.
You could stop here, you’ve already made a pretty paper collage.
I wanted to give my art a “the art is spilling out onto the picture frame” effect and I do love a bit of a doodle so I couldn’t resist drawing all over my paper collage.
If you want to go for the faux frame idea you’ll need to outline your art and then mark a line in pencil 1 cm in from the edge all round. Mark a second line 1/2 cm in from the first line, again, all the way round.
Finally draw a line through the corners.
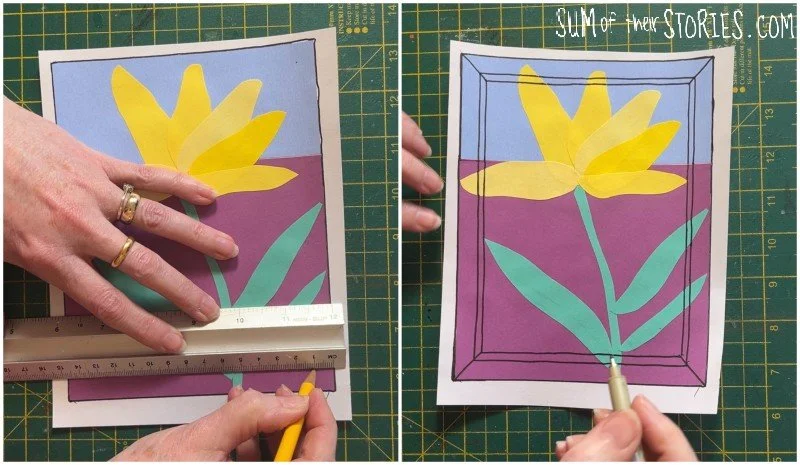
Use your black pen to go over the pencil lines.
Now it’s time to doodle (again, only if you want to)
Outline the paper petal shapes, add extra lines to give a bit of movement and a hint of shadow. There are no rules so just doddle as you fancy. I used the same black pen throughout, just press more lightly where you want the lines to be finer.
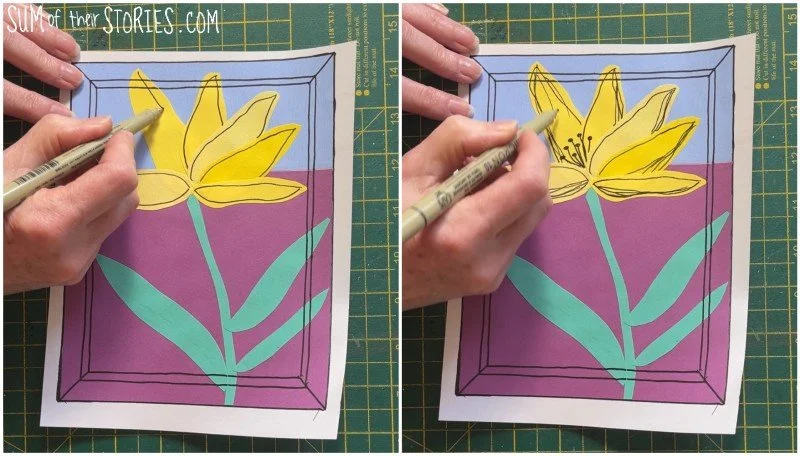
Doodle a central vein on the leaves and lots of fine lines.
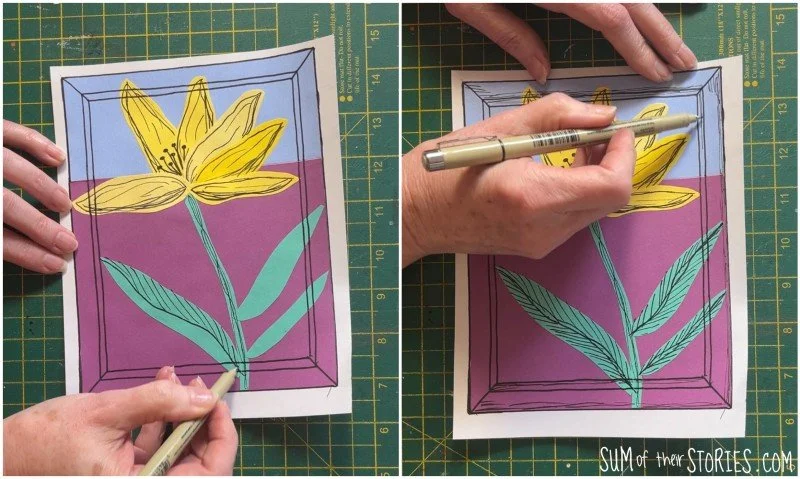
If you want to add a little dimension to the “frame” you can add a little of extra doodle/shading round the edges. Use the photos to guide you but don’t worry too much, if you put lines in the wrong place it’s not going to matter. Just enjoy the process and play.

I enjoyed making this floral paper collage so much I immediately made another! Mine have been glued into my old book art journal, the same book I’ve using for my 2026 photo a day project. You can see more about that every now and again when I share it on my Instagram.
What to do with your paper collage art
Frame your art and put it on the wall
Glue it to the front of a plain notebook or ring binder
Make it a little smaller and turn it into a birthday card for a special friend
Write your favourite inspirational quote or poem on the back and send it to a friend who you’ve not seen for ages.
Have I tempted you to take a 30 minute break in your busy day for a little art? This idea is so versatile, you can play around with petal shapes and colours to make all sorts of different flower collages, why not give it a try?
Julie
You might also like some of these paper craft ideas: