Swiss Darn Stained Sweater Makeover
/
I love a bit of visible mending, it feels good to find a way to repair a garment that still has plenty of life in it and if your mend is intentionally visible it does take the pressure off a bit and allows you to be really creative.
It’s time for the Sustainable Craft Challenge when I join a group of creative bloggers and we share ideas to encourage and inspire bringing a more sustainable approach to crafts and crafting. This month the theme is Warm so for my contribution I’m showing you how I upcycled an old sweater.
How to save a sweater with a stain with swiss darning
I was given this sweater (or jumper as I would call it!) last year and although it fitted me nicely and was in generally good condition it has a few issues. Namely, a metal zip in the back which felt really cold and a bit lumpy when the sweater was on, a small hole on the raglan seam and a stain on the front, right in the mid tummy area.

Admittedly the stain doesn’t look too bad in these photos but in real life it was pretty noticeable. The other slightly weird thing about the zip was that it opened from the bottom. I figure I’m just not trendy enough to know what that is all about!
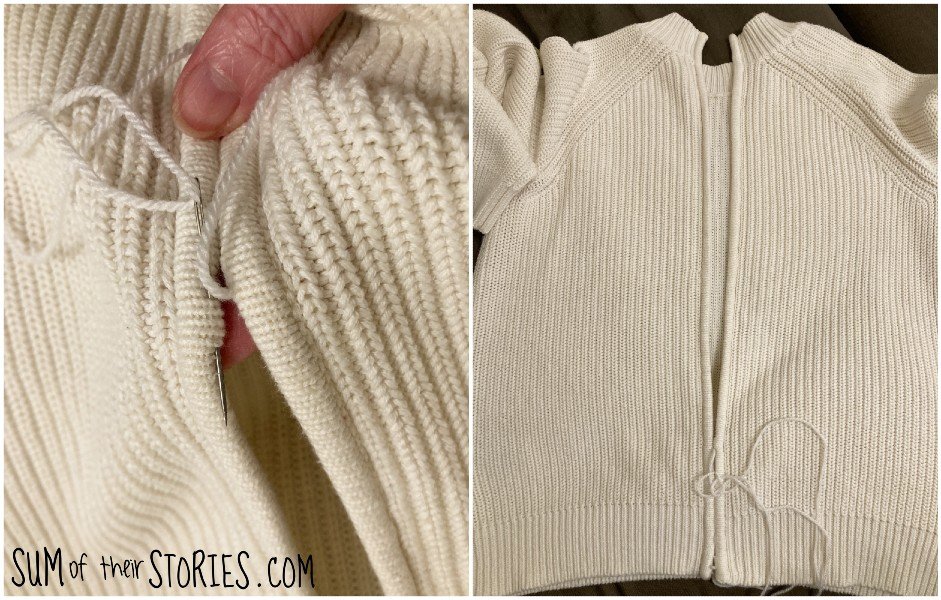
Fixing the zip was easy, I undid all the back seams and removed the old zip. Then I simply hand stitched the back edges together. I could have left it open and worn it back to front as a cardigan but the neck band wasn’t quite right for that, it sat too high.
The small hole on the raglan seam was also a very easy fix, a couple of stitches in a off white thread, just to secure everything and that was all sorted.
The stained area was more problematic. I had a number of thoughts about how to tackle this. I wanted to cover the stain but in a way that looks intentional and integrated properly into the whole sweater, not just an obvious cover up.
I love a little patch of visible mending on a cuff for example but sometimes the place that needs the mend or cover up is just not in a cool place for a motif or coverup.
Ideas to cover a stain on a sweater
So with all that in mind, here’s a peek at my notebook of ideas.
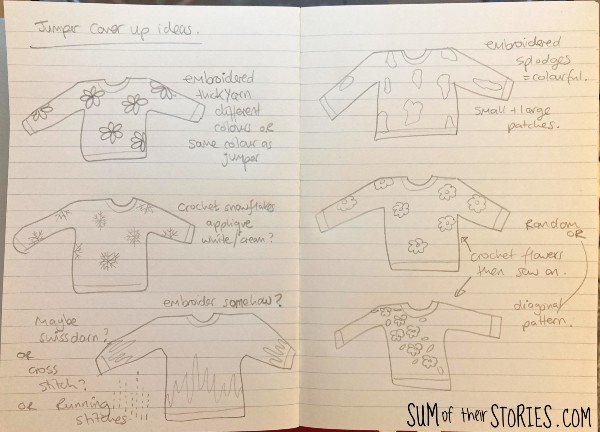
I thought about:
Flowers, big bold woollen flowers, embroidered all over the place. (A bit like this one: Daisy Jumper Refashion)
Crochet flowers appliqued on.
A random patchy colourful splodge design.
Crochet snowflakes appliqued on to make a Christmas sweater.
Some sort of drip effect but upside side so coming up from the ribbing.
The upside down drip effect was my favourite idea as I’ve done flowers a few times before, but the stain was quite far up from the ribbing and to make it look really intentional without having to do A LOT of embroidering or stitching.
I did also really like the idea of getting a good colour match yarn and doing some sort of embroidery that is cream on cream too but didn’t have anything that was the exact right shade.
Wanting to use supplies that I already have instead of buying anything new I dug out some scraps of pastel coloured yarns and settled on the colourful patchy splodgy idea.

Swiss Darning
Swiss darning is a method of embroidering onto knitwear in a way that looks like the design was knitted into the piece rather than embroidered on top. So with your yarn you echo the knit stitches exactly.
Knitting, when it’s stocking stitch, is made of lots of V shapes and it is these V shapes that we stitch again when Swiss darning.
My sweater is actually a rib knit rather than stocking stitch but it still have lots of visible Vs so I knew a Swiss darn technique would work.
What you need to swiss darn
To Swiss darn you take a length of yarn and a blunt needle with a nice large eye (to make threading the yarn easy)
How to swiss darn
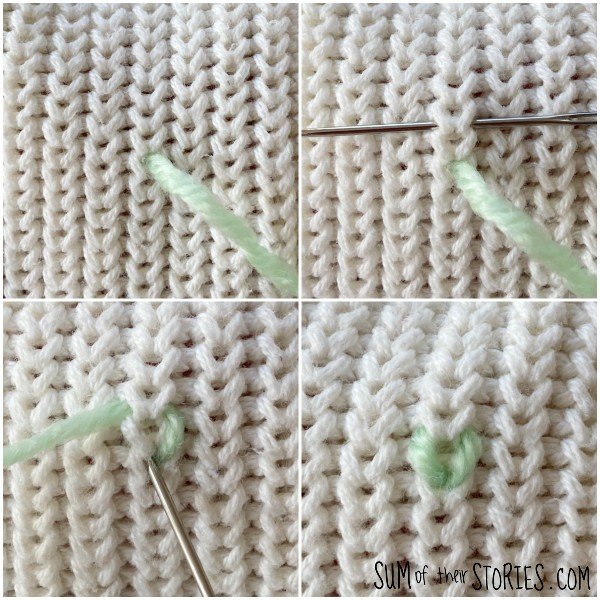
Come up from the back of your knitwear at the bottom of a V and leave a nice long length of yarn at the back.
Slide you needle horizontally across the top of the V and pull the yarn through, don’t pull it too tight, you want it to sit nicely over the V.
Poke the needle back into the bottom of the V in the exact same spot you started.
Continue in the same way covering the Vs on your sweater to create the design you want.
I went for a patchy look by doing alternate Vs as that worked well with the rib of the sweater.

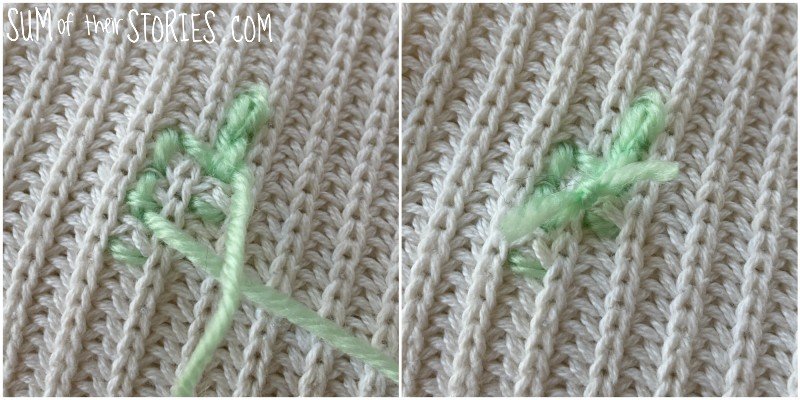
If you can work your stitching so that you finish close to where you started you can just tie the ends of your yarn in a double knot and save any stress on how to secure the ends.
I mixed it up, using 2 colours in some patches of darning and I made some splodges big and some small. I stopped when I thought it was enough but I might come back to this and add some more later.

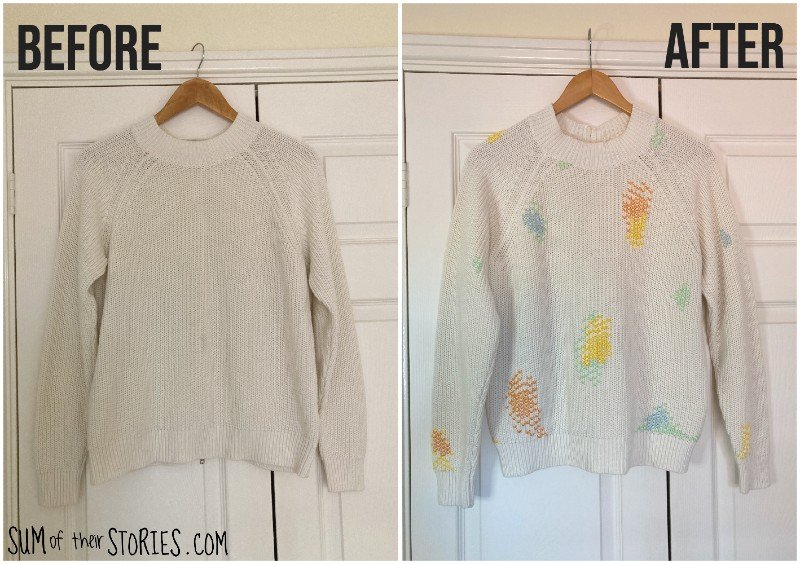

I swiss darned patches all over this sweater, adding them to the back and sleeves as well as the front. I’ve mentioned before, I just feel a bit cheated when only the front of a garment is fancy, I like to look nice as I walk away too!!

Anyone who is a regular reader here at Sum of their Stories will know how much I struggle with having my photo taken to show my garment makes and refashions. When I took part in Me Made May over on Instagram back in May last year I did discover a trick which I find really helpful though; a prop! Holding a mug of tea is something for my hands to do and I feel much less ridiculous for some reason.
More swiss darn embelishment ideas
This technique is so adaptable, you could use it to embellish any knitwear. Great to cover a stain as I did here or just to liven up an otherwise tired or boring garment. You could swiss darn a more regular design, anything that is on a chart for cross stitch or C2C crochet could be transferred this way, or keep things random as I have here.

Now let’s take a look at the other warm and cosy themed sustainable craft ideas that have been shared as part of the Sustainable Craft Challenge:

Homemade Swiss Mocha Hot Drink with Reusable Container
The Wednesday [Inspired] Snood
Super cozy fleece hot water bottle carrier, Free pattern
Recycled NoSew Pillow Teapot Cozy
Winter Door Hanger without a Cricut
How to make a cozy winter blanket (the easy way)
You might also be interested in these clothes upcycling and refashioning ideas: