Ribbon and Bead Bracelet
/It's not expensive or too difficult to make a pretty, delicate bracelet from ribbon and beads.
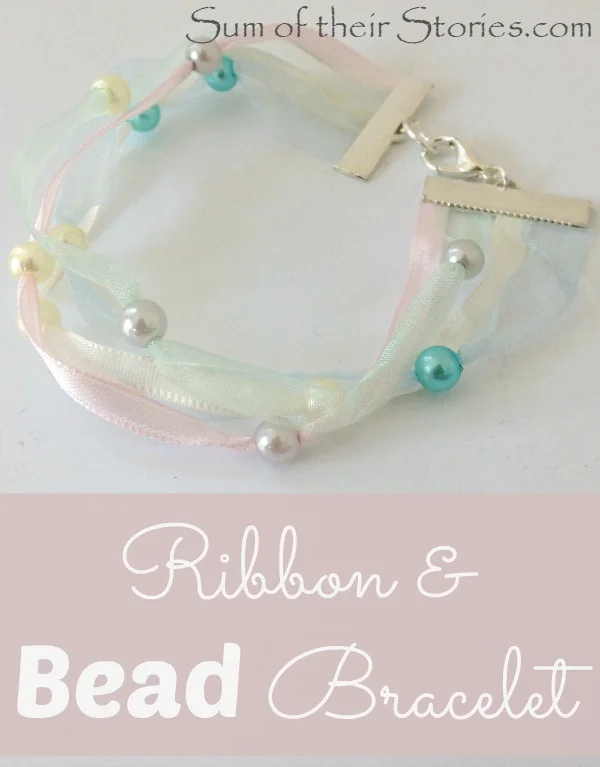
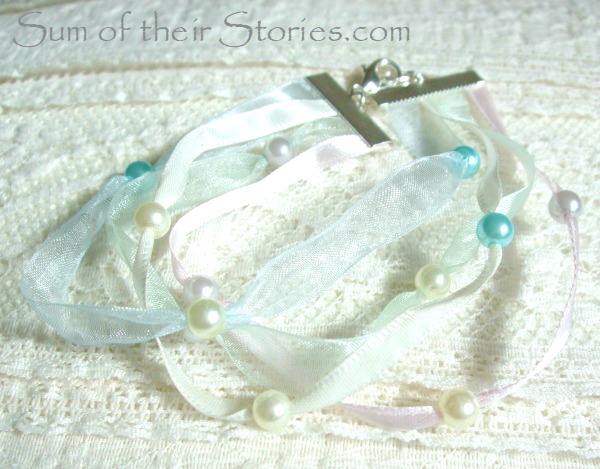
I've made this pretty ribbon and bead bracelet using pastel colours but you could really change the look completely with different types of ribbon, different colours and different beads. The options are virtually endless - I do love a project with lots of possible variations!
Some of the products I used to make this bracelet were provided by Pandahall.com
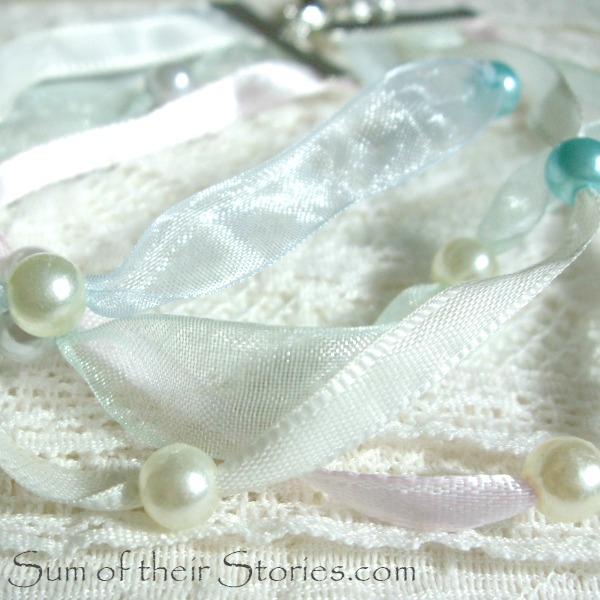
(Love how the sun really catches the sheer ribbon and pearl quality of the beads)
How to make a bracelet with ribbon and beads
To make a ribbon bead bracelet you will need:
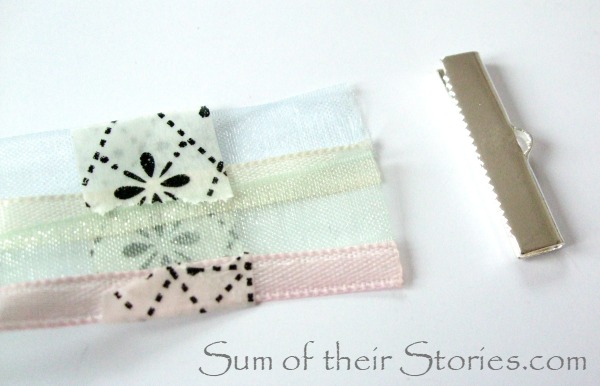
Ribbon (I used 4 from my stash, 2 sheer and 2 satin)
Acrylic Beads (Mine are these coloured pearl beads from Pandahall
A Selection of Jewellery Finding:
2 Ribbon Ends (mine are these silver colour 6mm ones from Pandahall)
2 small round jump rings (mine are these 4mm from Pandahall)
1 larger jump ring (mine is a 7mm oval, from my stash)
1 lobster clasp (mine is this one from Pandahall)
You'll also need to use:
A needle (a tapestry one is best)
Jewellery making or small pointy pliers
Washi or masking tape
Strong glue (I used Superglue)

Calculate the bracelet length
First you need to measure to see how long your bracelet needs to be. You could measure your wrist loosely but it's easier to find a bracelet that does fit nicely and measure that. My bracelet is 21cm when finished but my wrists are quite thin.
Now you need to do a tiny bit of simple maths to work out how long to cut your ribbon lengths. I will make it as simple as I can.
Finished bracelet length minus the Clasp length plus 1/2 cm
So the next thing you need do is to assemble the clasp end fixing. This is because you need to know how long they are joined together.
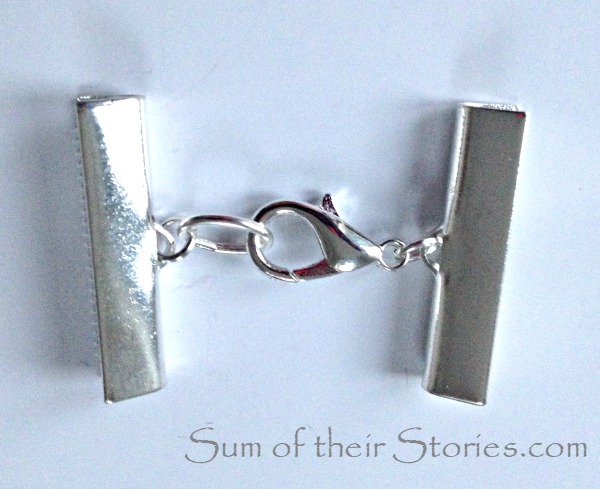
As you can see in the photo above, there's a 4mm jump ring joining to larger oval jump ring on one Ribbon End and a 4mm jump ring joining to a lobster clasp on the other. *
Measure across from one Ribbon End edge to the other to give you your “clasp length”. Now you can work out how long your ribbon needs to be.
For my bracelet the finished bracelet length I want is 21cm; the total clasp length as above is 3.5cm so using the calculation above I cut my ribbon 18cm: 21 - 3.5 + 0.5 = 18.
* When opening and closing jump rings always do so with 2 pliers opening the ring forward and backward not out to the side. There are photos explaining what I mean in my button key ring post here.
Prepare the ribbon lengths
Thread the ribbon through your needle and then thread a few beads onto each ribbon length. As many or as few as you like. I put 3 on each ribbon but you can vary it as your prefer. You will, of course, have made sure you choose a needle that will go through the hole of your selected beads! I used a tapestry needle as they have a nice long eye but are not too fat.

Take one end of each ribbon and tape together just to hold them in place.
Assemble the bracelet
Put a small dab of glue inside the Ribbon End and insert the ribbon. The glue is not essential but it hold everything in place and makes it a little bit less fiddly.
Using pliers squeeze the Ribbon End together to trap the ends of the ribbons in place. My pliers have ridges on them so I sandwiched the Ribbon End in a piece of scrap fabric to protect it from marks.
Repeat for the other end, then remove the tape.
That's it! You can play around sliding the beads along the ribbon until you are happy with the arrangement.
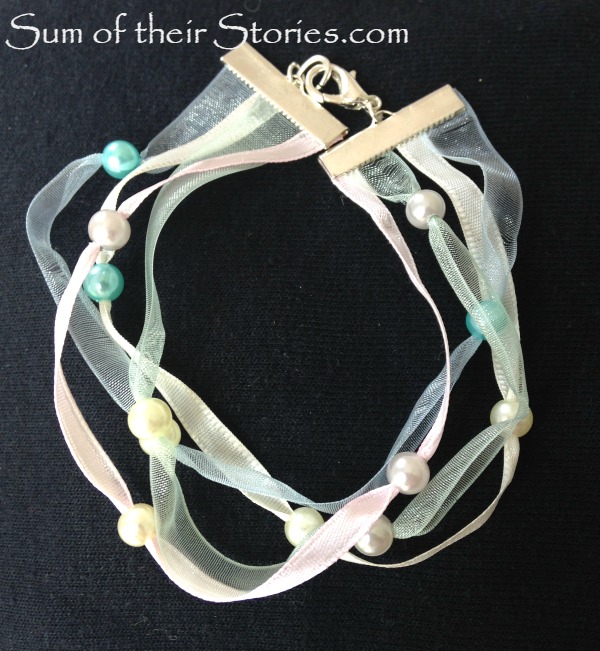
Using this sheer ribbon and pastel beads this bracelet is very light and delicate, lovely for summer with a lacy top.
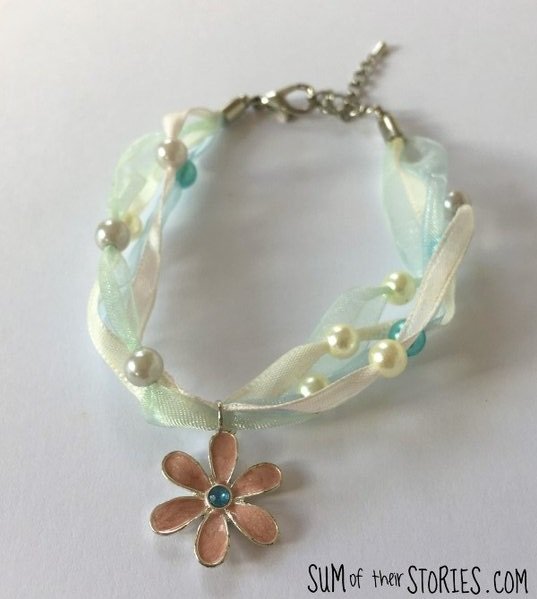
You can add a charm too for a different look. This flower charm was saved from an old broken necklace and repurposed. This bracelet has a round end cap fastening too instead of the ribbon end.
These bracelets are really quick and easy to make and the results are so pretty.
If you like this style of bracelet you might like to check out these other similar style bracelet tutorials:


Julie
I’ll be sharing this tutorial at some of these link ups
You might also enjoy some of these jewellery making ideas: