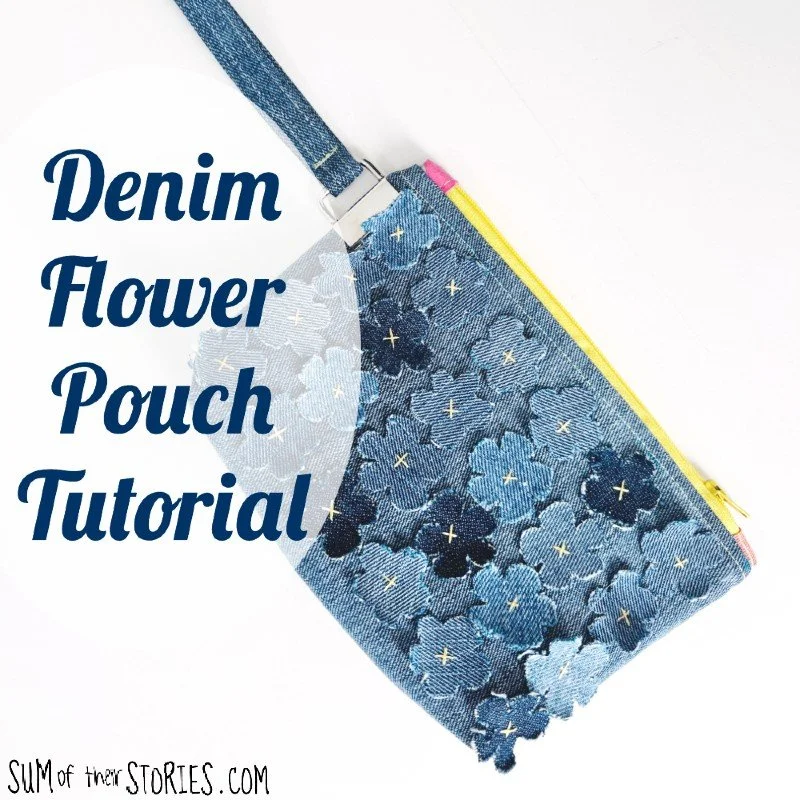
Denim Flower Pouch Tutorial
/

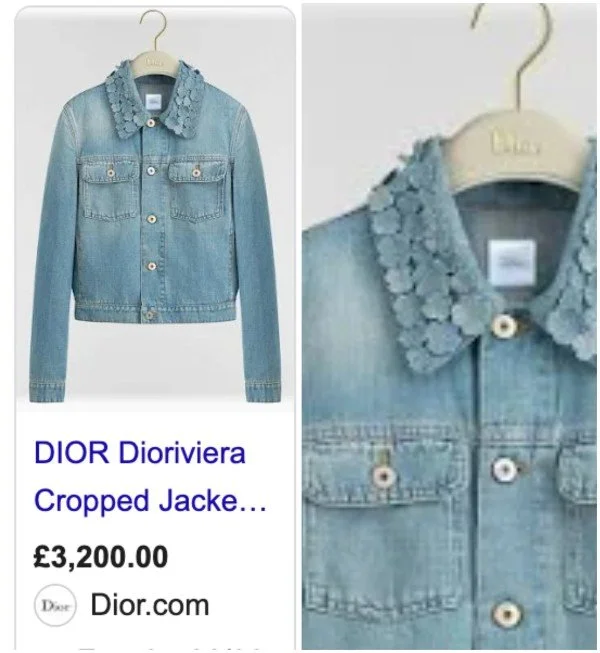
Have you seen the denim jacket by Dior with the little flowers on the collar that is doing the rounds on social media just now? It’s very cute, however it’s over £3,000 and very DIY-able. I’ve seen 3 people share their versions on Instagram just this week and I was very tempted to join them and do a version of my own.
If you are just here to find out how to make your own denim flower pouch then just scroll on down to the tutorial. However if you want my whole slightly overlong backstory then read on!
The rather long backstory to this denim pouch
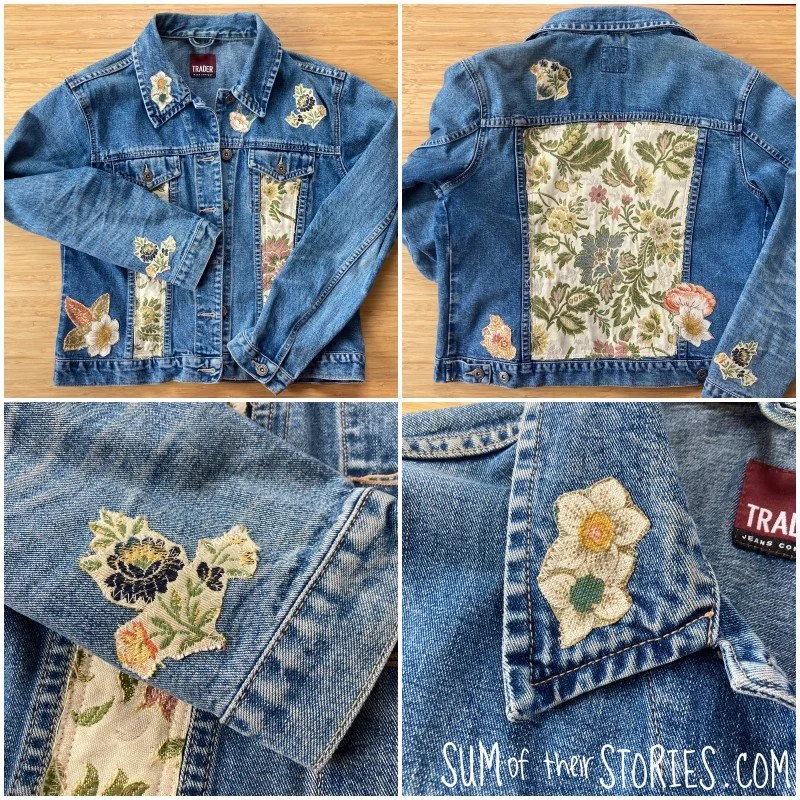
I already have 2 embellished denim jackets and although I wear both regularly I really don’t need another just now.

But I still wanted to make something inspired by the sweet cut out denim flowers with their embroidery thread centre crosses on the Dior jacket. So I decided to make a little pouch instead.
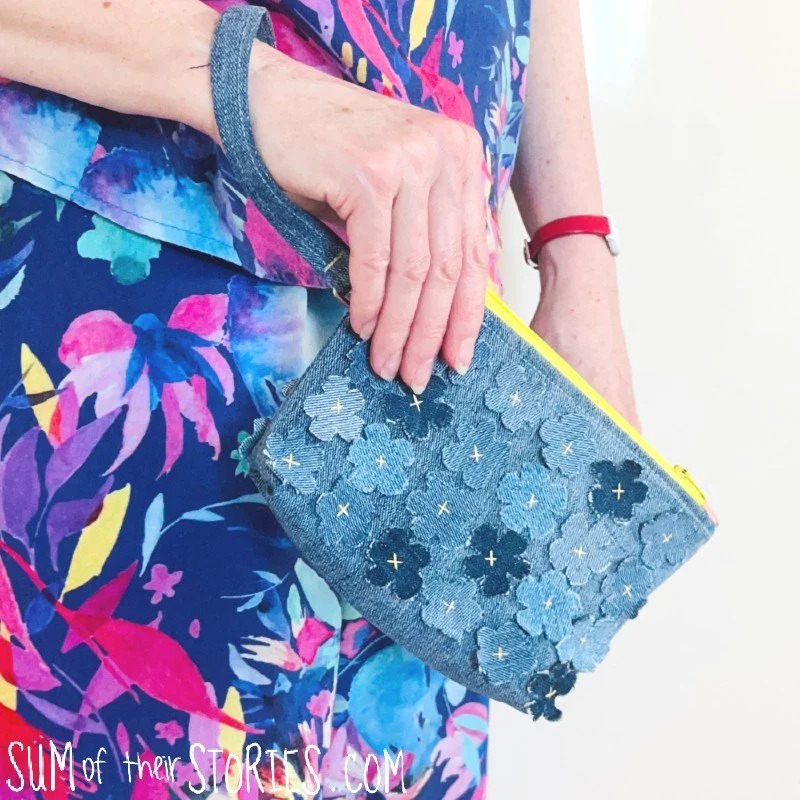
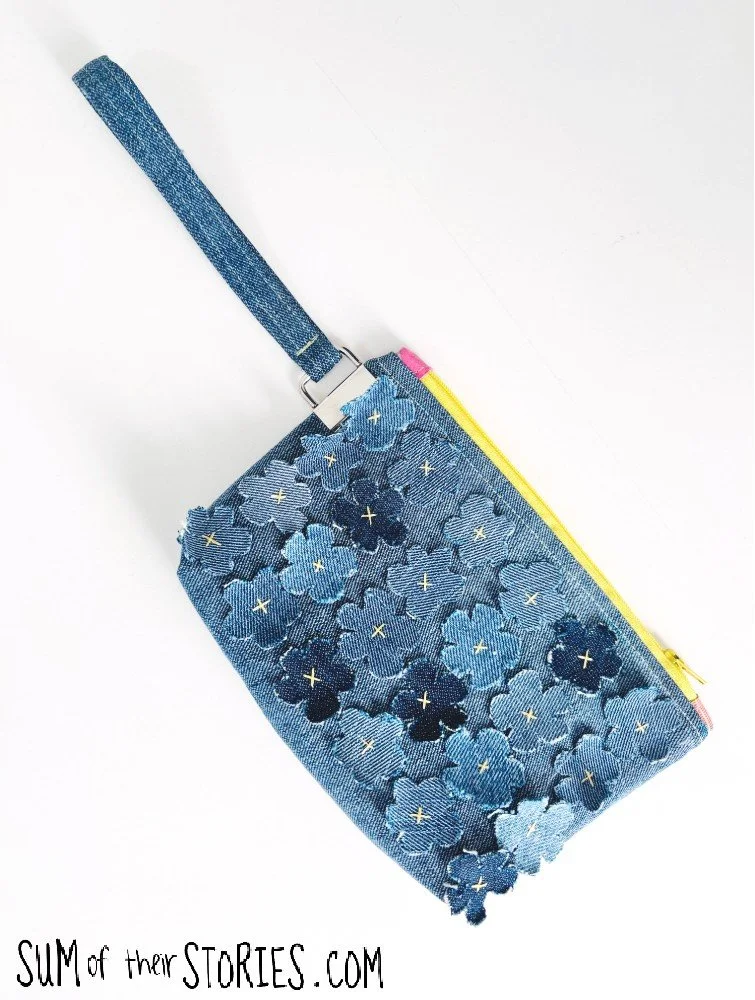
My plan was to make a little flower covered denim pouch that I could use as a cute evening bag, just something big enough for my lippy, phone, tissues, hair tie, paracetamols, indigestion tablets and hand cream - these are my “I’m an older lady now” going out essentials!
I’ve made lots of zip up pouches before, I sell them occasionally in my Etsy shop, but the size I normally make felt a little bigger than what I wanted this time so I sized my homemade pattern down a little.
The pouch came together just fine. I embellished it first, sewing on all the denim flowers. I found a nice lightweight cotton fabric for the lining so I wouldn’t add too much more bulk to the seams (always a consideration when working with denim) It sewed up nice and easily.
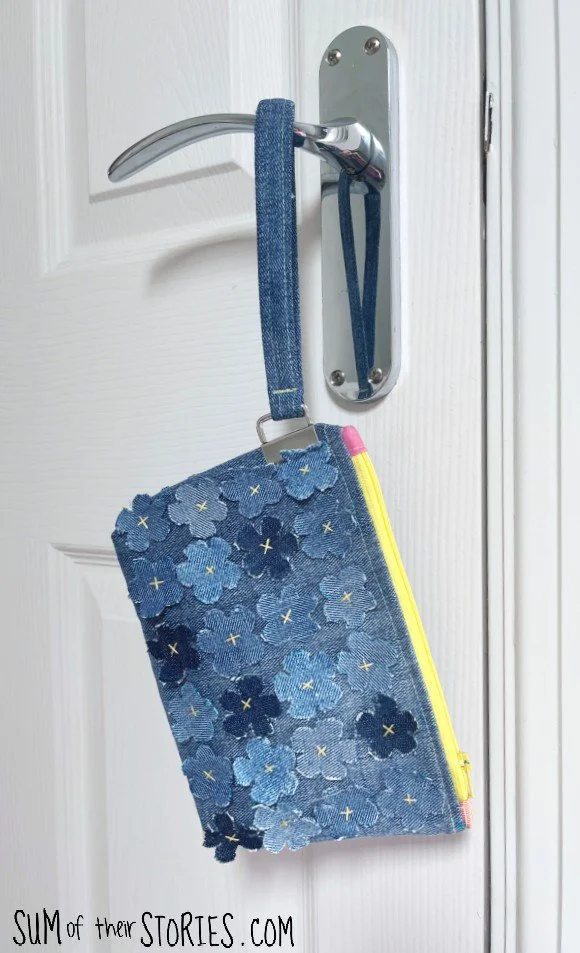
Then I looked at it and realised it would actually be perfect if it had a wrist strap! I maybe need to note here that my prime going “out out” days were the late 1980s into the 1990s so obviously I love me a small bag with a wrist strap. They are just so practical. By the time 1988/89 rolled around we young folk didn’t want to be dancing round a pile of handbags any more!
If you are making a zip up pouch with a wrist strap it’s advisable to either sew the strap straight into the side seam, or at least sew a tab of some sort into the side seam that you can attach your wrist strap to with hardware. This takes forethought of course. Ops.
I’ll point out when to sew your wrist strap into the pouch in the tutorial below, just in case you want to do that. But luckily for me I was able to find a solution and retro fit a wrist strap. I found a metal thing in my stash that I’d used for making keyrings a while back that turned out to be perfect. I’m not sure what these things are actually called. Online they have the rather snappy title of “Hardware Key Fob Keychain Tail Clip Wristlet with Split Ring for Lanyard”
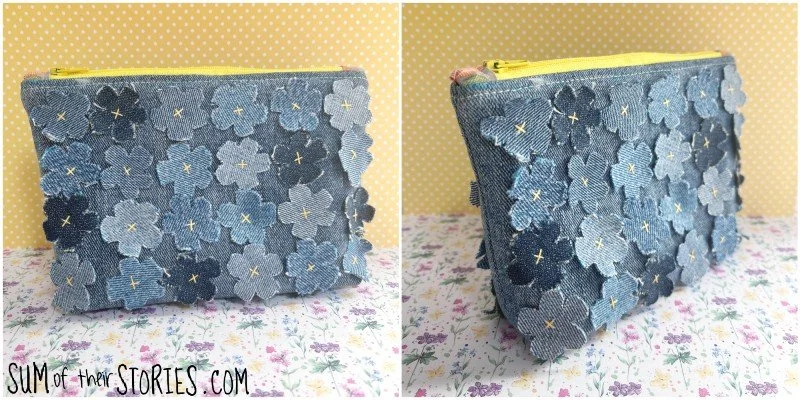
So all’s well that ends well, I’ve ended up with my perfect flowery denim evening bag/wristlet.
Now enough waffling on, let me show you how to make your own cute denim flower pouch (wrist strap completely optional!)
How to make a denim flower covered zip up pouch
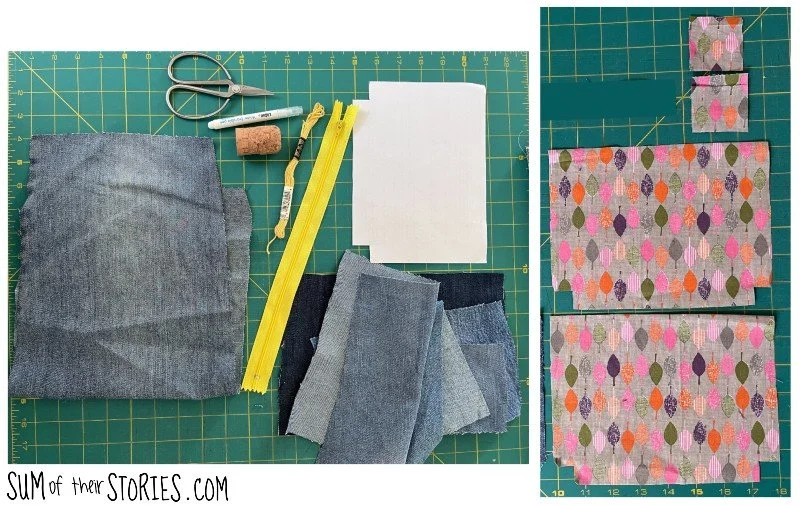
What you will need:
A piece of scrap paper to make your pattern
Fabric scissors and scissors for paper
A washable stick glue
A water erasable fabric pen
Something small and round to draw around, like a cork or lid
2 pieces of denim both 8” x 6”
Scraps of denim, ideally in different shades
2 pieces of lining fabric both 8” x 6”
2 pieces of lining fabric 2” x 2”
1 zip at least 8” long
Yellow embroidery thread
Sewing machine, sewing thread, embroidery needle, pins or clips
Optional for the wrist strap:
Denim 13” x 1.5”
Make your pattern
Start by making your pouch pattern piece. It couldn’t be simpler:
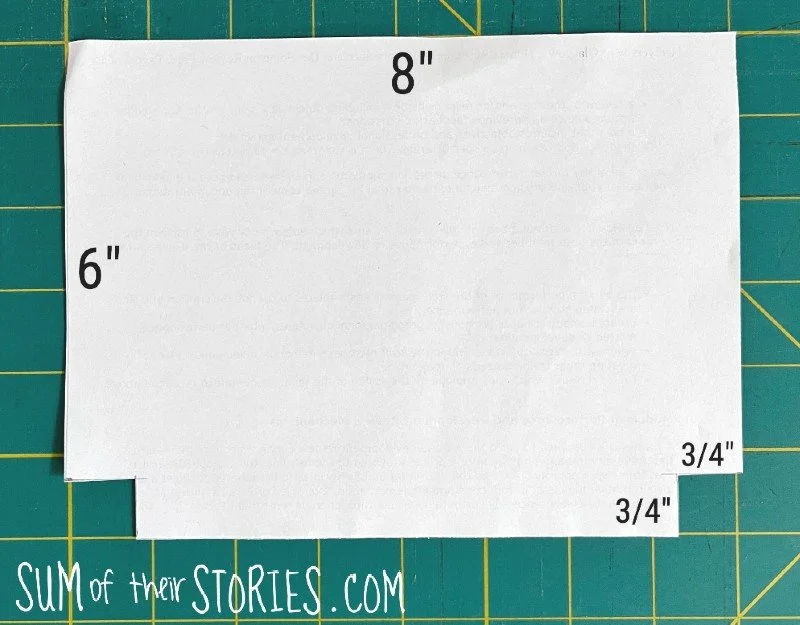
Using your paper pattern piece cut out 2 in denim and 2 in your lining fabric.
Creating the mini denim flowers
On the back of your denim scraps start drawing circles. I used a cork to draw around, it’s a fraction over 1” in diameter.
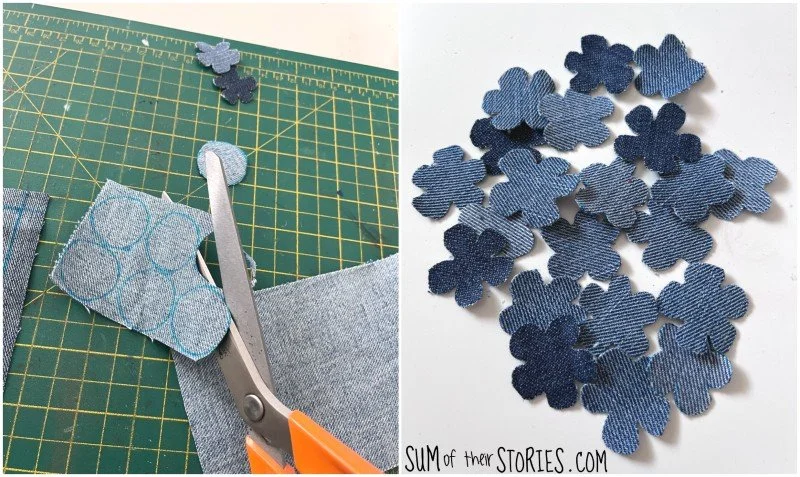
You need 48 circles in all if you want to cover the back and front. If you’d rather just cover the front then you’ll only need 24. (I’d feel cheated if only one side was covered, but that’s just me. If you are in a hurry you might want to just embellish one side of your pouch)
You need to turn those circles into flowers. There are a few different ways you can do this.
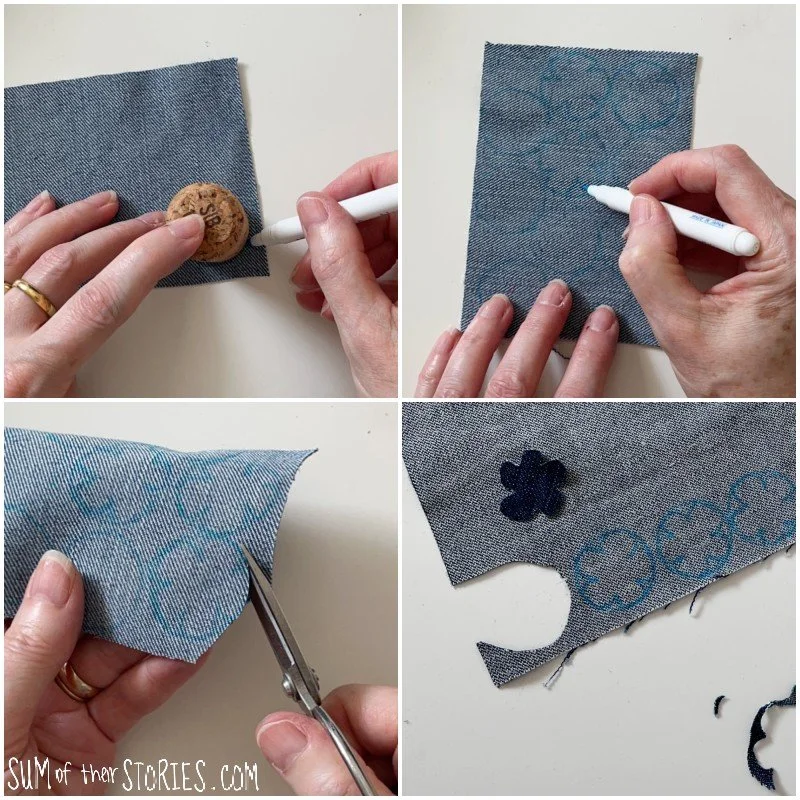
1) Use your erasable pen to turn your circles into simple flowers and then cut then out following the lines your drawn. This is what I started off doing, then after about 6 flowers I discovered a quicker way:
2) Cut out the circles and then freehand cut little slightly curved v shapes around the edge to form flower shapes. This is what I did for the next 42 flowers!
3) if you are really not confident to cut out flower shapes you can search online for “printable simple flower outline” and you’ll find dozens of options. You can then make a template to draw around.
You might like to note that I gave all my flowers 5 petals. The Dior denim jacket inspiration has flowers with 4 petals. You can have as many or as few petals as you like, that’s the beauty of a DIY, right?
Attach the flowers
Once you have all your flowers cut out you are going to fix them to the denim pouch front and back.
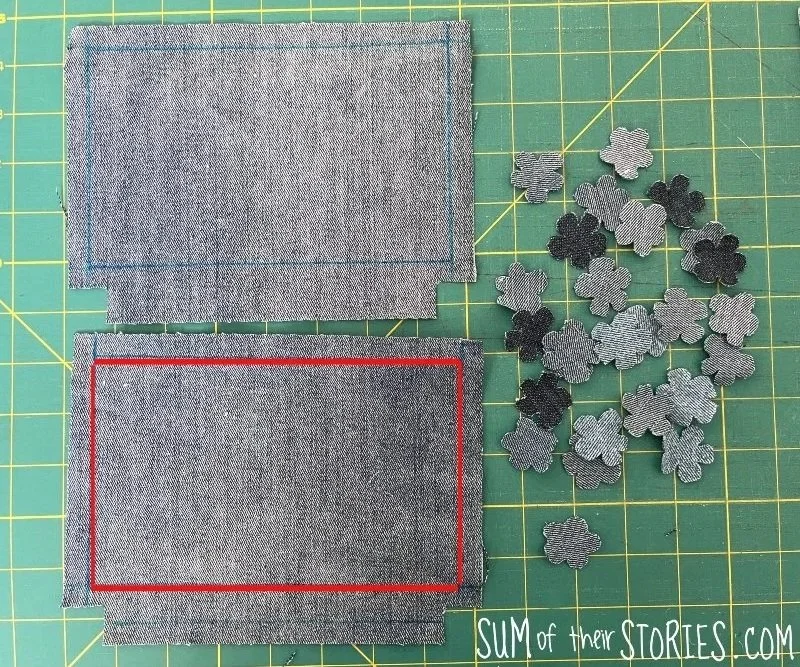
Lay the denim pieces out flat and mark the 1cm seam allowance around the edges as shown above. I’ve marked the line in red on the bottom piece just to make sure you can see it, the top piece is how it is irl with the erasable pen marks. This just helps to ensure your flowers remain free and flappy and not caught up in the seams.
Spend a little time arranging your flowers. I went for a grid effect and mixed up the denim shades as you can see.
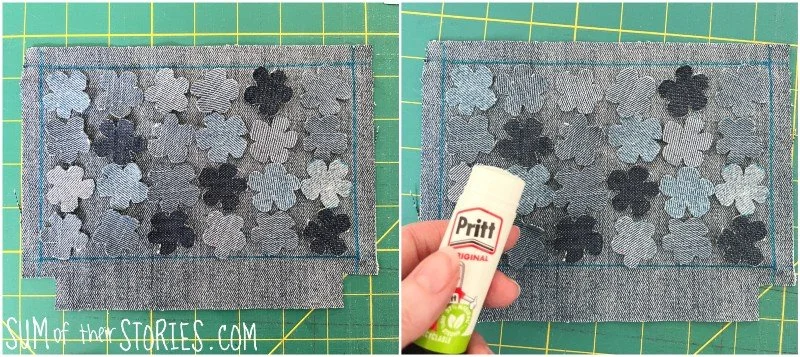
When you are happy I’d recommend using a tiny bit of a washable stick glue to secure each flower in place so they don’t move around as you stitch them. You could pin them if you prefer but then be careful you don’t stab yourself in the next step.
Take a length of embroidery thread, I used 2 strands but you could use more for a bolder look. Stitch each flower in place with a cross in the centre. I did my crosses in random directions rather than all straight, that’s just my preference. Yours can be however you like.
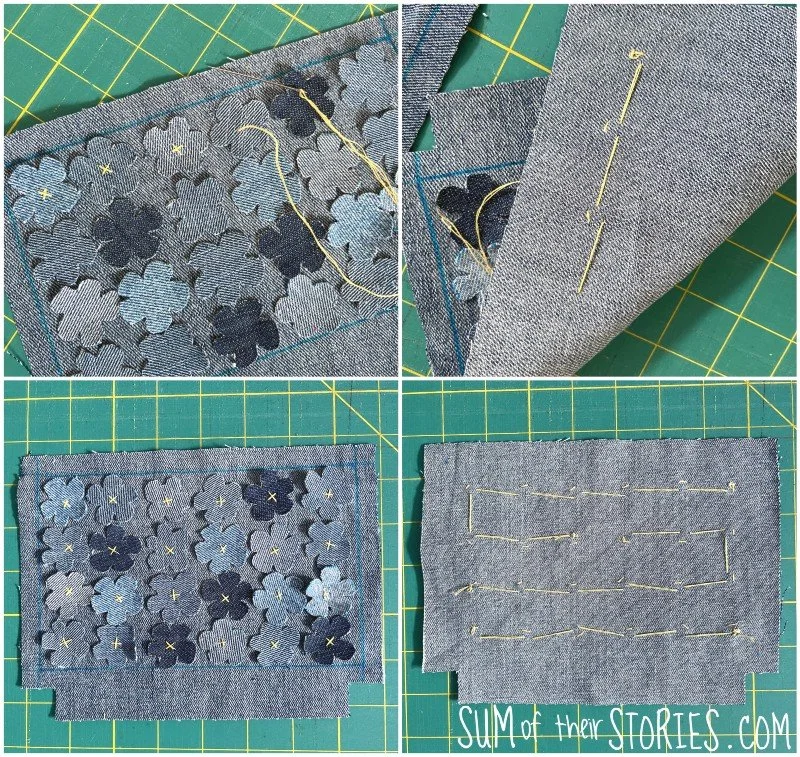
I dragged my thread across on the back between crosses just being careful not to pull it too tight. The back is a little messy but this bag will be lined so no one will ever see.
Prepare the zip
I love a colourful little end stops on the zip on a zippered pouch. It reduces bulk, making the zip sit nicely and looks cute. Plus it’s not difficult to do, just an extra few steps which I think are well worth it. This only works on a plastic zip though, don’t attempt it with a metal zip or you’ll really upset your sewing machine.
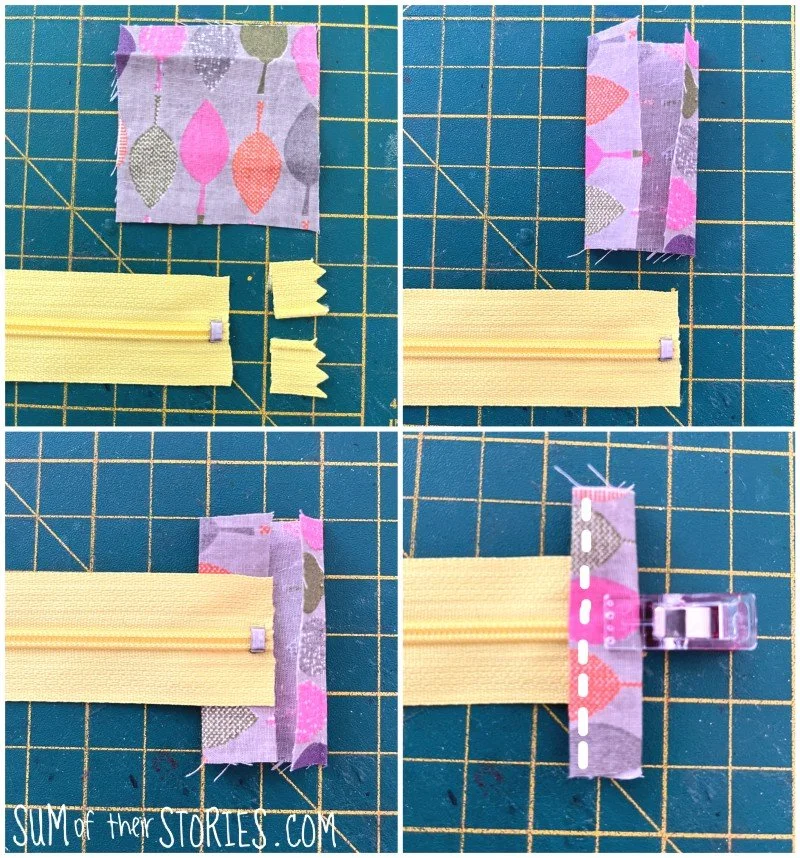
Take your 2 2” squares of lining fabric and fold them edges to centre as shown in the photo. Cut the excess ends from your zip.
Place the zip end right up to the centre of the fabric and fold the top over so the zip is sandwiched inside the fabric. Secure with a clip.
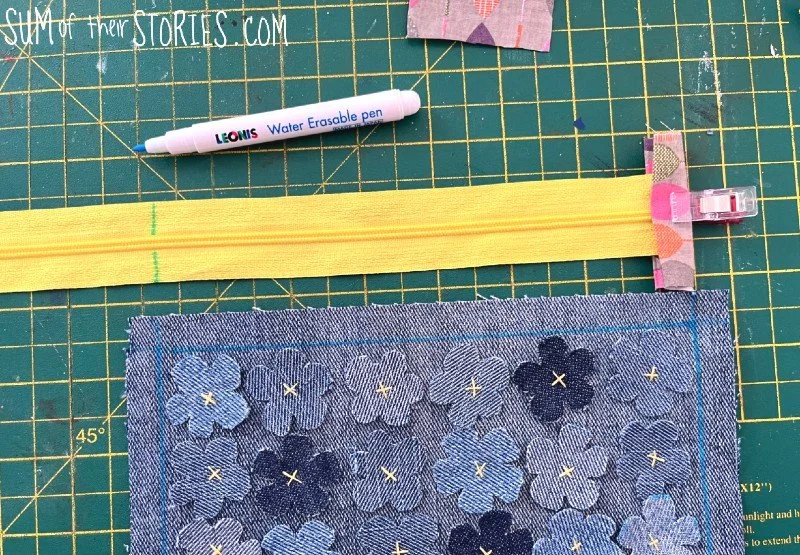
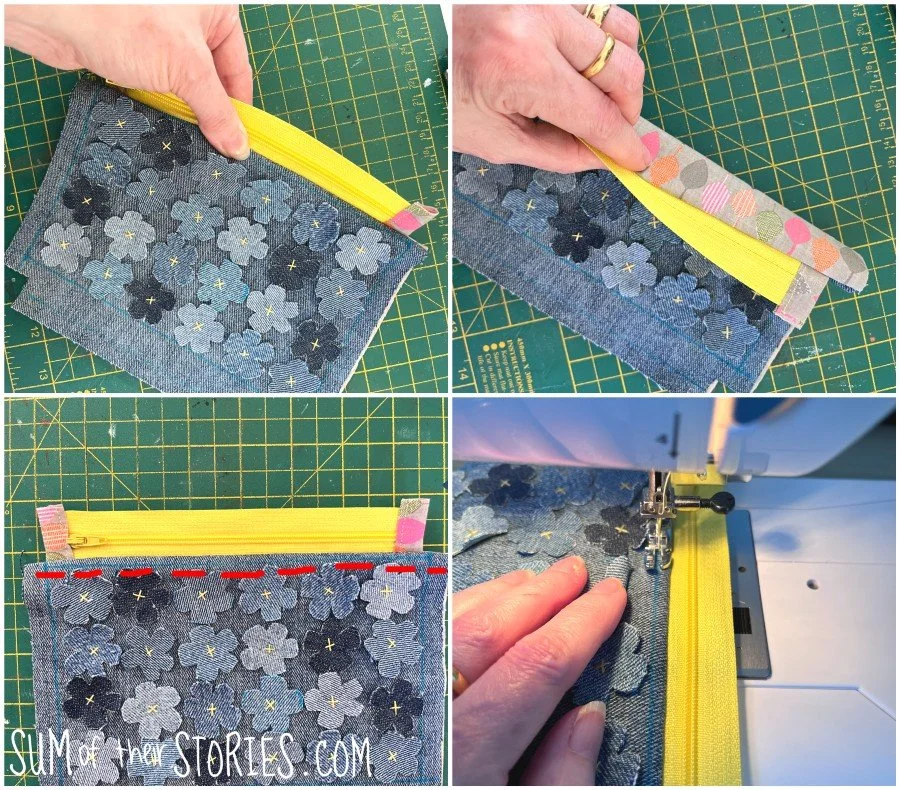
Lay your zip on top of your pouch front, lining up the end of the zip with the marked seam allowance on one side. Mark the position of the other seam allowance on the zip.
Making sure the slider part of the zip is not on the end, cut the zip where you’ve just marked.
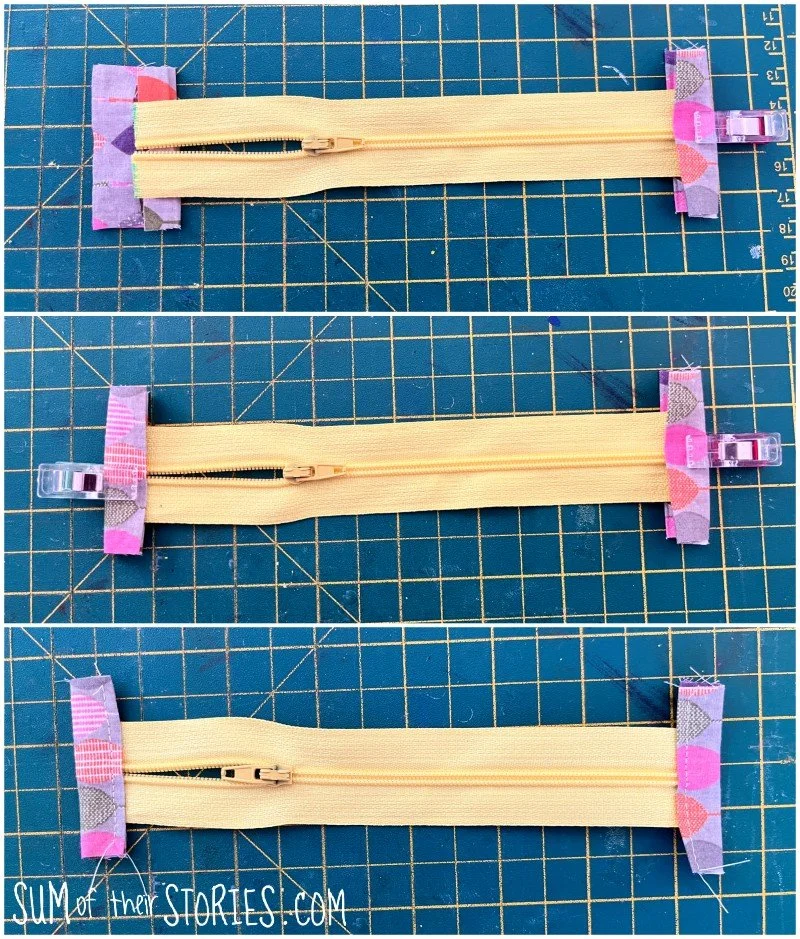
Stitch a little fabric end onto the other end of the zip in exactly the same way as before. The only difference is that the zip will be open at this end. Just take care to make the sides as close as possible when you stitch across.
Assembling the pouch
Now we are going to put the pouch together.
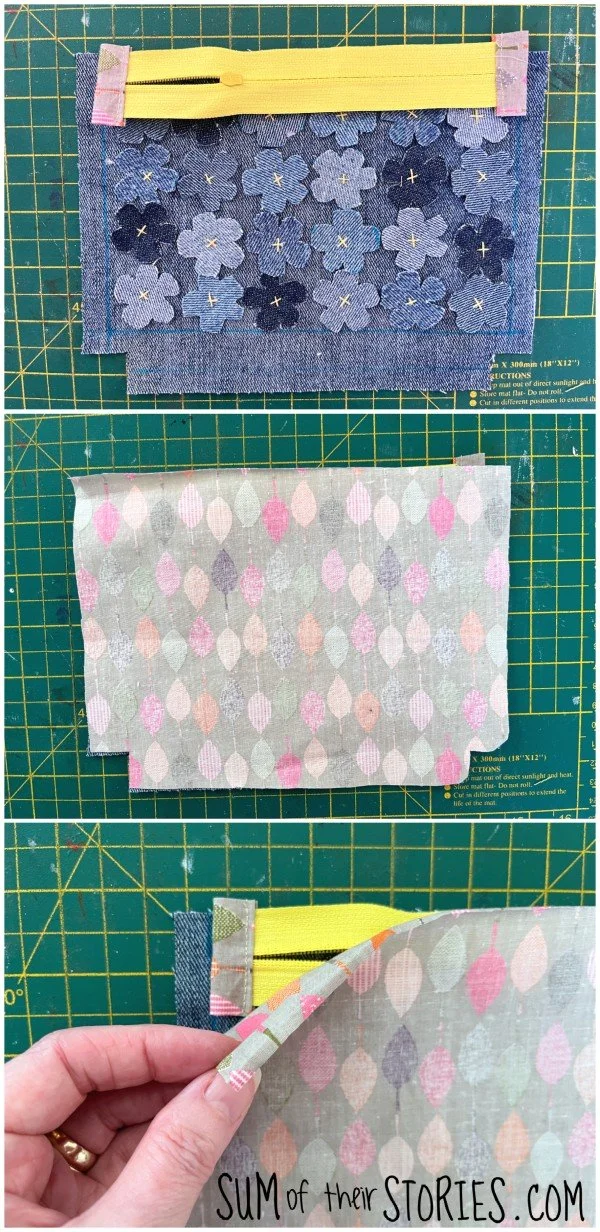
Lay one denim piece flat on the table face up. Lay the zip on top. lining it up to the top edge. The zip is face down.
Lay one of your lining pieces on top FACE DOWN, sandwiching the zip between the layers.
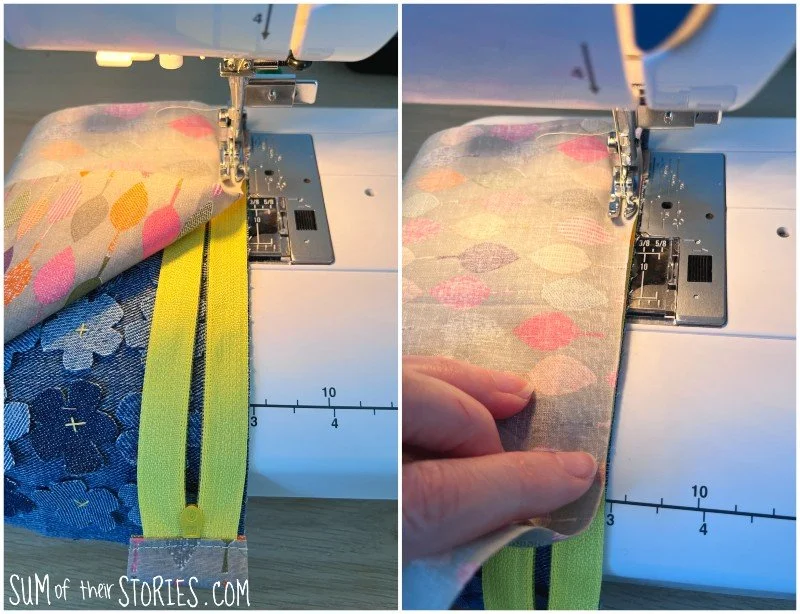
Stitch straight across. You will need to use a zipper foot on your sewing machine so you can stitch close to the zipper teeth. At some point along this seam you are going to come to the slider. Stop. Raise the foot and reach inside the “sandwich” to slide the slider out of the way. Drop the foot and continue stitching.
Open the pieces out so the denim and lining are together. You are going to top stitch along the zipper. I like to finger press this seam before I stitch, I’ve seen some people use their iron to press it properly. I melted a zip once so I prefer the finger pressing method! However you do it you just want that seam nice and smooth so the zip is sticking out on it’s own and no lining is flapping around to get stuck in it later.
When you are happy top stitch straight across.
Lay the other denim piece on your surface, right side up. Lay the other side of the zip on top, again right side down. Layer on the lining as before, right side down.
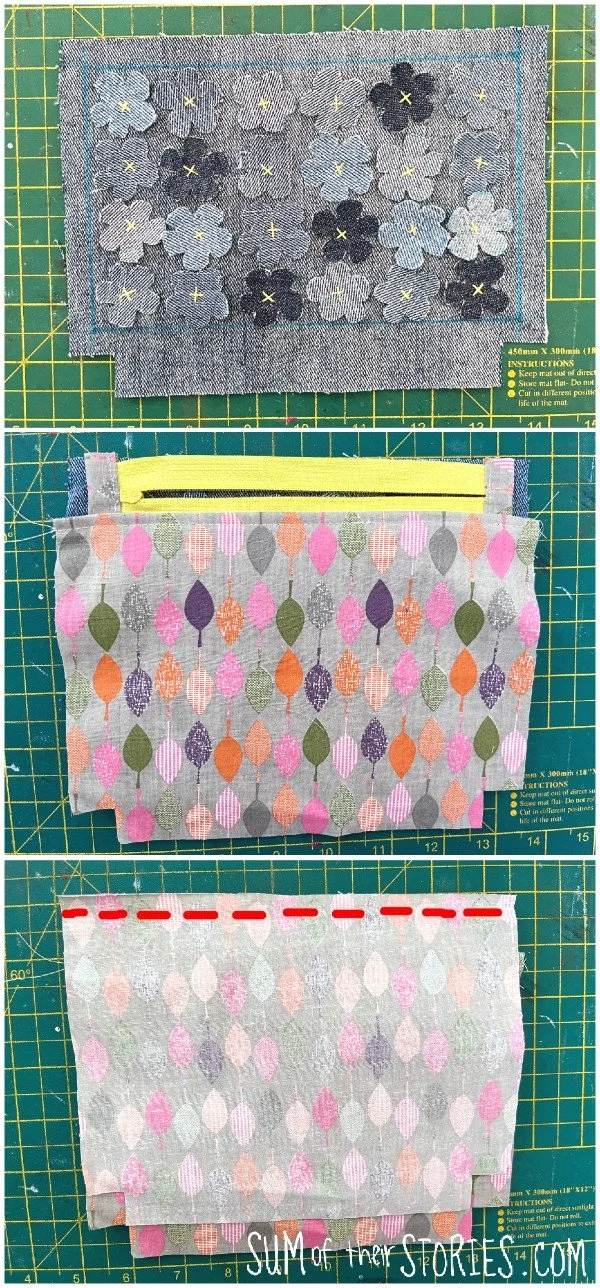
Stitch across in the same way, moving the slider out of your way as before. Press and top stitch as before.
Lay the pouch pieces out so that the denim sides are right sides together and the lining pieces are right sides together with the zip central. AT THIS STAGE IT IS ESSENTIAL TO OPEN THE ZIP HALF WAY. Don’t forget to do this (we’ve all done it and it’s super annoying later, let me make the mistakes so you don’t have to!)
If you want to add a wrist strap that’s sewn in to the pouch now is the time to add it.
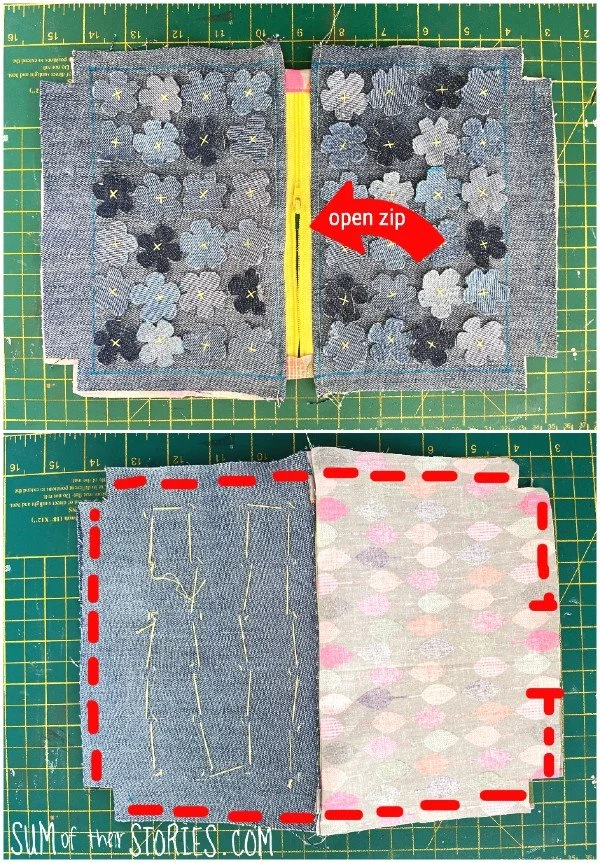
Pinch the zip so it is bending towards the lining.

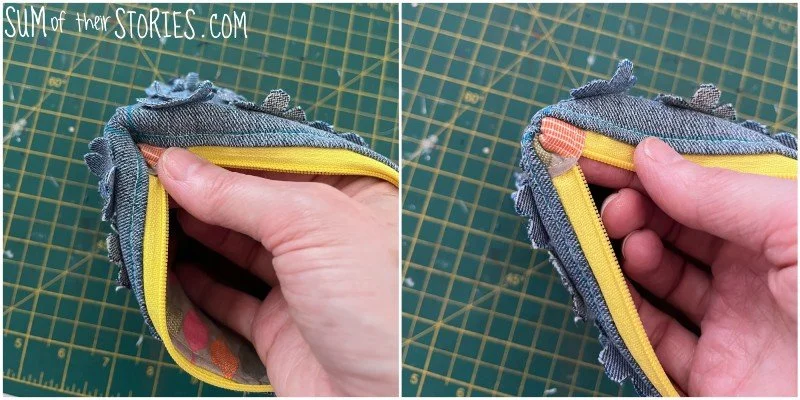
Stitch all around the pouch, leaving a 3” gap in the bottom edge of the lining. Take your time when you get alongside the zip. You don’t want to actually stitch over those cute little zip ends that you made. Ideally you are stitching just alongside them, but your foot might lift a little on one side. Slow and steady wins the day!
Box the corners
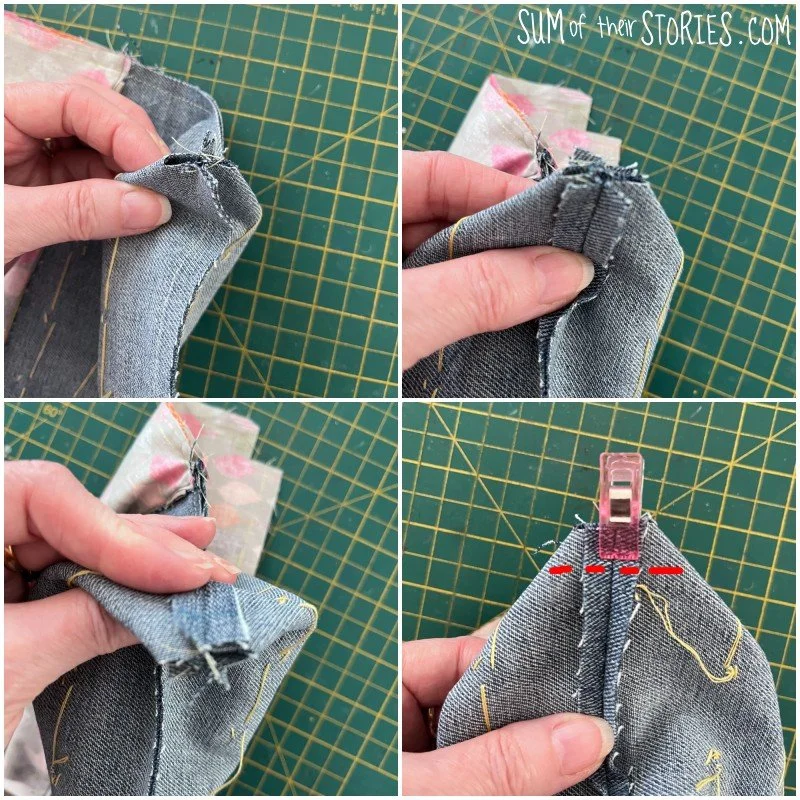
Open out the pouch and flatten the corners so the seams line up. Open the seam allowance, again, I like to finger press this as it’s a bit small and fiddly to do with the iron. Stitch straight across, it’s especially important to remember those few back stitches and the beginning and end of each seam here. Repeat for all 4 corners.
You’re nearly there!

Turn out the pouch
Find the gap in the lining and use it to turn out the pouch. You’ll see why it was so important to open this zip earlier that this point. If you haven’t opened the zip you can’t turn out the pouch and it’s all stuck inside the lining.
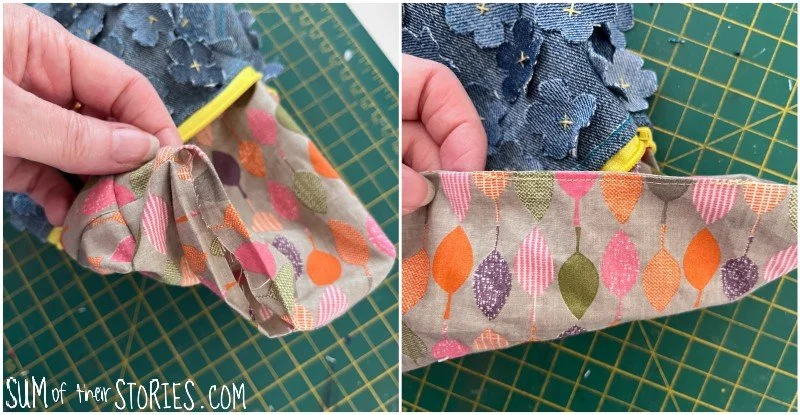
Sew the gap in the lining closed and then push the lining inside the pouch. Use you finger to push the little zipper ends out so they sit nice and neatly.
Cute right?
This was where I got to when I realised I really wanted a wrist strap for my pouch and retro fitted it.
Making the wrist strap
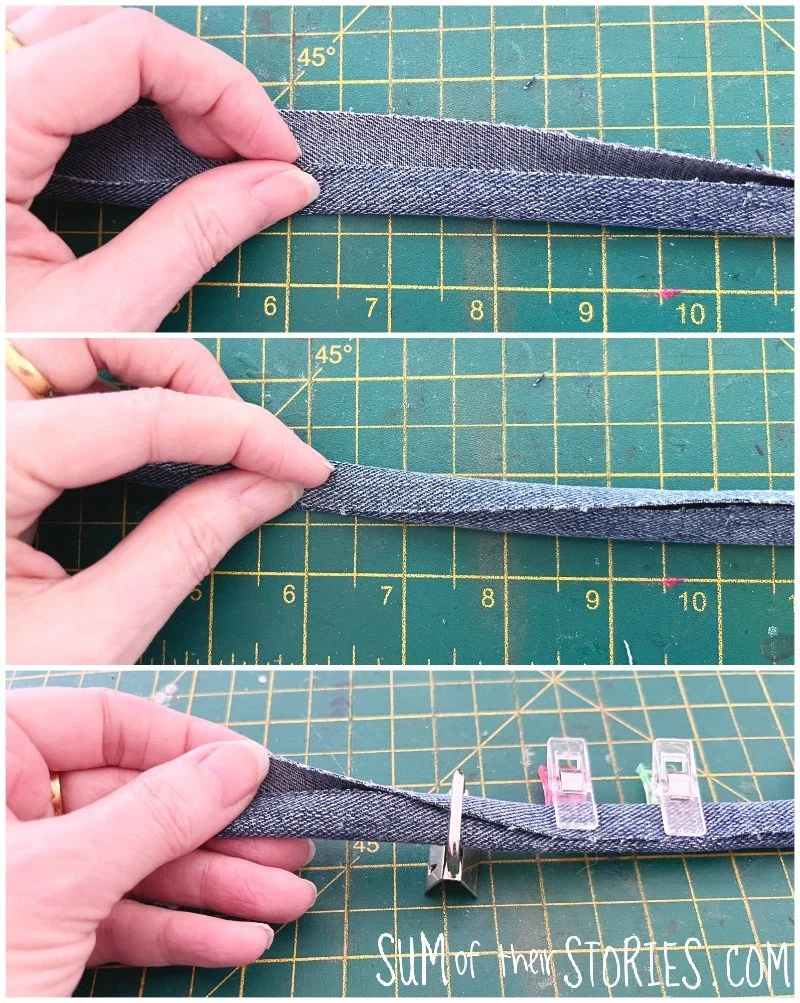
Take a length of denim 13” x 1.5” and fold it in 3rds lengthways, press and clip or pin.
Before you stitch anything thread the strap through the loop of the hardware.
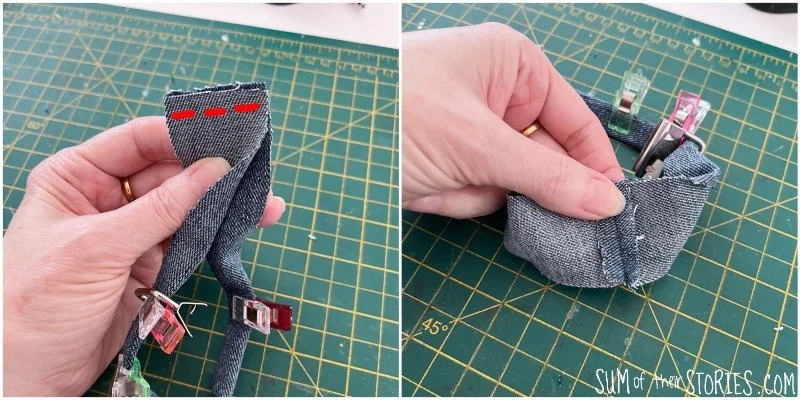
Line up the ends of the strap, right sides together and stitch across.
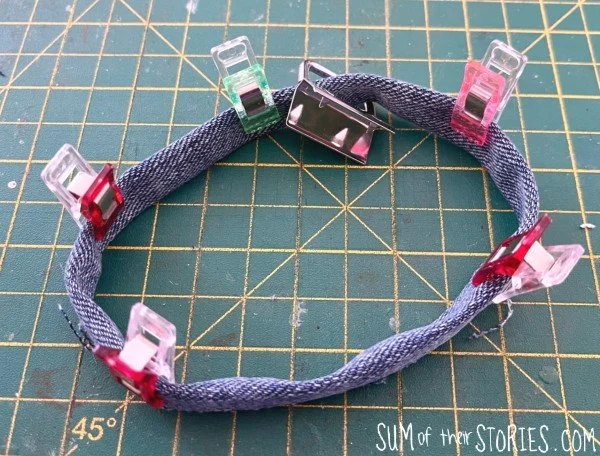
Open and press the seams and then refold into the 3rds as before. Take the sleeve off your sewing machine so you can fit the strap on and stitch all around. I went round twice just to make it neat.
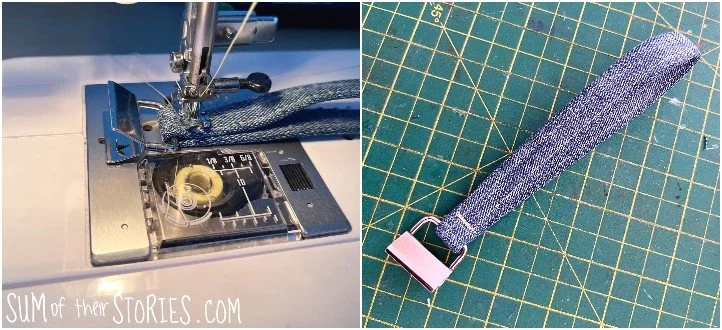
Stitch across close to the hardware. You could do a close zig zag for this but I just went back and forward about 8 times.
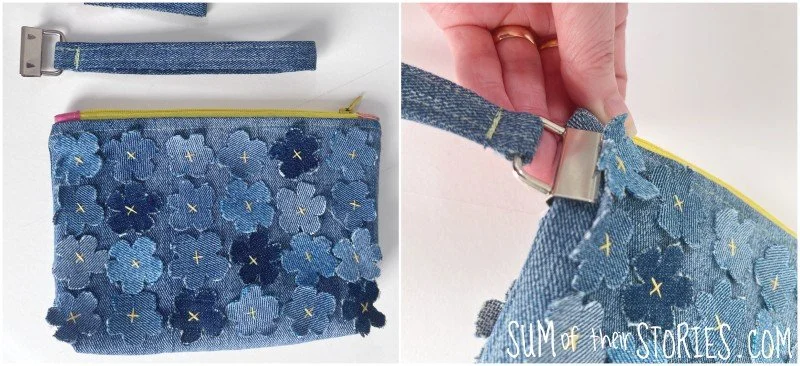
Attach the hardware to the side of your pouch. Use a scrap of denim to protect the shiny metal from the teeth of your pliers.
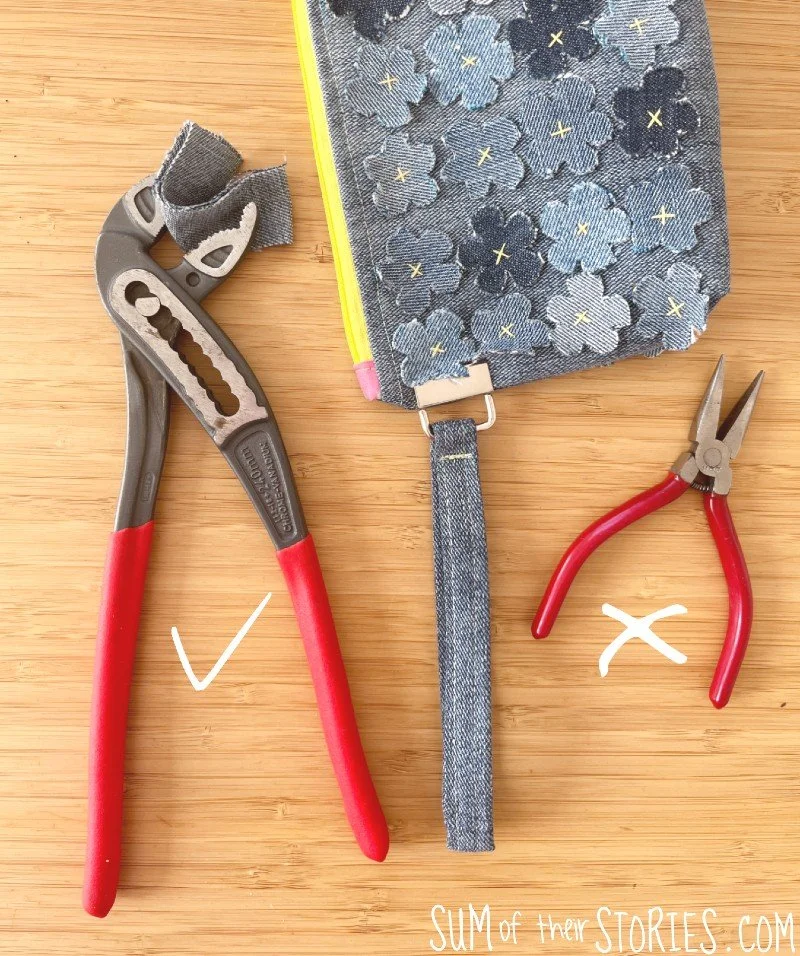
I thought I’d used regular pliers to close these clips in the past but apparently I’d not because I couldn’t close them at all. I had to raid the tool box and use this big ratchet style adjustable spanner/pliers type thing (I don’t know it’s proper name)
Spray your pouch with water to remove any visible marks from the water erasable pen and your gorgeous pouch is ready to enjoy!
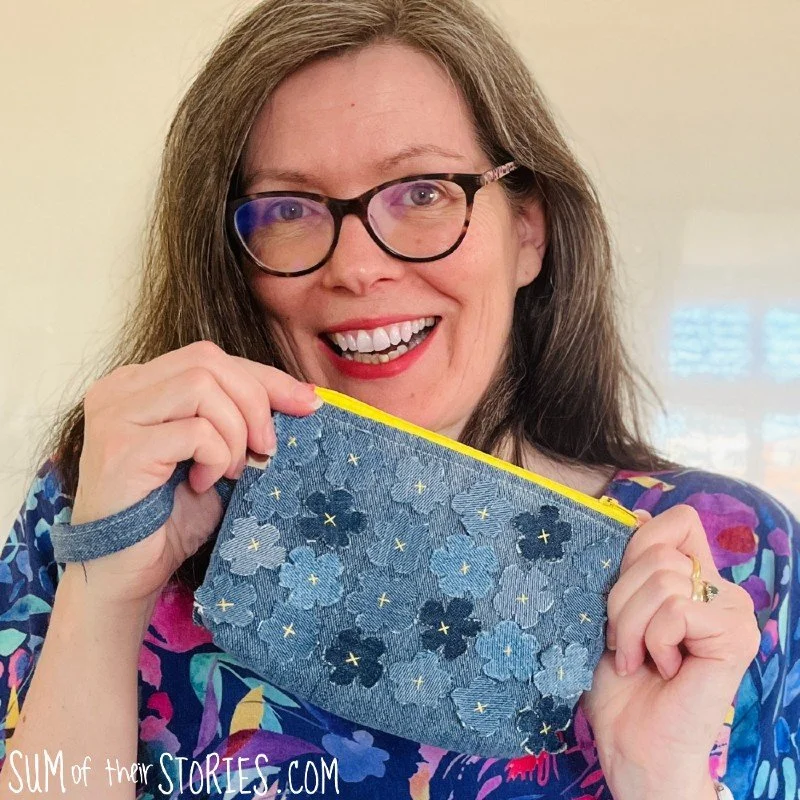
My little wrist pouch is exactly what I wanted, I think it’ll be really useful as well as cute. There are lots of ways you could adapt this idea to make it your own:
Cover any size of bag with denim flowers. You could make a tote bag or tiny coin purse or anything in between.
Vary the size of denim flower. If you were covering a large bag with tiny flowers, let’s be honest, that’s going to take forever. How about incorporating some larger flowers too?
Layering the denim flowers. You could create a lovely effect by layering denim flowers on top of each other.
Use a variegated embroidery thread so the colour of the crosses changes
If sewing is really not your thing you could try gluing denim flowers to an existing bag with fabric glue.
Have I tempted you to make a little Dior inspired denim pouch? Cutting out the flowers took a bit of time, I did mine whilst watching the tv one evening, and sewing them on took a little while too. The pouch itself was pretty straightforward to put together after that. Totally worth the effort for me, I love my little bag and let’s be honest probably as close to Dior fashion as I’m going to get!
I’ll be sharing this denim wristlet tutorial at some of these link ups
Julie
You might also be interested in some of my other denim sewing projects: