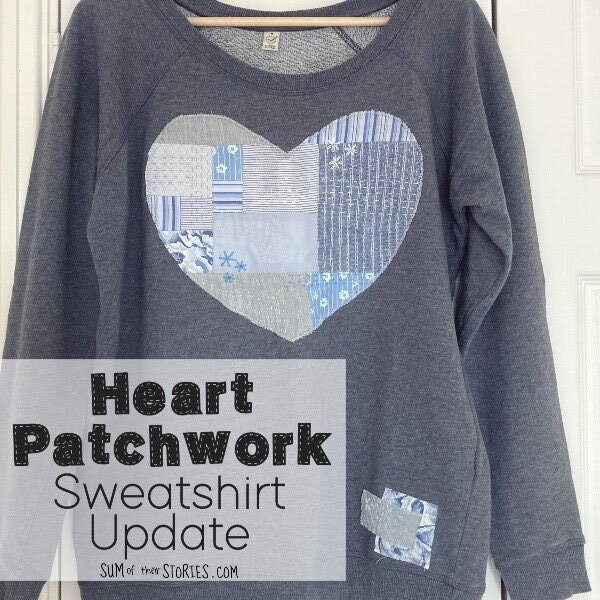
Heart Patchwork Sweatshirt Update
/

Here’s a easy way to give an old sweatshirt or T-shirt a new look with a patchwork heart.
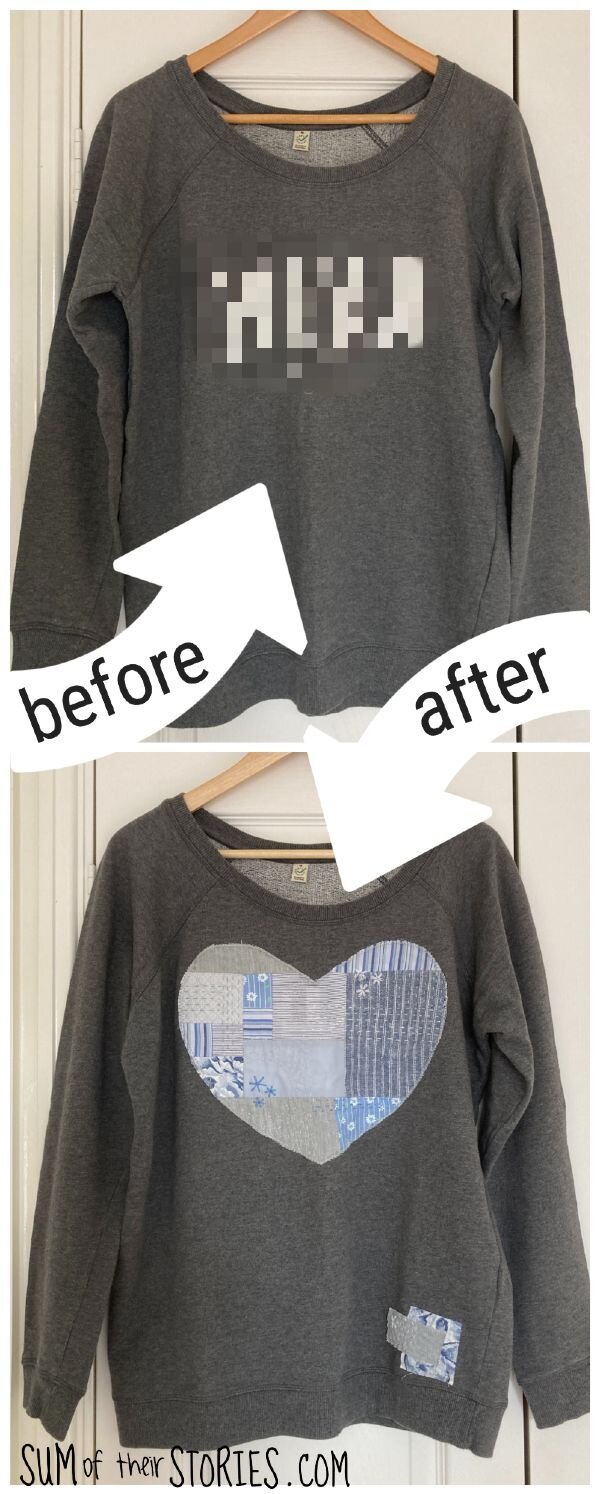
I had this sweatshirt which is a great fit, very soft and comfortable but that had a odd slogan on the front.

I’ve pixelated the slogan as I don’t want to be rude to the people who made it, or those who love and wear it. Suffice to say it was just not my cup of tea, I wasn’t sure if it was supposed to be funny, I didn’t really get it (maybe it’s my age, I don’t know!) so for me to be able to wear it I needed to cover it somehow.
This idea will also work well on a plain sweatshirt or t-shirt that you’d like to jazz up somehow or one that has a stain or hole that needs covering.
I made a patchwork heart in soft grey and blue fabrics to cover the slogan on my sweatshirt. You could pick a different shape or a different colour scheme, it’s a really versatile idea, make it your own.
To update a sweatshirt or T-shirt with a patchwork motif you will need:
A sweatshirt or t-shirt of course!
Scrap paper
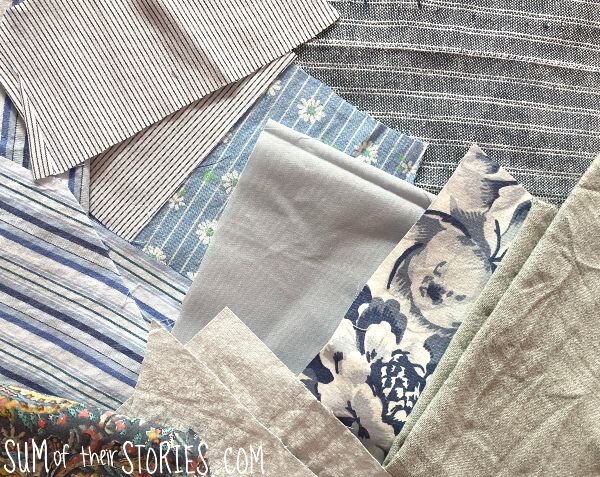
Small pieces of toning fabric
Sewing machine and thread
Embroidery thread and needle
Using the scrap paper create a template of a shape, big enough to cover whatever you are wanting to cover on your sweatshirt.
Take your pile of scrap fabric and start randomly joining pieces. You are making a new piece of fabulous patchwork fabric.
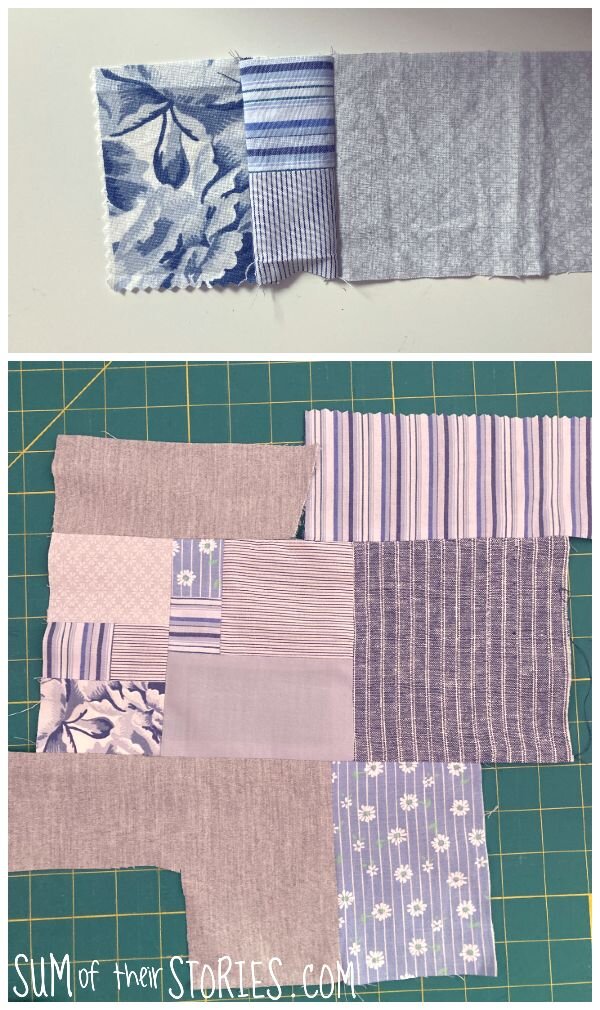
Using your paper template cut your shape from the new patchwork fabric.

Lay it onto your sweatshirt and pin to hold it securely in place.
Stitch all around the shape. I did this first with a regular straight stitch, just to get it into position and remove the pins and then I went round it a second time with a wide, close zig zag stitch. I had the width of my zig zag as wide as it could go, a number 5 and the closeness of the stitches (stitch length dial) set at 1, so close but not the very closest it can be.
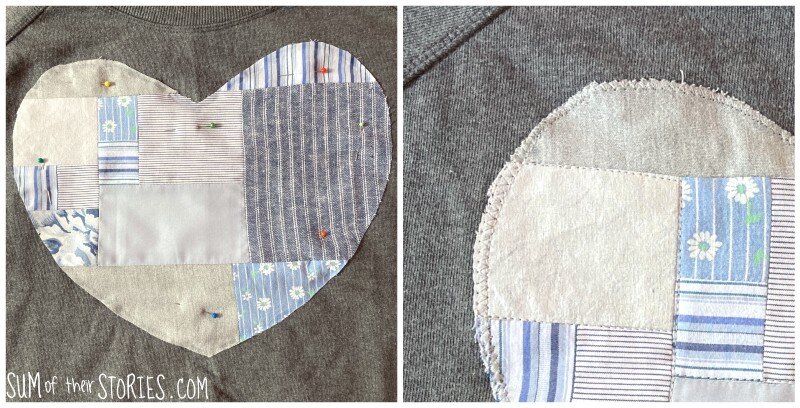
Change back to a straight stitch and stitch in the ditch around some of your patchwork shapes. You don’t need to do them all, but stitch a few just to keep the patchwork heart flush to the sweatshirt and stop it from bagging.
Once the heart is securely fastened to the sweatshirt you could stop there and call it a day. Or you can do what I did and add some hand embroidery.
I have a bunch of embroidery threads, I keep all the little scraps from all my previous embroidery so that was a great project to use up some of those little leftovers. It doesn’t matter how much you stitch of each colour of thread, the more random the better so just stitch as takes your fancy. See this as a good chance to use up some of those odd leftover threads.
I worked a couple of clusters of lazy daisy flowers and then some rows of running stitch.

To add some interest I drew around a tin over one of the clusters of flowers with an air erasable fabric pen and worked some circles of running stitch too.
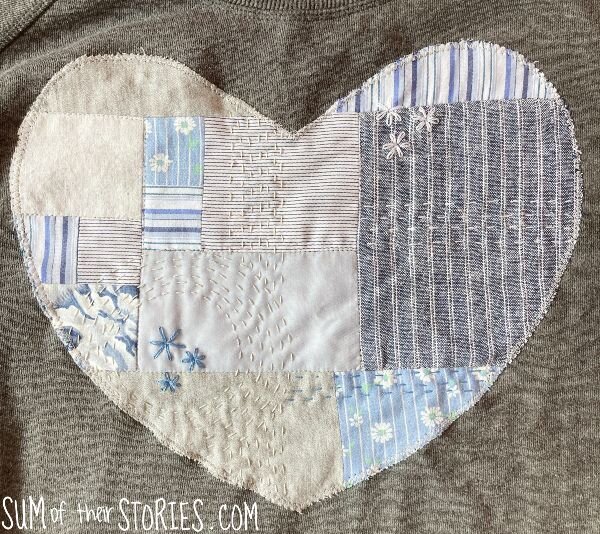
There are no rules with this, stitch as much or as little as you like. Any colours you like, any stitches you like. I’ve got a guide to some beginners embroidery stitches that you might find helpful if you’ve not embroidered much before.
Once the heart was finished I felt like the sweatshirt needed just another little patch of colour to pull it all together so I added a little more fabric and embroidery in exactly the same way as before just above the ribbing hem.

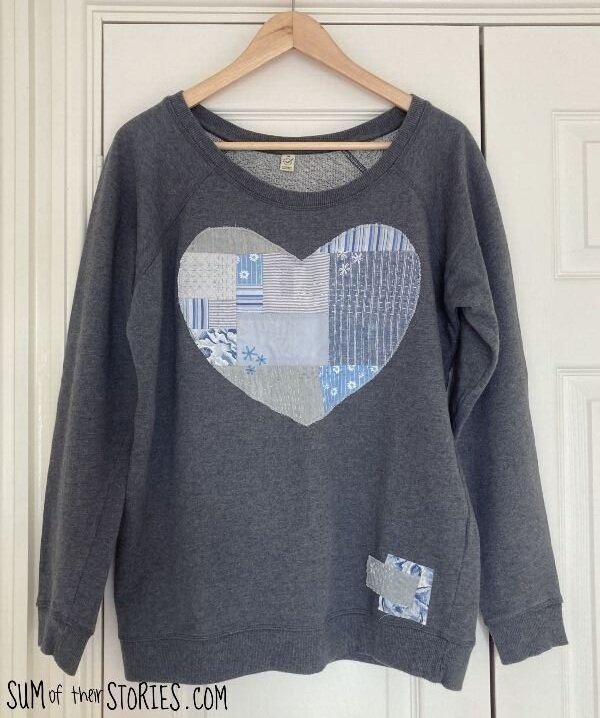
This was such a fun project to do, once I’d done the machine stitching I was able to sit watching tv over a couple of evenings doing the hand embroidery. I could have carried on and added more but stopped when I thought it was enough. Isn’t that the beauty of making something yourself? You can decide how much is enough.
Do you have a sweatshirt or t-shirt that would appreciate a bit of an update like this? Either because it’s plain and a bit boring or because it has something on the front that you are just not feeling.
If you do try this idea please do tag me on any photos you share on social media, I love to see what you make inspired by my tutorials.

I’ll be sharing this idea at some of these link ups