Pumpkin Cross Stitch Free Mini Design
/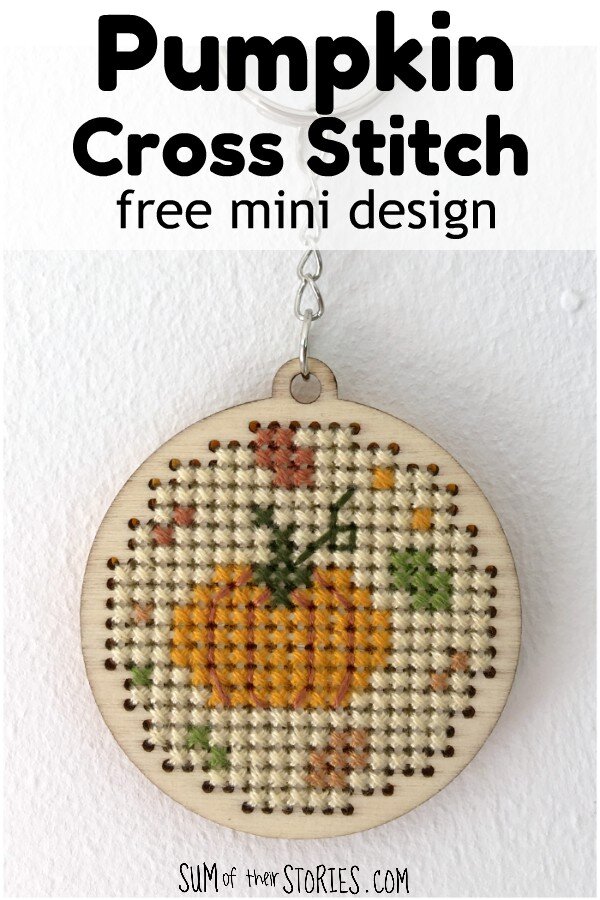

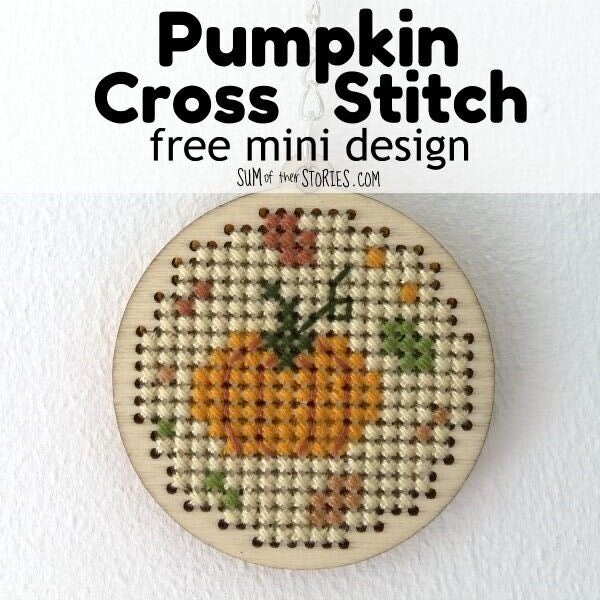
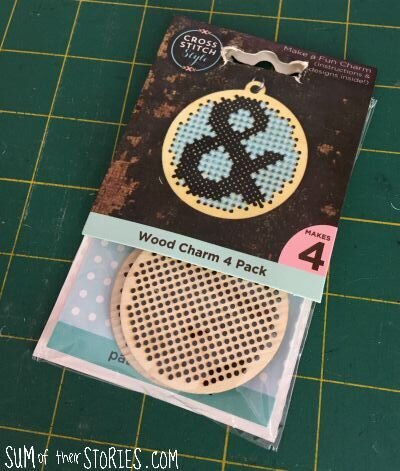
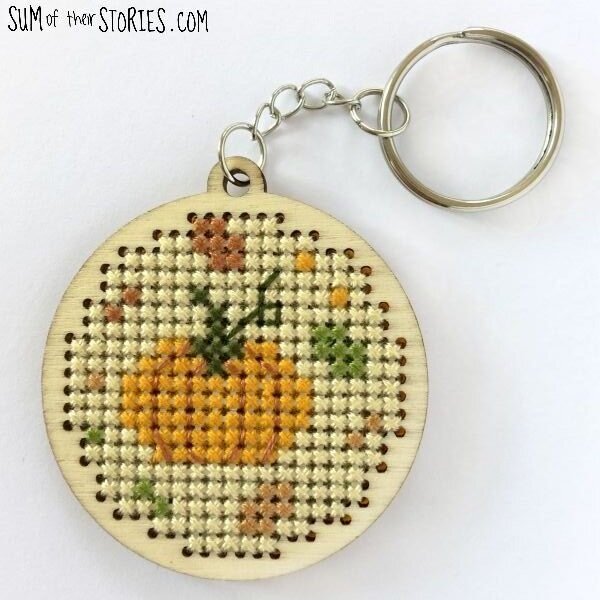
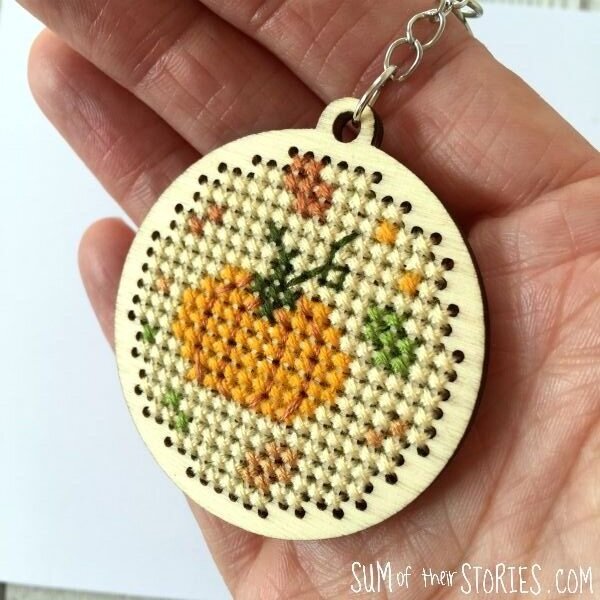
It's time for the September Pin Challenge! The Pinterest Challenge is all about encouraging us to not just pin, but to make it happen too! This month's challenge is all about pumpkins and Halloween projects. I was inspired by this floral wooden cross stitch necklace pin. Not a very Halloween or Pumpkin themed inspiration I know, but after a trip to my local craft shop where I picked up some wooden cross stitch disks I knew a sweet autumnal pumpkin design would look great. These disks are a good size for a keyring, but if you like a larger pendant they could be a necklace too. These from Amazon are similar.
I used small scraps of left over embroidery threads so I’m not sure of the DMC codes. On a small project like this i don’t think it matters too much, and I love using up those tiny odd lengths that always seem to hang around. I’ve added some suggested colours on the chart but ideally for a tiny design like this you can just use what you have.
Stitching onto a wooden disk is a little different to stitching onto cloth, there is no give whatsoever of course so it makes it difficult to cast off. I worked around this by just leaving a ‘tail’ and making sure I worked the adjacent stitches over the tail to secure it. Of course when I got to the very last stitches I had to just squeeze them under the backs of the stitches as best I could.
When starting a new thread I found it easiest to use a long single strand folded in half. Then I simple secured my thread through the loop on the back, no extra long tails to worry about.

The other main thing I learnt when stitching through these wooden charms is that if you make a mistake and have to undo any stitches you will just need to throw that thread away. It gets worn on the wooden edges and if you try to reuse the thread it will simply snap half way through leaving you with more undoing to do!
Start in the middle of the design and work your way out, that’s by far the best way to be sure your design is properly centred.
Work the cross stitches first and then the back stitch over the top.
As you can see I worked all the background in a cream thread, that’s not mentioned in the suggested colours key

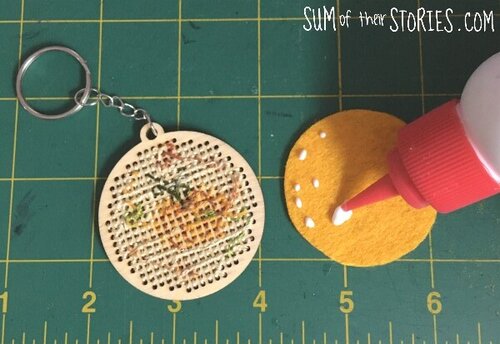
I finished my cross stitch pumpkin keyring off by gluing a circle of felt on the back to cover the less than pretty side! I used my favourite PVA Anita’s Tacky Glue.
You can right click on the design below to copy it and print from your computer or you can download it here.


Julie
I’ll be sharing this idea at these link ups.
For more Pinterest inspired projects from this month's Pinterest Challenge hosts, check out the links below

Simply Crafty Life - How to make a 2x4 Pumpkin in 5 easy steps
My Slices of Life - A Pumpkin Garden flag using a Cricut
Mom Home Guide - DIY Halloween Shadow Box
Decorate and More with Tip - Kirkland’s fall Decor Dupe
Sew Crafty Crochet - Crochet Pumpkin Placemat
Life Beyond the Kitchen - How to make an Embroidered Needlebook
My Pinterventures - Pumpkin Face Shadow Box, easy Halloween Decor
Purple Hues and Me - Decoupage Jack o Lantern Wood Cut Out
A Good Life - Pumpkin Painted Notecards
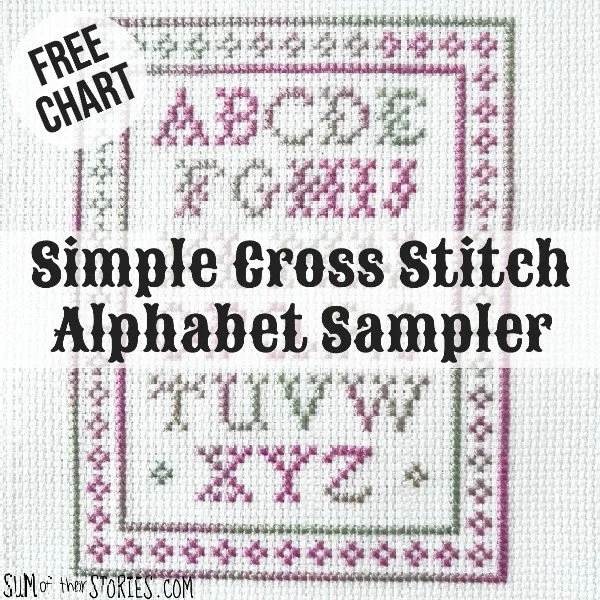
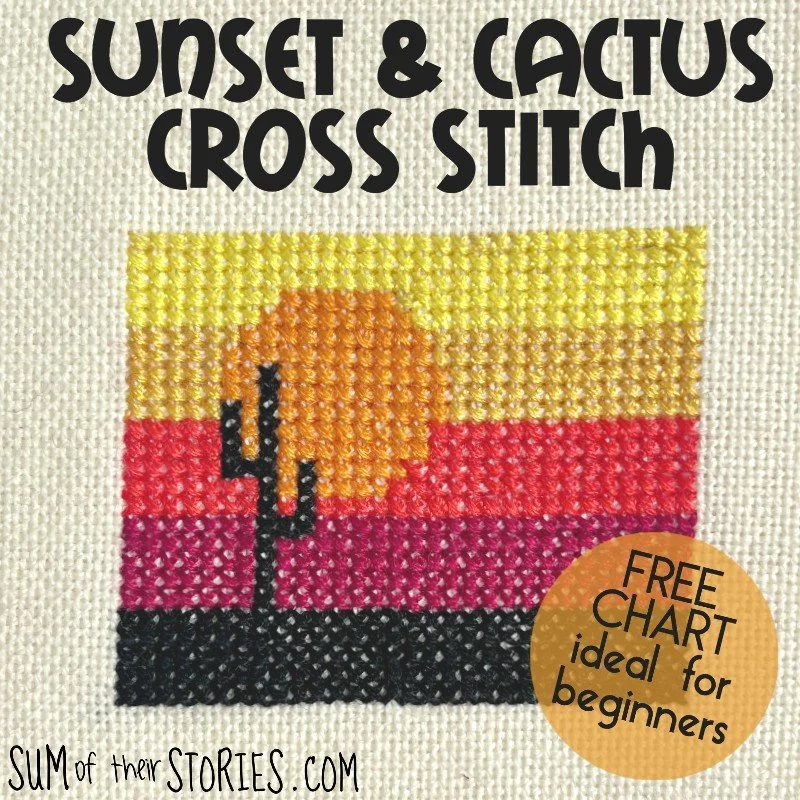
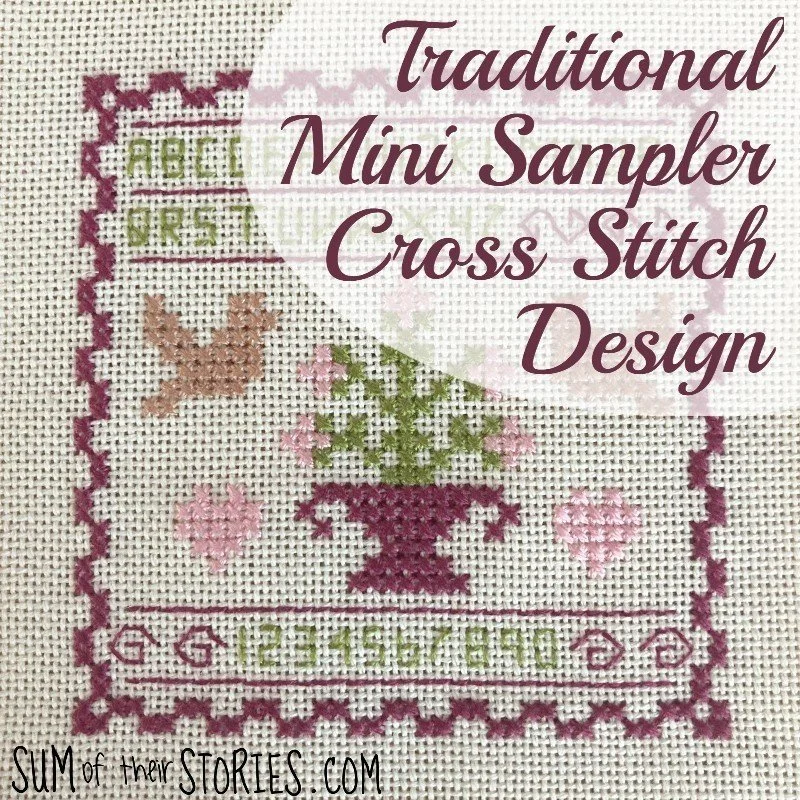
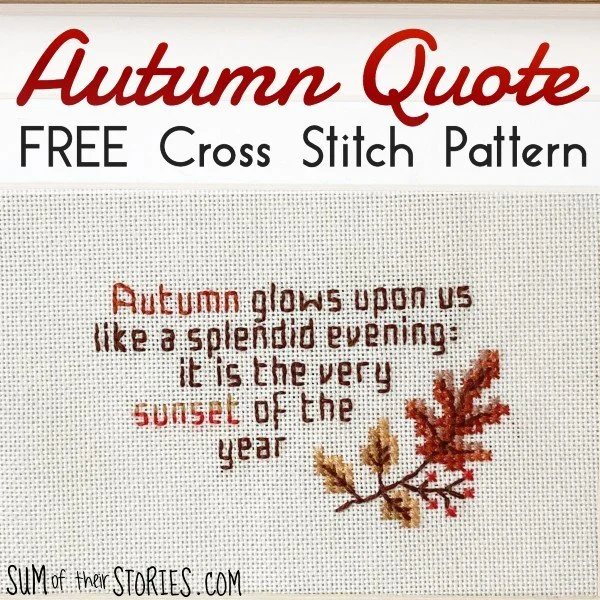
If you enjoy cross stitch you might also like to check out some of my other free cross stitch designs: