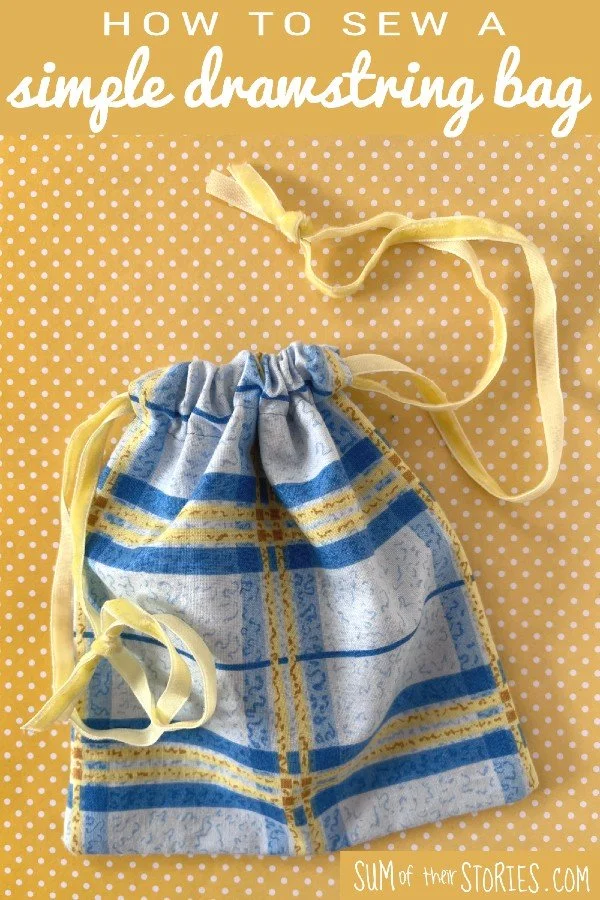
The Easiest Way to Sew a Fully Lined Drawstring Bag
/
Drawstring bags are useful for all sorts of things and they are really easy to sew.
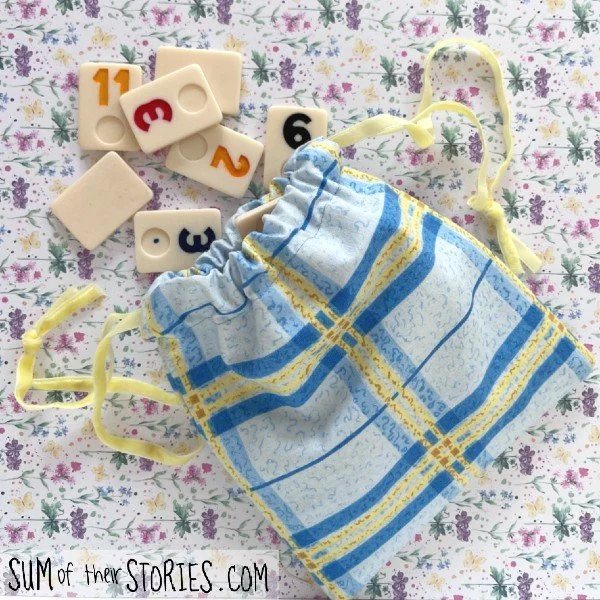
Larger drawstring bags are great for shoes or dirty laundry in your suitcase, or to use as reusable gift bags. Smaller drawstring bags are perfect for game pieces, dice etc or for helping to keep your handbag organised. They are lovely for reusable kid’s party bags too.

I’ve made lots of drawstring bags over the years, using all sorts of different methods, some easier than others. Generally, but not always, more complex patterns will result in a more professional and polished drawstring bag. But sometimes you don’t actually want or need a drawstring bag to be polished and professional. Sometimes you just want to make something quick and useful and that’s when a tutorial like this comes in.
All you need to make this super easy, fully lined drawstring bag is 2 rectangles of fabric, some ribbon or cord, a sewing machine and the ability to sew a reasonably straight line. Plus about 15 minutes of your time.
Let’s get started:
The easiest way to sew a drawstring bag
You can make your bag any size you like. For this sewing tutorial I’ll show you how to make a bag that measures 6” x 6.5” (15cm x 16.5cm) and then we can talk about different sizes at the end.
To make a small simple drawstring bag you will need:
2 pieces of fabric 7” x 14” (18cm x 36cm)
2 lengths of ribbon or cord: each somewhere between 16” (40cm) minimum and 28” (70cm) maximum
Lay your 2 rectangles of fabric right sides together on a flat surface. Measure and mark the centre point on both long sides.
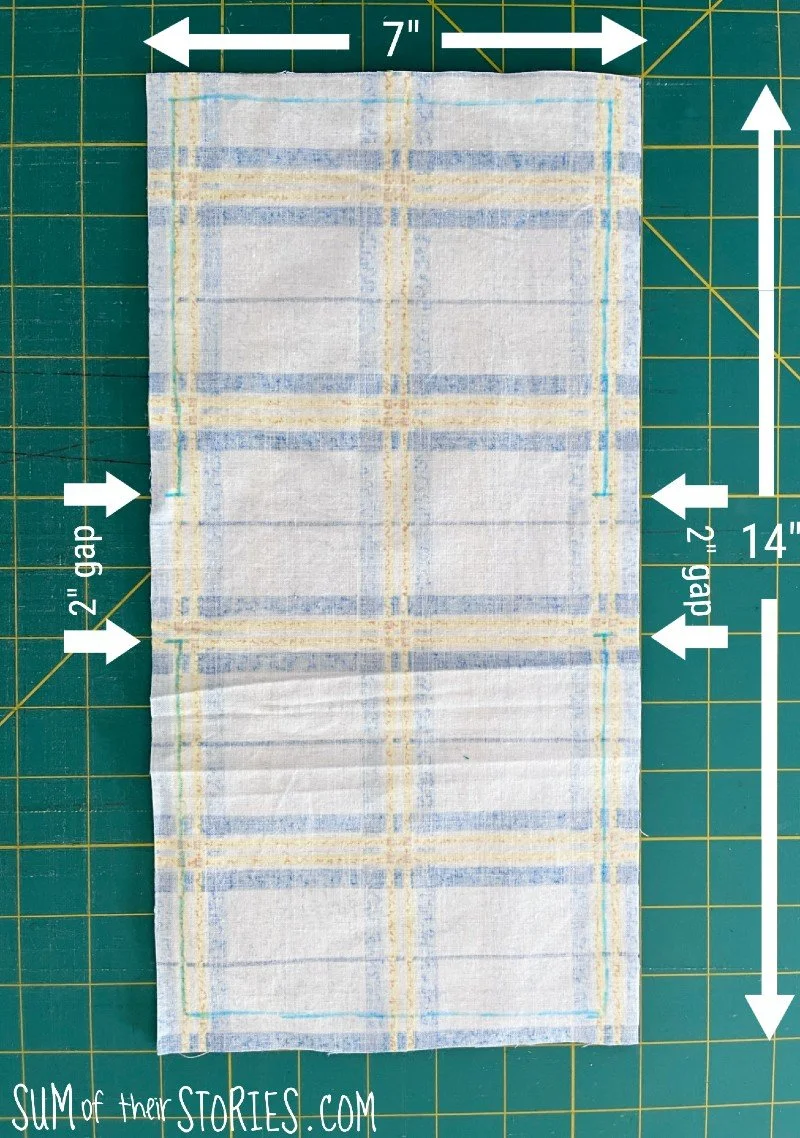
Measure and mark 1” (2.5cm) from the centre point in both directions. Repeat on the other side.
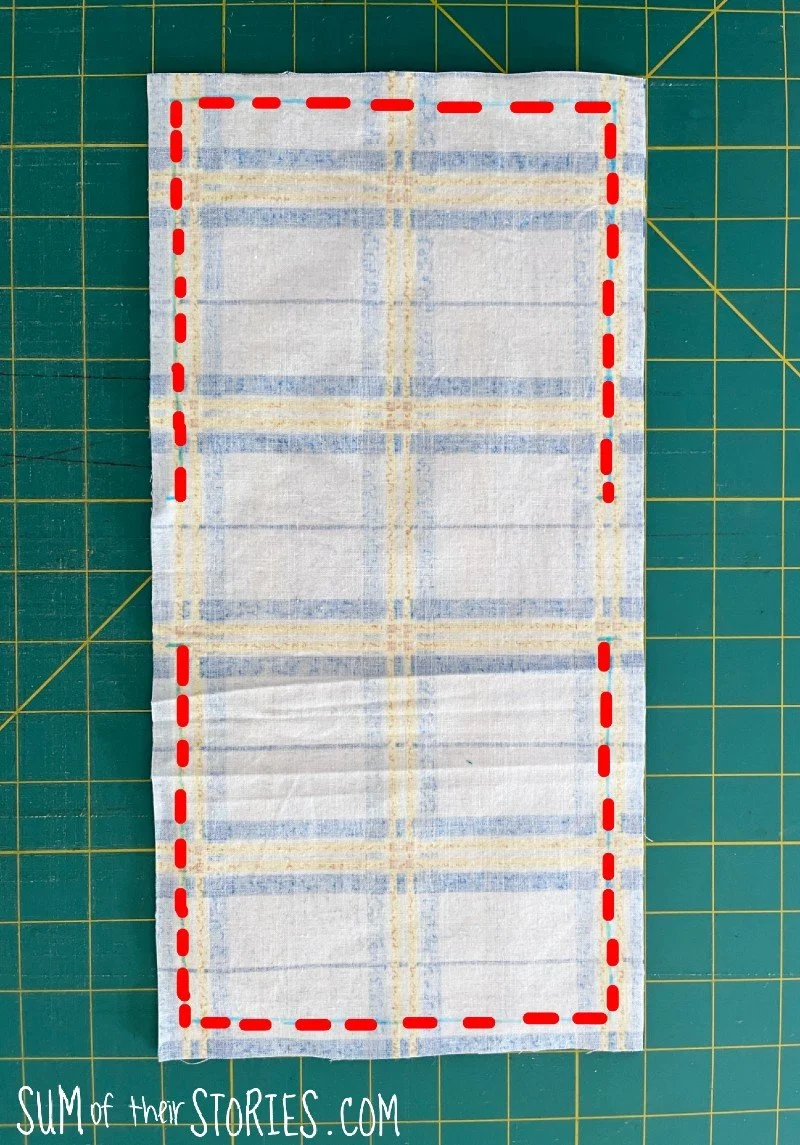
You are going to stitch all around the edge of the rectangle leaving a gap in the centre of each long side between the marks you have just made. Remember to work a couple of backstitches and the beginning and end of your stitching each time just to make it secure.
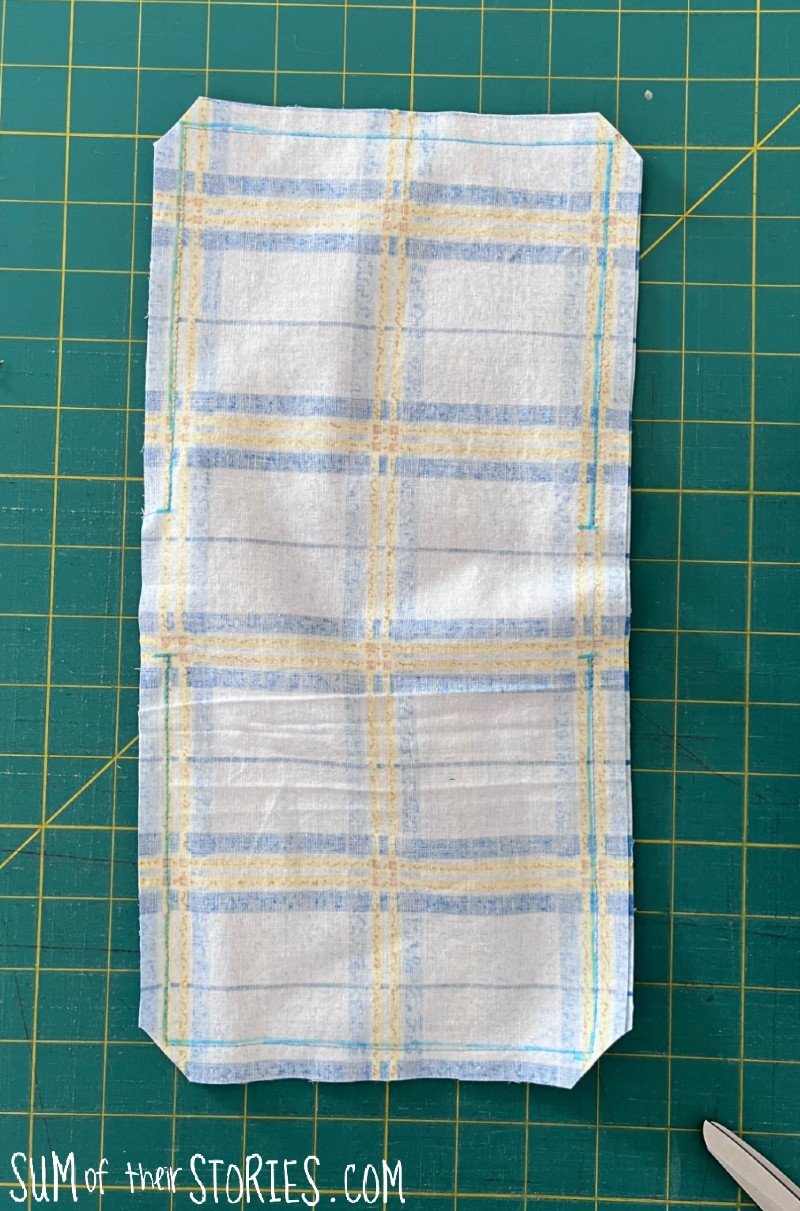
Snip across the corners to remove bulky fabric being careful not to snip into the stitches.
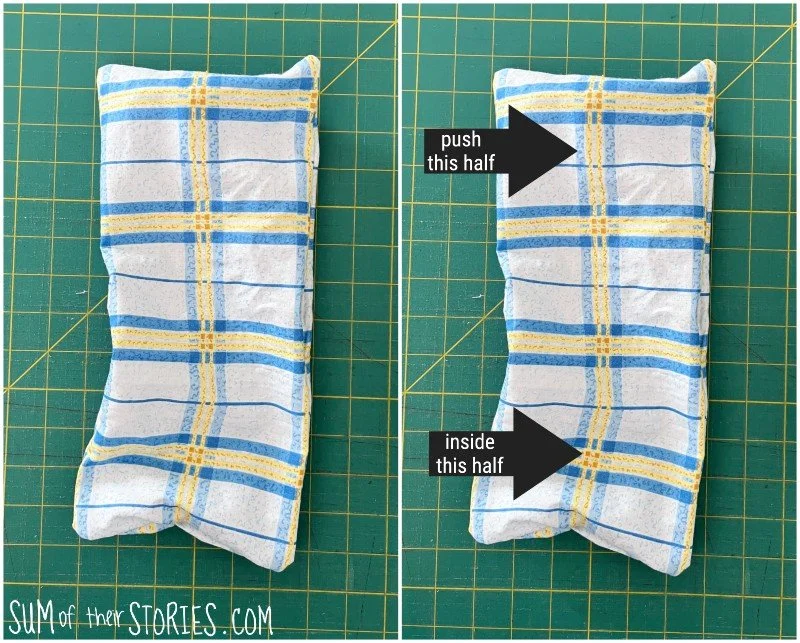
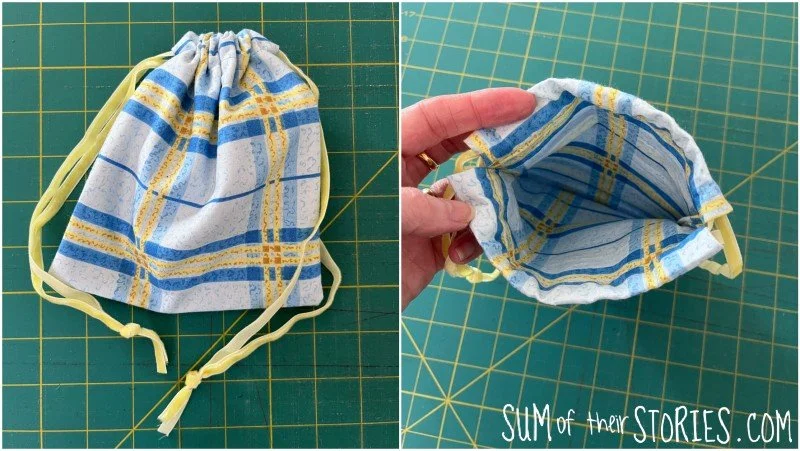
Turn the bag out through one of the gaps you left in the side.
Push half the bag into the other half, flatten and smooth.
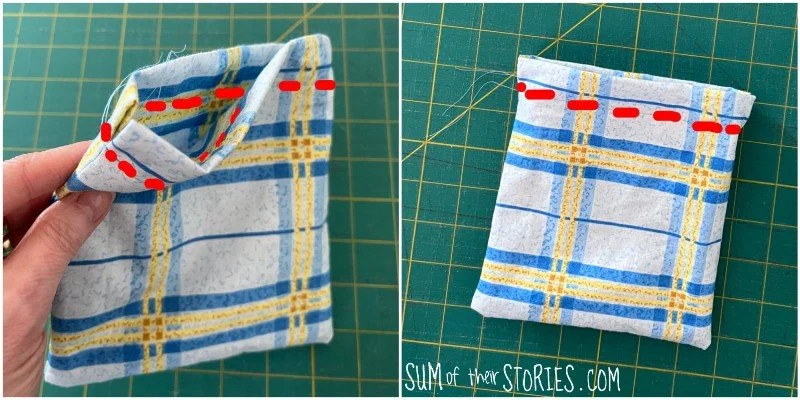
Remove the sleeve of your sewing machine and stitch all the way round the top about 1” (2.5cm) from the folded top edge. You are stitching AROUND the bag not across the top.
Finish by threading your 2 lengths of ribbon or cord through the channels you’ve made at the top of your drawstring bag.
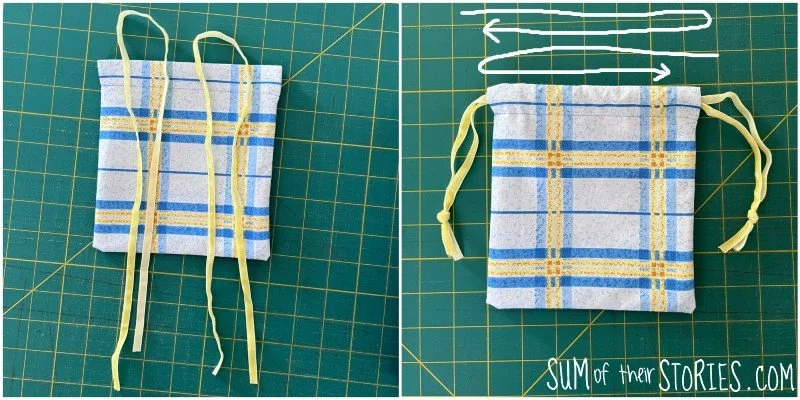
One cord goes in one direction and the other in the opposite direction. Tie a knot in the ribbon ends to secure them.
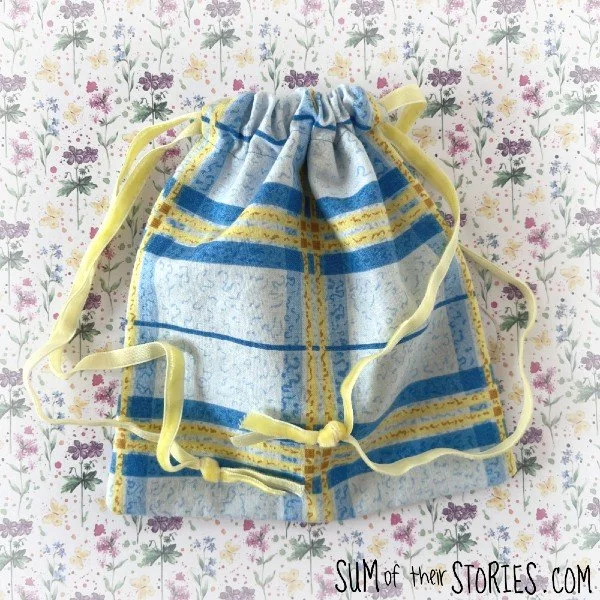
That’s it! Simple as that and you’ve made a useful little drawstring bag that is fully lined, no exposed seams showing.

What kind of fabric is best for these Drawstring Bags?
You can make a lined drawstring bag like this from any fabric but I’d recommend something with a bit of structure, just to make life easier for you. An light upholstry fabric is ideal.
The blue check fabric I used here is old curtain fabric and that worked well. A decent quality quilting cotton would also work perfectly.
I think denim from old jeans would probably be a little too thick and bulky. I’d also avoid anything too light and flimsy, just because the area where the cord is threaded could become tatty and fray rather easily.
If you did have a favourite fabric that seemed a little too lightweight then you could add a fusible interfacing to both pieces of fabric before you start sewing to give it more structure.
You see this a lot, especially in those short speeded up tutorials on social media, when all fabric seems to require an iron on interfacing before sewing. Personally, I’m not a fan! Most interfacings are made from polyester and I prefer to try and pick a fabric that is a suitable weight for my project rather than try to make the fabric that is not suitable, more suitable - if that makes sense. I don’t mind some of the fabric things I make being a little floppy! I try to limit my use of interfacing to the times when it’s unavoidable. All that said, if you like to use an iron on interfacing to give structure to your fabrics then that is exactly what you should do.
Making different sized drawstring bags
You can size this pattern up to make any size of drawstring bag. I wouldn’t recommend going any smaller though as it would be much more difficult to sew around the top edge in the final step. The whole point of this sewing tutorial is to show you an easy method to make a drawstring bag so let’s not go making life difficult for ourselves, right?

How to decide of the length of your cord or ribbon
As you can see I’ve given the minimum cord lengths you’ll need to create the ties for your drawstring bag. You can make your cords longer if you like but any shorter and you won’t be able to tie a knot.
In my photos for this tutorial I’ve used a longer length of yellow velvet ribbon. They are 28” each.
You could just use 1 length of ribbon or cord for your bag and only have it on one side. This makes it more difficult to fully close the bag and keep it closed though and also can make your drawstring bag feel a little lopsided. The 2 cord method I’ve explained here is always my preference.
Julie
I’ll be sharing this tutorial at some of these link ups
More bag making tutorials for you to sew: