Paper Silhouette Lampshade Upcycle
/Use paper cut outs to give a plain old lampshade a new look.

It’s time for another Do It Over Designers Challenge when I join some of my creative blogging friends to bring a collection of upcycling/makeover ideas for you. You’ll find links to all the projects at the end of this tutorial.
This month I’m bringing a project that would have been perfect for last time’s challenge. Being a little late with something is unfortunately not a new experience for me but I’m a firm believer in “better late than never” which is just as well really!
Warning: rambling backstory to this project imminent. Feel free to scroll on down to get to the tutorial, I promise I won’t be offended.
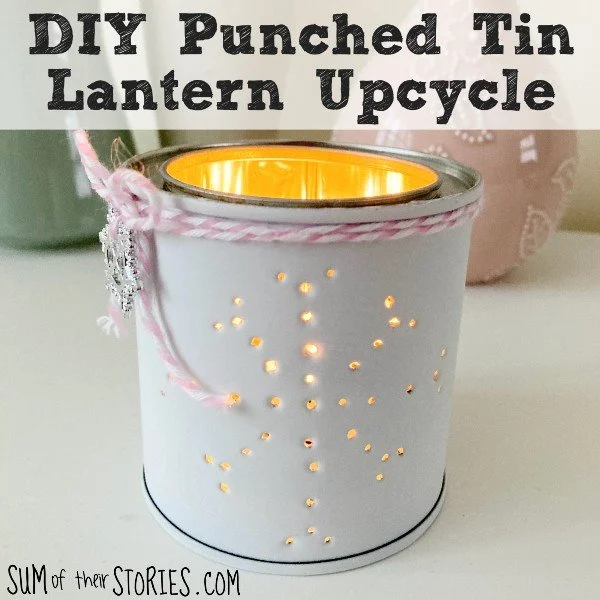
Back in July, when we held our last Do It Over Challenge, our host Ann from The Apple Street Cottage had set a theme of LIGHTING and my entry was this summery punched tin tealight holder. However I had spent a good few weeks in late June and early July checking out our local charity shops searching for a plain lampshade so I could try out a paper silhouette idea that was stuck in my head. When I couldn’t find anything suitable I changed my plan and the summery punched tin lantern happened instead. (On the plus side the lantern has turned out really useful this summer to hold an insect repellent citronella candle whenever we’ve sat outside to eat so I’m not sorry I made it)

However the very day after the July Do It Over Designers Challenge went live my husband walked in the house holding 3 old plain lampshades (including this cream one above) asking if I wanted to keep them for anything! He’d been helping a friend clear out before a move and the lampshades were no longer wanted. Other than being a little dusty they were absolutely perfect for me to try my paper silhouette idea. If he’d walked into the house with them even a week earlier I’d have called it serendipity but instead we have to go with better late than never!
So now I can bring you the makeover project I really wanted to do back in July. I’m rather excited about this one because it turned out even better than the vision I had for it in my head. Let’s get started:
How to upcycle an old plain lampshade with paper silhouettes
What you need for this lampshade makeover
An old plain lampshade
Several sheets of regular copier paper
Mod Podge & a brush
A die cutting machine and metal dies of stems, leaves, flowers etc
Can I still make this craft if I don’t have a die cutting machine?
Yes! You could print whatever images you like from your computer and cut them out. Or you could draw simple designs and cut those out. They don’t have to be as intricate as the ones I used for my lampshade.
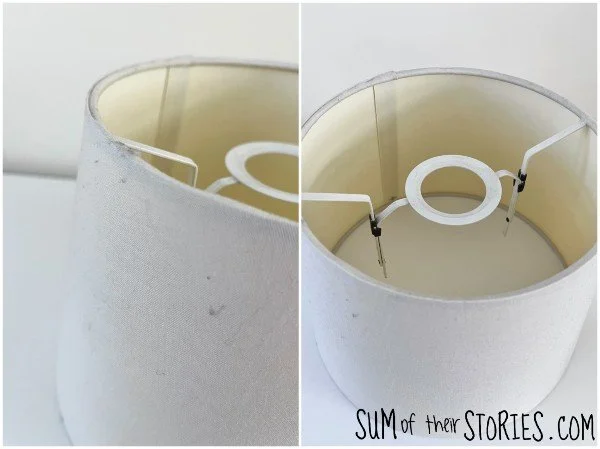
Start by cleaning the lampshade if necessary. As you can see, mine was a little bit dusty but it cleaned up nicely with just a soft cloth.
Prepare your paper cut outs
In the past, here on Sum of their Stories, I have bemoaned the fact that I didn’t have any sort of cutting machine. I was strictly a scissors or craft knife kind of girl for years. I am now lucky enough to have an electric die cutting machine and a lovely selection of metal dies. I was given them 2nd hand when a friend’s mum passed away. She had done a lot of papercrafts and I am honoured to be able to put her old equipment to good use.
You can cut whatever paper shapes you like for your lampshade. I looked through my collection of dies and picked out lots of leaves, stems, florals etc.

Cut several sheets of your chosen shapes - I did 5 sheets - you want lots of shapes to choose from.

Applying the silhouettes
Working on the inside of your lampshade, apply Mod Podge over a small area and glue down your first paper shape. Dab a little Mod Podge over the top of the shape too, to seal it in.

Work around the entire lampshade glueing on your cut out paper shapes.
I found it easiest to apply the larger shapes first, then fill in any gaps with the smaller shapes.

It’s as easy as that! Once you are happy with the design just leave the glue to dry.

Pop your lampshade onto whatever light fitting you want. Looks exactly the same as it did before, right?

But turn on the light and “boom!” - that’s when the magic happens.
I didn’t use all my paper shapes but it was good to have loads of choice to experiment with. How many you use will depend on your design and how big your lampshade is of course. Just to give you an idea, this is how many I had left over:

They won’t be wasted, I’ll just pop them in an envelope and use them for something else sometime.


Now let’s check out what my fellow creative bloggers have made for the Do It Over Designers Challenge.

Color Me Thrifty - Clothes Pin Fall Flowers
Vintage Style Gal - DIY Metal Crafts
The Apple Street Cottage - Doily Ghost
Birdz of a Feather - Crochet light
Exquisitely Unremarkable - DIY Wooden sign with transfers
Modern on Monticello - Rainbow Bridge Garden Bench
Pandora’s Box - Denim seam bracelets
Purple Hues & Me - Organza fabric vase
Unique Creations by Anita - Halloween Wall Clock Decoration
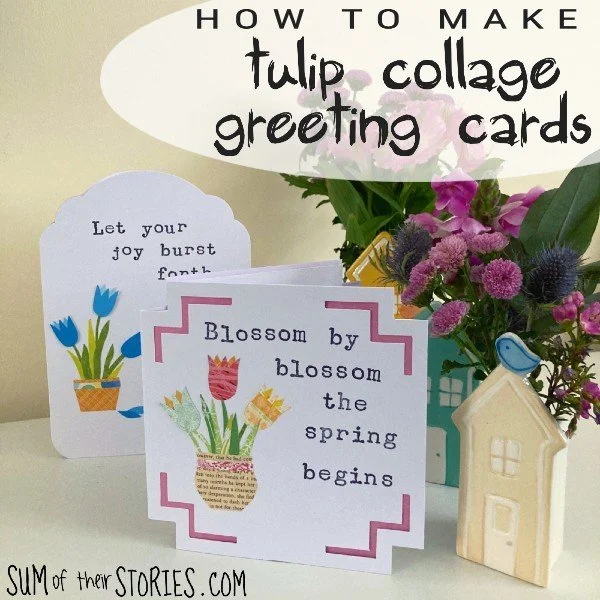
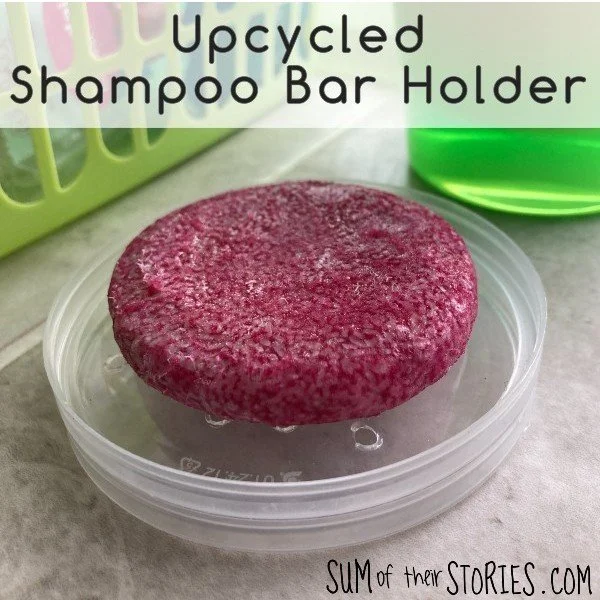
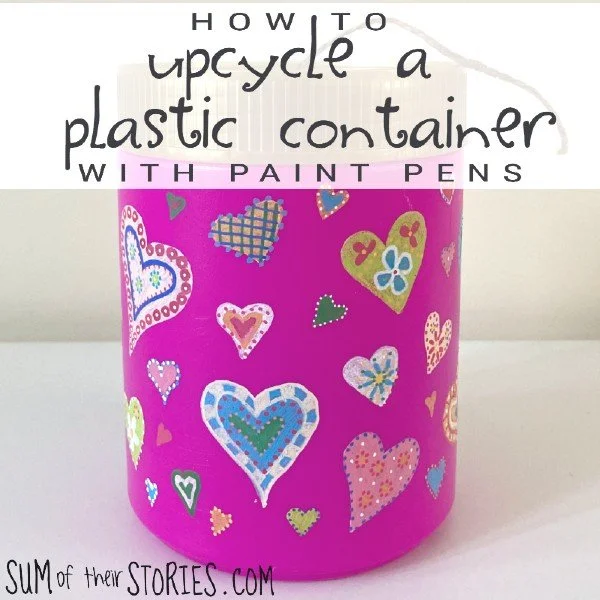
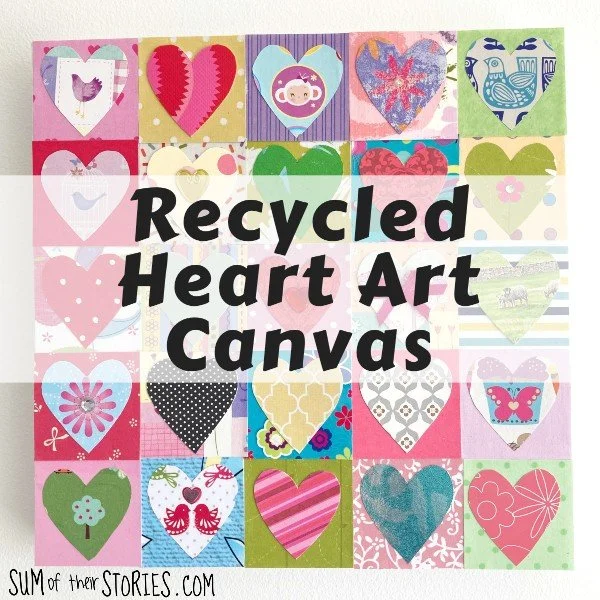
You might like to check out more of my recycling and upcycling ideas: