Waterproof Picnic Bag
/

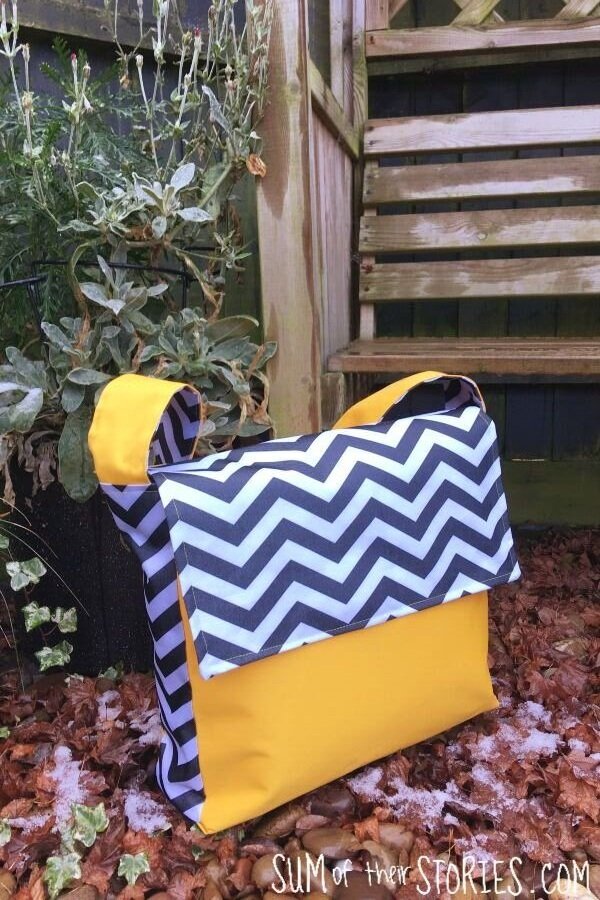
How to make a roomy and sturdy waterproof bag, perfect for picnics, blankets, flask and all your outdoor distanced meeting needs.
The Ottertex waterproof canvas to make this bag has been provided by Fabric Wholesale Direct.
This last year has really helped us all to focus on what really matters, time with family and friends. The current restrictions mean here in the UK we can’t meet up at all, apart from for a few very specific exceptions, but we hope that before long we might move back into a situation where we can meet a small number of our friends in a park or garden. I am going to be well ready for that moment (honestly I just can’t wait!) with my lovely new roomy waterproof bag which is going to hold everything I need for an outdoor winter/spring outdoor meet up.
It’s big enough to hold several blankets, a flask, food, wipes, sanitizer the lot! Blankets and a flask are the most important I think, there is nothing quite like a cup of tea with a friend, even if you are sitting at opposite ends of a park bench.
I’m thinking lots of blankets for winter/spring but actually the weather here is so unpredictable that blankets are often needed well into summer too! These are photos of me and my friends having a socially distanced garden get together last June! Blankets are essential for anything outdoor here in England!

First a word or two about the fabric I used.
This Ottertex waterproof canvas is available in a whole array of fabulous colours and patterns. As I said at the top, mine was gifted to me by Fabric Wholesale Direct.

Based in the US, they ship worldwide and my parcel arrived in record time - less than a week. The fabric is a firm canvas, and appears to be completely waterproof, it stitched easily enough on my regular domestic sewing machine, but it because it is fairly stiff it was, at times, slightly difficult to wrangle it into the bag I wanted. This bag design is slightly simplified from my original idea, which had a recessed zipper and everything, but necessity is the mother on invention and all’s well that ends well.
I found the canvas is difficult to turn out once stitched so my usual method of making a bag and lining together and then turning through a gap in the lining just wasn’t going to work. So instead I made a bag and lining separately and then secured the two together by placing the lining inside the bag and top stitching around the top.
You could make this bag from a softer fabric of course, but you’d probably want to add some kind of interfacing, the stiffness of the fabric makes it stand up, making it easier to fill with all your supplies.
Despite the minor challenge I love two things about this waterproof canvas, the vast choice of colours and pattern and just how water resistant it is. Hopefully you can see it in this photo. When I was outside taking photos of my finished bag it wasn’t actually raining but there were some drips from the top of our garden bench onto it. The water just sits in droplets on the surface of the fabric until you wipe it away.

I didn’t seal my seams or anything like that so I can’t dunk my bag in water and expect it to keep everything dry, but it is most definitely showerproof and I can put it down on the ground knowing that the base will just wipe clean.
I also avoided using pins on this project whenever possible and used quilting clips instead. This was for 2 reasons, quilting clips are much easier when you have 4 or more layers of a thick fabric, when I did use pins I bled on this project more than once (luckily it’s wipe clean!) Second I wanted to avoid making holes when not necessary.
I used a denim needle which worked well, I used regular sewing thread which seemed fine. My walking foot came in very handy too but I think you could manage without.
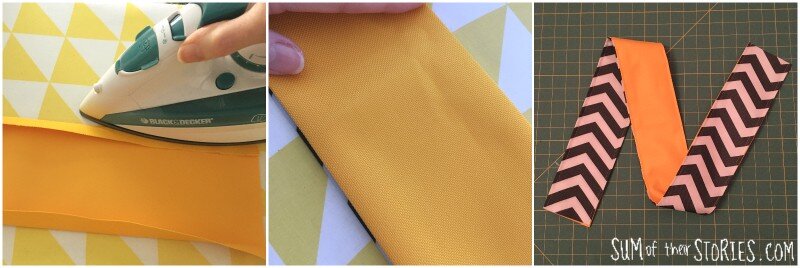
You can iron this fabric but ONLY ON THE RIGHT SIDE! Do not, I repeat DO NOT try to iron the wrong side. It will melt on your iron and cause a nasty mess which you will not enjoy cleaning off. You are warned!
Ok, enough rambling, let’s get on with making the bag.
You will need:
Sewing thread in a matching colour
A denim sewing machine needle - not essential but recommended
2 magnetic bag fastenings
I have given all the measurements here in inches. Although I do work in both inches and cm, my cutting board is in inches and for this bag it was just easier. Apologies if you are a cm kind of person, hopefully you can convert easily enough.
Cut out the following pieces:
From the sunflower yellow canvas-
17” x 38” the main outer bag
17” x 13” the top flap lining
41” x 5” the handle
7” x 9” the pocket
7” x 8” the flask holder loop
From the contrast zig zag canvas-
17” x 38” the main lining
4 pieces 5” x 17” the side panels, for the outside and the lining
17” x 13” the top flap
41” x 5” the handle
Step one, assemble the outside of the bag:
Attach 2 of the side panels to the main yellow outer bag piece. Place the panels at the top of the main bag piece, right sides together, and sew down the side stopping approx 1/2 inch from the bottom end of the side panel.
When both panels are stitched to one half, fold the main bag piece up and sew the panels to the other half of the main bag piece in the same way.

Now stitch the gap at the bottom of the side panel closed.

Step 2, assemble the bag lining:
This is pretty much the same as the bag outer, but we are going to add in a few ‘extras’. First a pocket.
Take the pocket piece and carefully press a small hem all the way round (on the right side only remember - don’t let that iron touch the wrong side of the fabric) Stitch straight across the top.
Place the pocket onto the main lining piece centrally, 4” from the top edge with the stitched edge at the top.

Stitch round the 3 remaining sides of the pocket, you’ll need to fold the pressed hem back under as you go. Now is when you will start to find this firm canvas a little bit challenging to work with. It doesn’t fold like regular fabric. I found if I rolled it then it tucked under the machine much better.

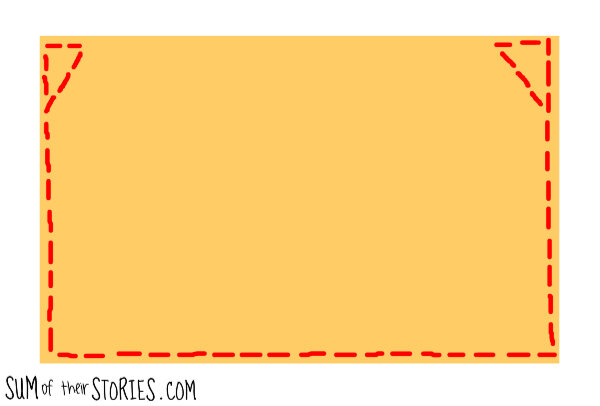
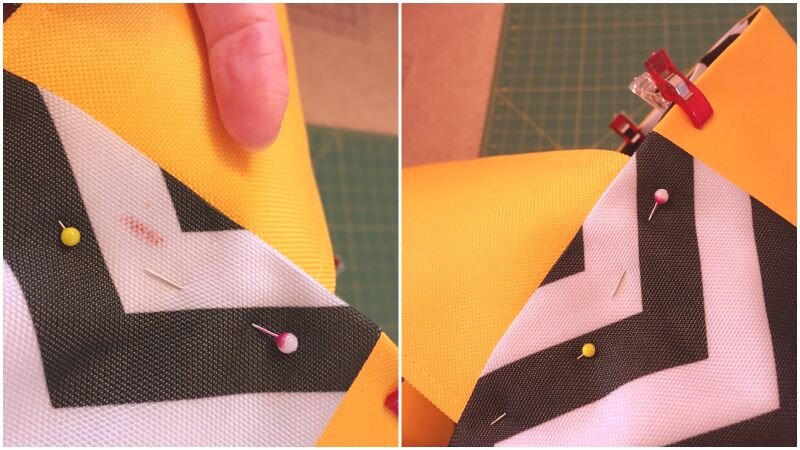
When you stitch the pocket, start an inch down from the top and stitch a triangle before stitching all around the 3 sides and finishing with another triangle. This diagram is an exaggeration of the triangle but gives you an idea of the shape you are stitching.
Next prepare the flask holder loop.
Fold over and then stitch a narrow single hem on the 2 long edges of the flask loop piece. Mine looks super wonky here, I’m sure that’s just the angle of the photo!

Now all your lining pieces are prepared put the lining together in the same way you did the bag outer. The only difference is that you are going to insert the flask loop in the side seams on one side of the bag.
To do this position the flask loop 9” from the top of the main piece of bag lining, sandwiched between the lining and the side panel. Lay it face down, so right sides together with the main lining piece.

Continue joining the side panels in exactly the same way as the bag outer, the side seams and then the bottom of the side panel. Repeat the inserting of the other side of the flask loop into the other side seam as you stitch it.
Your lining should look something like this when it’s finished.

Step 3, make the handles:
Take the 2 long thin strips of canvas, press a narrow single hem on both long sides of both pieces, lay them wrong sides together and top stitch both long edges.
Step 4, make the flap and add the fastenings:
Place the 2 flap pieces together, right sides together and sew around 3 sides. Turn the right way out, and top stitch.
Mark a point 1.5” in from each of the stitched corners in both directions and insert one half of each of the magnetic fasteners. A small piece of canvas to go inside to reinforce the fastening is a good idea.

It’s easy enough to reach inside the flap to attach the fastening. Some people like to mark and attach these before they do any bag construction but I prefer to do it at this point as it’s easier to ensure they are in the right place, if my seam allowance has wavered even a little it won’t matter if I pop the fastenings in last.
Turn 1.5” down on the top of the bag and the lining and press as well as you can.

Pin the flap centrally to the inside of the back of the outer bag then allow it to flap down onto the front of the bag and mark the 2 points where the fasteners on the flap touch the bag front.
Fit the second part of the magnetic fasteners in place on the bag front.

Step 5, put it all together:
This next bit was the most fiddly bit of the entire construction. It’s not difficult but the stiff structure of the canvas makes it a bit fiddly. I stabbed myself several times with pins at this point. I suggest you just take extra time and care as you assemble it all.
Start by positioning the handle on the inside of the side panels of the bag, pin them in place. Then slide the lining inside the outer bag. You are sandwiching the handle ends and flap between the outer bag and lining.

Line the top up, use a mix of quilting clips and pins to hold it all in place and then top stitch all around the top edge. This will attach the lining into the outer bag and secure the flap AND the handles all in one go.

Getting the pins through all these layers is tricky, I’ll say again, be careful. This is where I stabbed myself a few times, but see how nicely my blood just cleaned off!
Feed the bag through your machine slowly and carefully. You can manoeuver the handles and flap out of the way, just go slowly and you should be fine with all the layers.

That’s it, your bag is finished. Now all you need to do is wait until your countries regulations allow you to meet your friends and family outside again and you’ll be ready.
The bag is so nice and roomy, you can see 2 blankets in here, plus my flask and it’s barely half full.

The pocket is ideal for your phone, keys or anything else small.
I love the monochrome zig zag fabric contrasting with the vibrant and cheerful yellow.

My most favourite bit of the bag is the inside! I love these bright pops of colour.