Upcycled Can Herb Planters
/
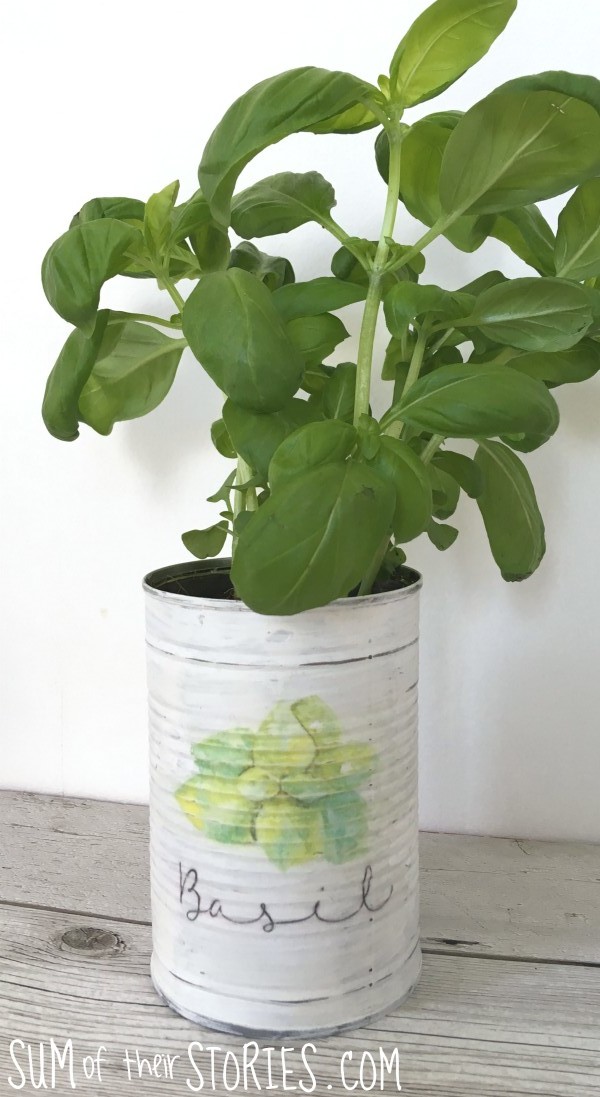
I love having a few pots with fresh herbs on my kitchen windowsill. Having them close at hand makes it easy to use in cooking. I’ve decorated some empty food tins to create herb planters. I was inspired by this beautiful herb sign from Katrin over at Kreativ K. Isn't it pretty? Update - sadly the Kreativ K blog is no longer around so this picture is just for inspiration now.

I decided to use the same method of image transfer but try making some planters for my herbs.
Upcycled Can Herb Planters
To make upcycled can herb planters you will need:
Old food cans
White Paint - mine is Rustoleum chalk paint
Herb printables - I downloaded this backwards version from Kreativ K when it was still an active blog. I’m afraid I don’t have access or copies of any other versions.
Mod Podge and a brush
Sandpaper
Prepare the can for upcycling
Wash your cans and remove any labels.
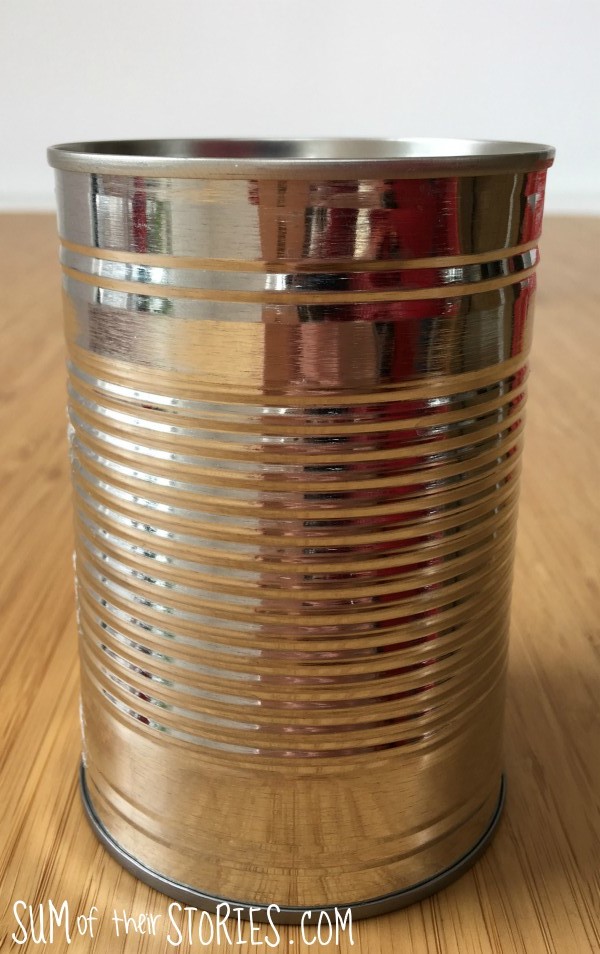
Be careful, mine were the kind that have ring pulls to remove the lids and the inside top edge is left sharp. I did not realise this until too late! Ops!

If your can has a sharp inside edge then you can give it a squeeze all the way round with pliers.

Decorate the can
Paint the clean, dry can with the white paint and leave it to dry completely. You don't have to be too fussy about the painting as a distressed look is what you are going for anyway.

Cut out the herb that you want from the printed sheet and cover the printed side with a layer of Mod Podge.
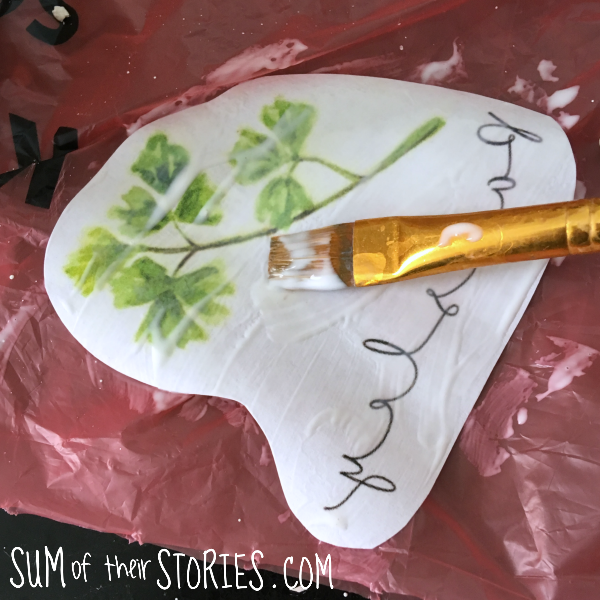
Apply it to the can, and press firmly, go over it with another layer of Mod Podge using the brush to really press the paper into the creases of the can. Leave this to dry completely.

Now you dampen the paper and rub it away. I found the top layer came off easily, I wet the underneath layer and rubbed gently to remove a little more. I was worried I would remove too much and wreak the whole things so I'm not sure if I could have removed more or not. I just kept on wetting the paper with a little water on the paint brush then rubbing again with my fingers until the rubbed off bits turned green. At this point I figured if I rubbed much more off there might be nothing left so I stopped!

Let it dry and then give the can a light going over with the sandpaper just to give it a more distressed look.

When I did the Parsley can I rushed a little and the Mod Podge wasn't completely dry when I started removing the paper. Just a little bit of the writing came right off and so I just touched it up with a thin sharpie - I make these mistakes so you don't have too!

Planting up your upcycled cans
You can plant your herbs straight into the can or put them in a pot that sits inside the can. If you plant directly into the can it will go rusty after a while. Check out my post on using old food cans as kitchen planters and you'll see what happened to those cans after a year or so. I kept my herbs in their original pot and just dropped that inside the cans, I added a layer of foil to the bottom of the can first too, hopefully that will help a little with the rust issue.


I'm keeping my planters inside. If you want to use your planters outside you'll need to make a few holes in the bottom for drainage and give them a coat with some sort of suitable clear sealer to protect the paint and design.
Julie
I’ll be sharing this upcycling tutorial at some of these link ups