
Simple to Sew Reusable Gift Bags
/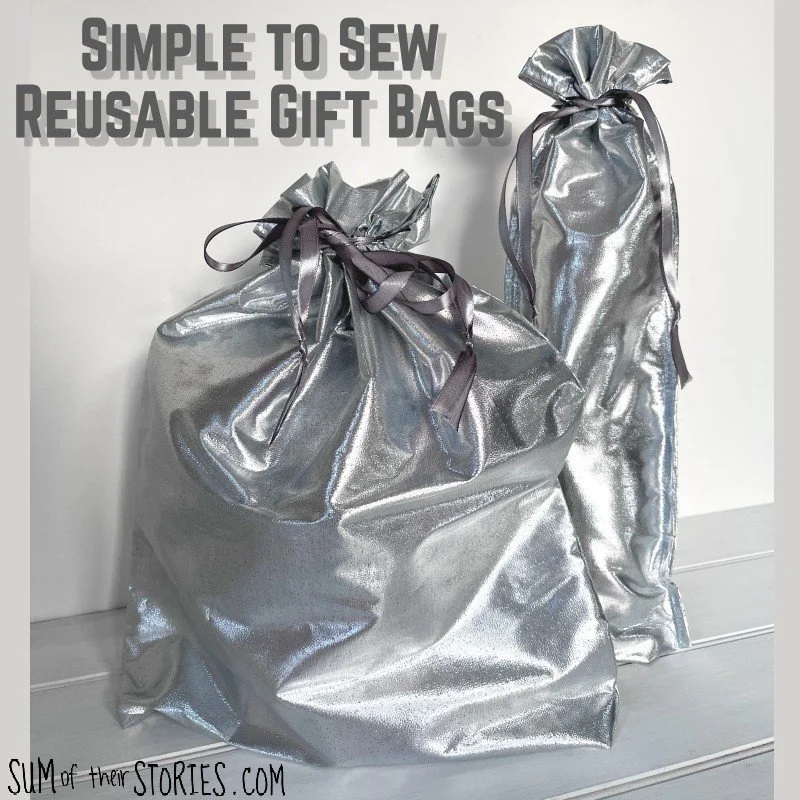
Reusable fabric gift bags are easy to make and can be used over and over again, year after year helping to reduce the enormous amount of waste we seem to produce over Christmas and other times of celebration.

A few years ago I shared with you a really simple tutorial to make reusable gift bags. That tutorial is really easy to adapt to make bags of any size and has a nice tidy finish to the inside.
I’ve been making reusable bags again and have a slightly different tutorial for you today. This gift bag has a more traditional drawstring fastening, the previous tutorial has a simple tie attached at the side.
I created this new fabric gift bag tutorial to make it easy to make gift bags from fabric that is traditionally quite tricky to sew with. I’ve used some silver lame (woven tissue lame so it’s not stretchy) which has made bags that look so shiny, like shimmery water - I love them! However you can use any fabric for this tutorial as long as it’s not too thick.
My tissue lame fabric is some more from the fabric scraps box I received from Fabric Wholesale Direct a month or so ago. It’s not the kind of fabric I would normally work with at all but that is what made the scrap box so much fun, it really pushed me outside of my comfort zone. You can read more about the scrap fabric box from Fabric Wholesale Direct here when I share a flat pencil case tutorial.
These bags are designed to be made with the full width of fabric, so there is a selvedge edge on both sides. You could adapt the idea to use left over fabric, old bed linen etc but you’d just need to add a narrow hem on the fabric edge instead of using the finished selvedge as I have here.
There are only 8 seams to sew making this sewing tutorial really simple. It is perfect for batch making, if you want to make a whole bunch you can really get some speed up.
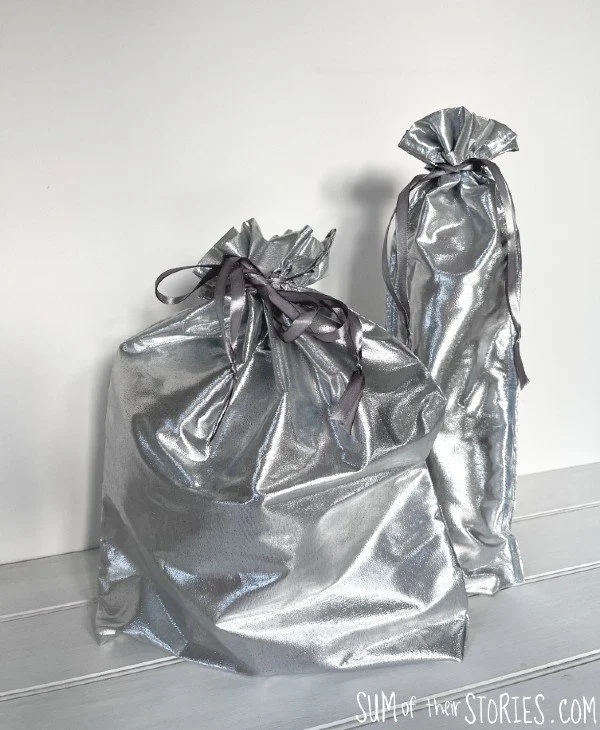
I’ve made 2 sizes of fabric gift bag here, the larger size and a narrower bottle bag. Both are made in the same way. The larger bags measure 13” x 17.5” and the bottle bags are 7.5” x 17.5”.
I’m putting everything in inches here, sorry to all my cm loving friends, I made the bags using inches and it just seemed to work out nicely. I have a cutting mat and ruler with only inches so I do often sew in inches these days.
How to make a simple fabric gift bag
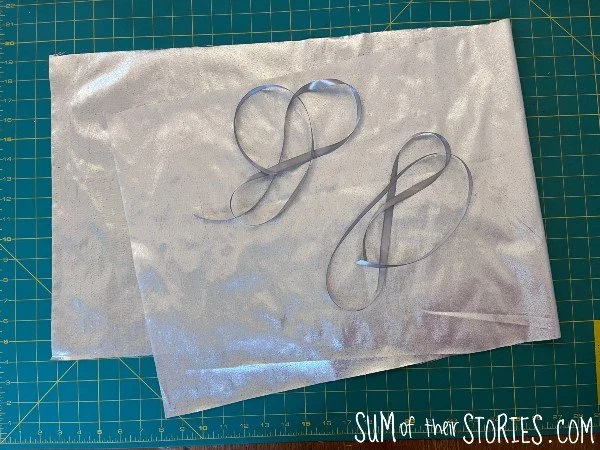
For each large gift bag you will need:
A strip of fabric that is 15” x the full width of the fabric. My fabric is 44” wide so my strip is 15” x 44”.
Ribbon - 2 pieces, each 38”
Sewing machine, matching thread, scissors, tape measure, pins, safety pin.
Sewing the fabric gift bag
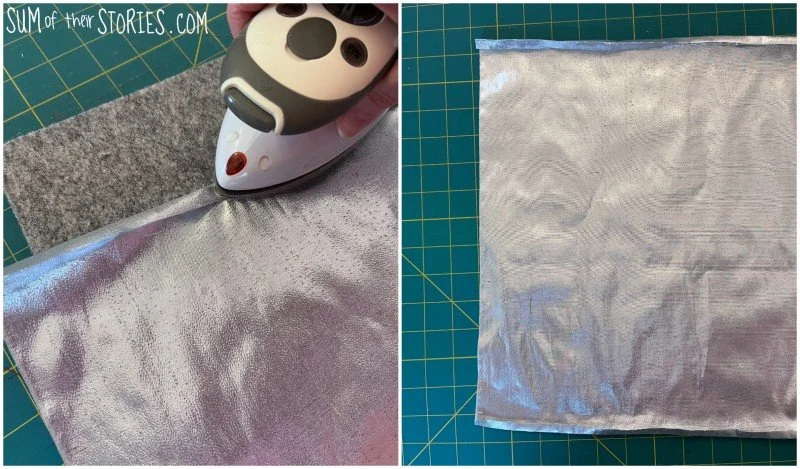
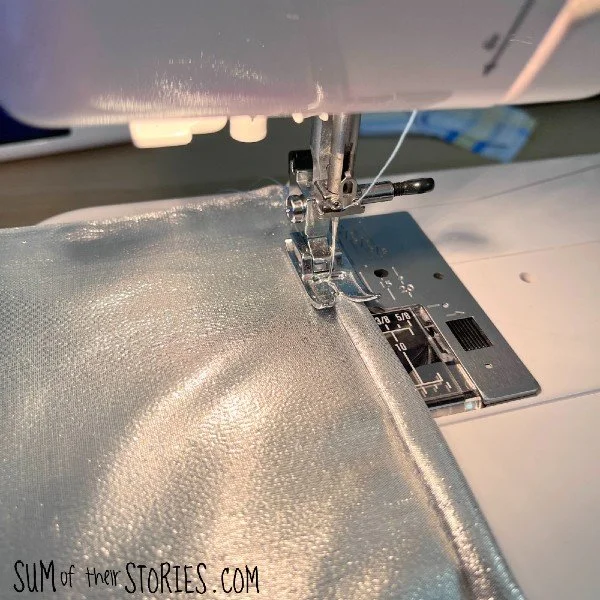
Turn a narrow double hem on the 2 long sides of your fabric, press and stitch. Remember to work a couple of back stitches at each end of all your seams as you make your gift bags, it stops anything unravelling later.
I found I could press the lame with a cool iron and it held the crease well. Do be careful and test your fabric first, especially if you are using something like this that might melt.
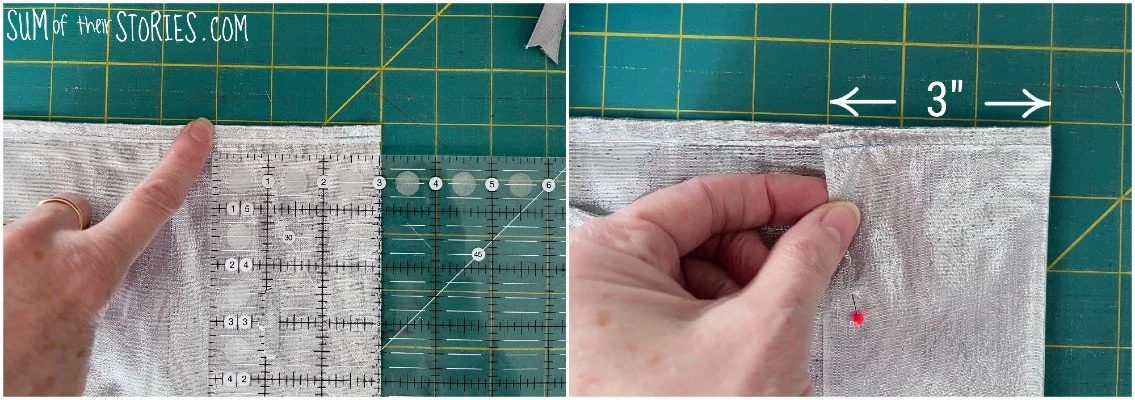
* With the wrong side facing up, turn a 3 inch single hem at each of the selvedge (shorter) ends.
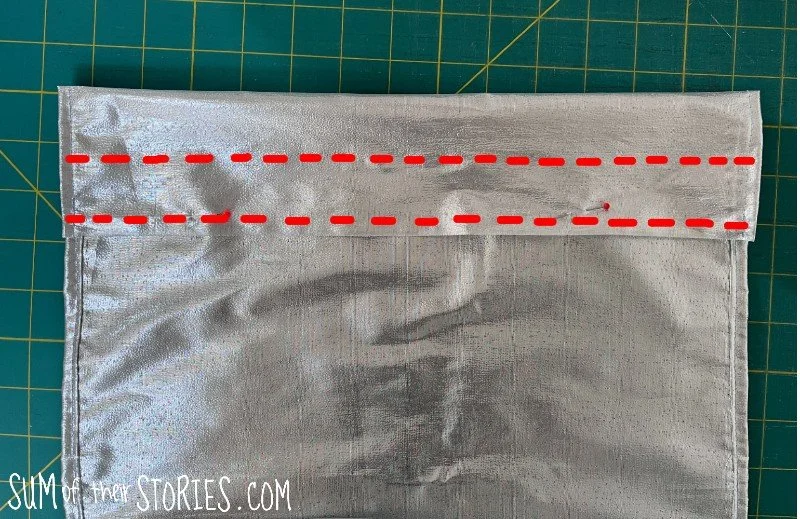
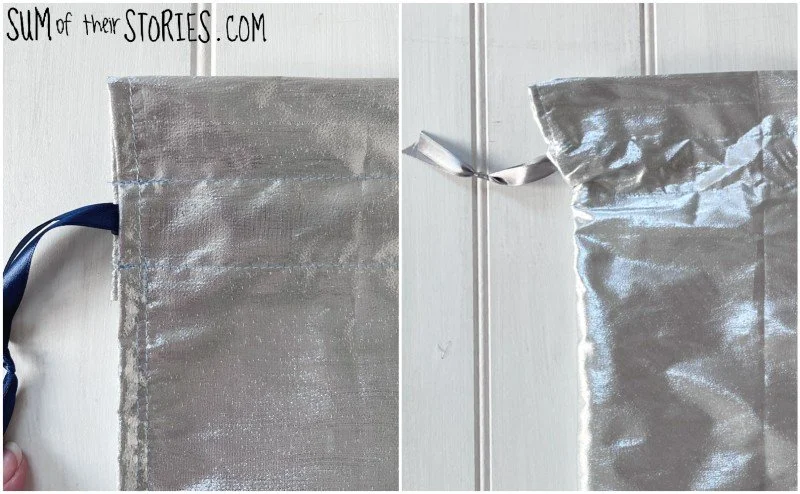
Pin in place and then stitch 2 lines, one close to the selvedge edge and 1 approximately 1 inch in.
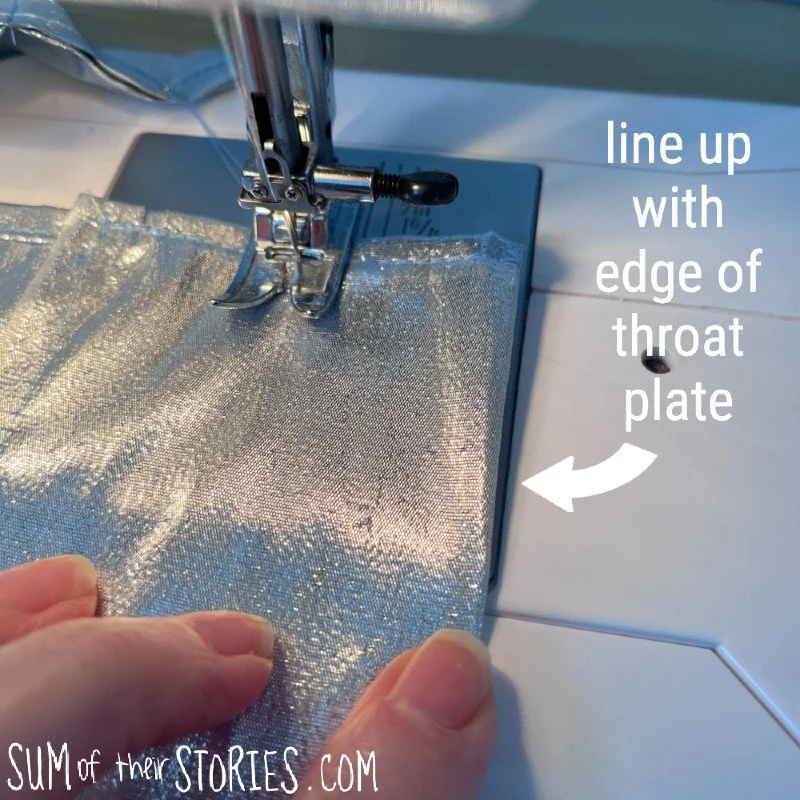
Tip: Use a point on your sewing machine to line the edge of the fabric to keep this seam straight. I used the edge of the throat plate on my machine. This made the gap between my 2 lines of sewing just over an inch which is fine, it doesn’t have to be super accurate. This is the channel that the ribbon will thread through later so as long as it’s wide enough for that we are all good. If your machine doesn’t have anything suitable to line your fabric up to you can stick a piece of masking or washi tape on to help you keep things nice and straight.
Making the gusset
I’m switching to a little drawing here because the photo I took were not as clear as I would like.
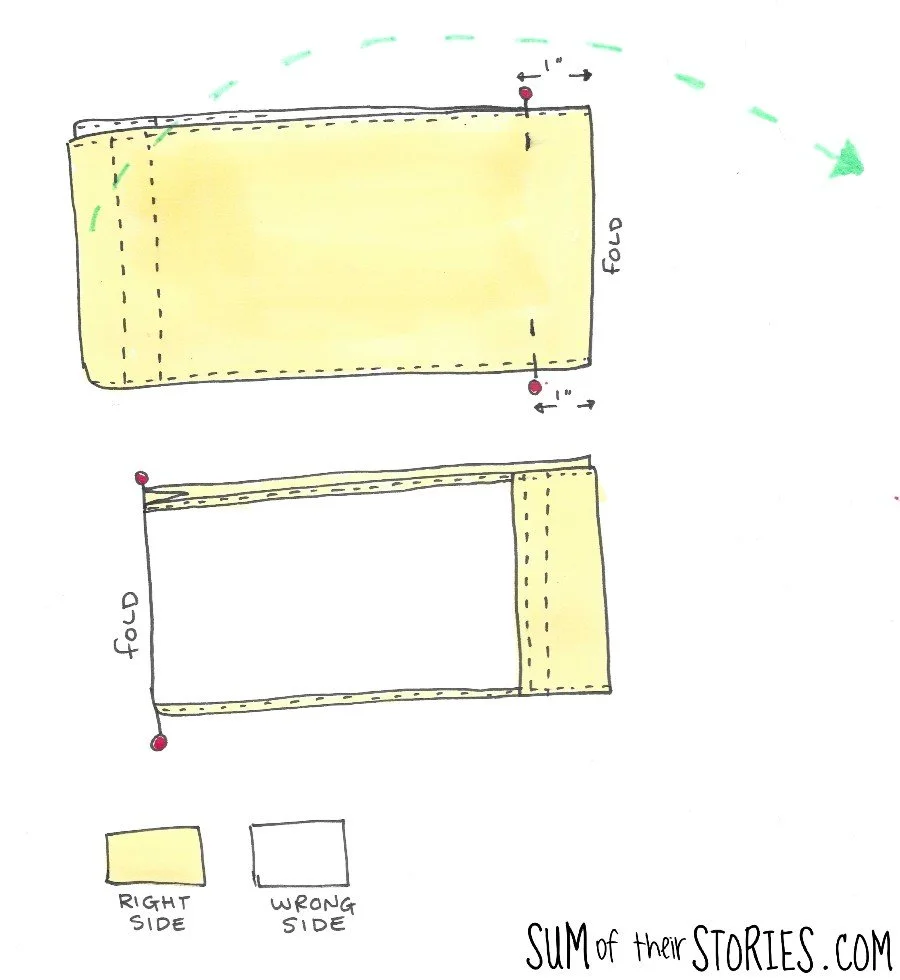
Lay the fabric on a flat surface and fold it in half, wrong sides together.
Mark 1” in from that centre fold and pin at 90 degrees, making sure you go through both layers of fabric.
Repeat on the other side.
Flip the fabric so the right sides are together and line up the sides carefully. Pin down each side.
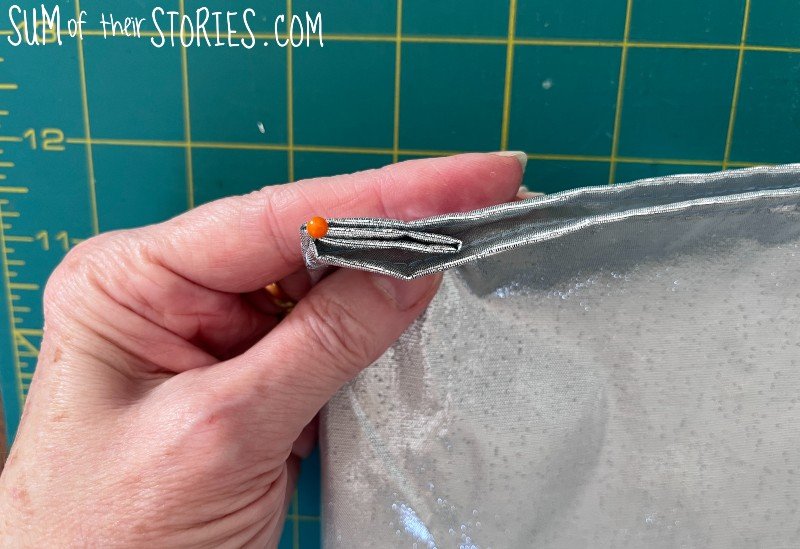
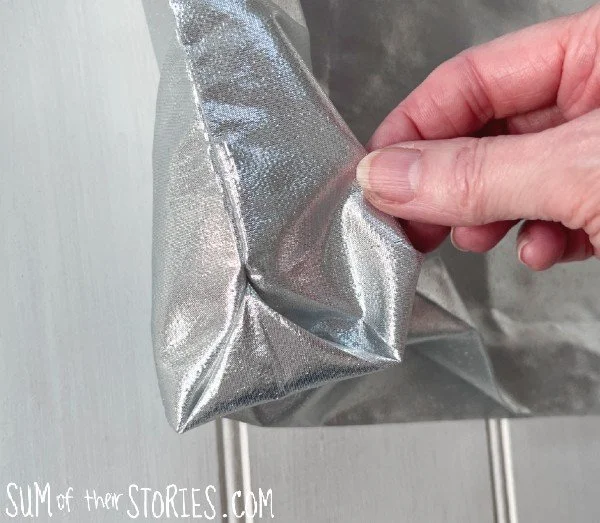
You should have a little W shaped fold at the bottom on the bag, this is going to make a little bit of a gusset, making the bag a little roomier.
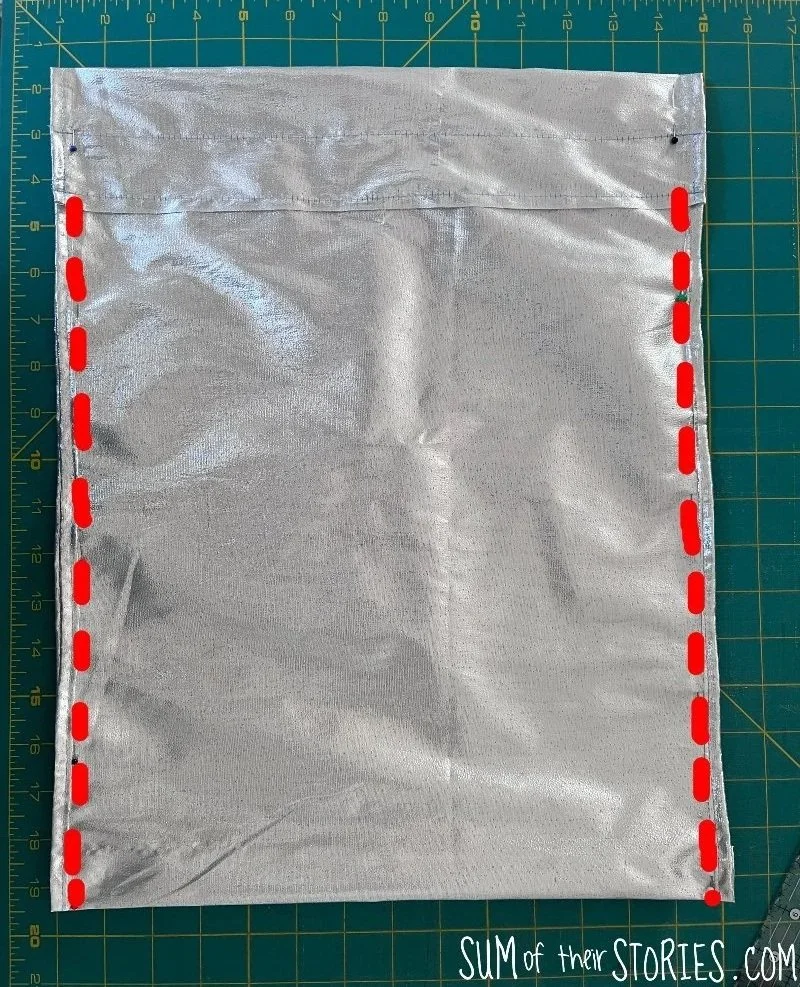
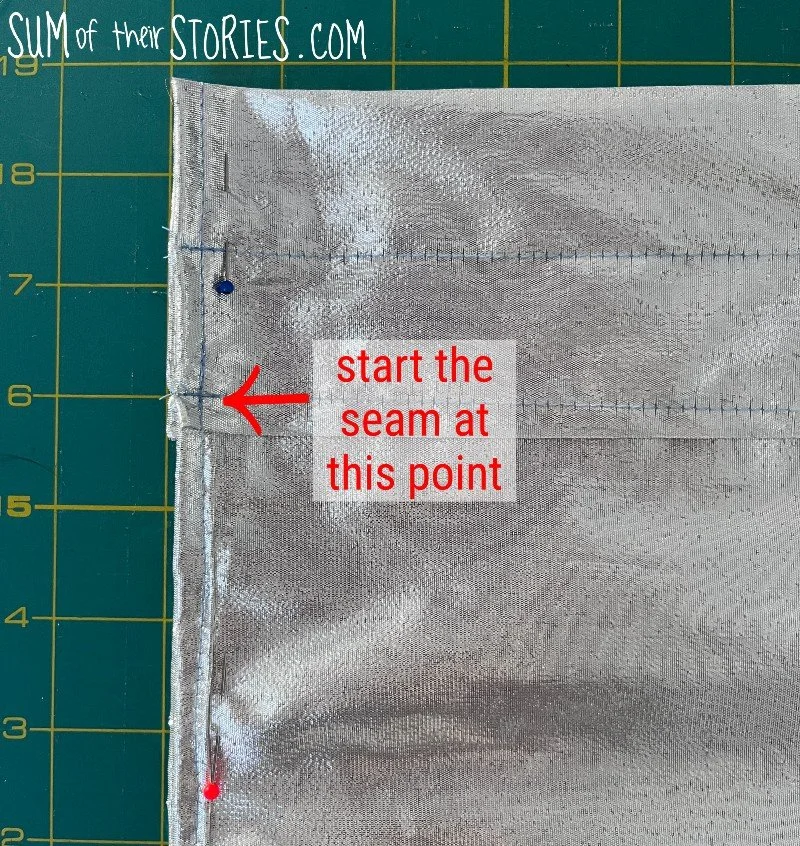
Sew down each side seam, starting at the seam nearest the selvedge edge and finishing at the folded bottom edge.
Flip the bag right sides out.
Adding the ribbon drawstrings
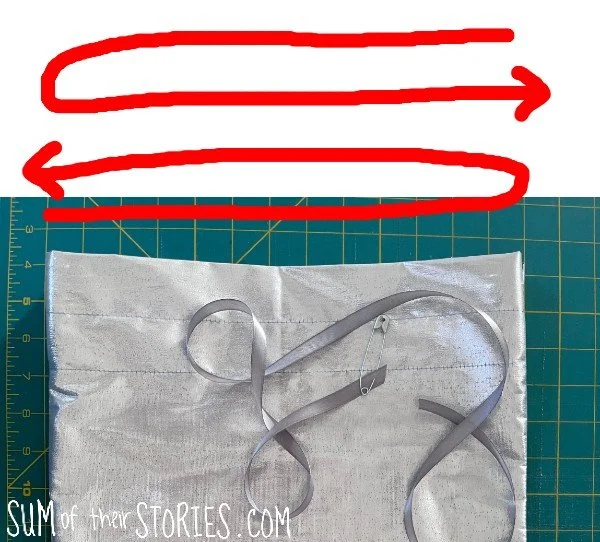
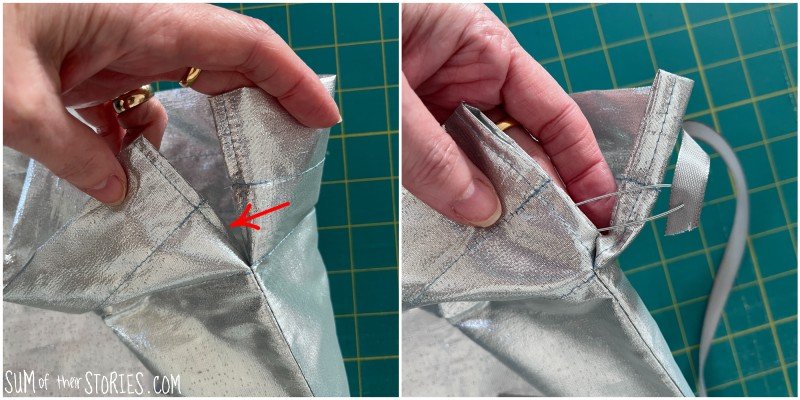
Using the safety pin, thread the ribbons through the drawstring channels. One goes left to right at the front and right to left at the back and the other ribbon goes in the opposite directions.
Tidy the ribbon edges by melting them with a flame if they need it (BE VERY CAREFUL as you do this obviously!) and tie the ends in a knot on each side.
That’s it! Whoop Whoop, your gift bag is finished.
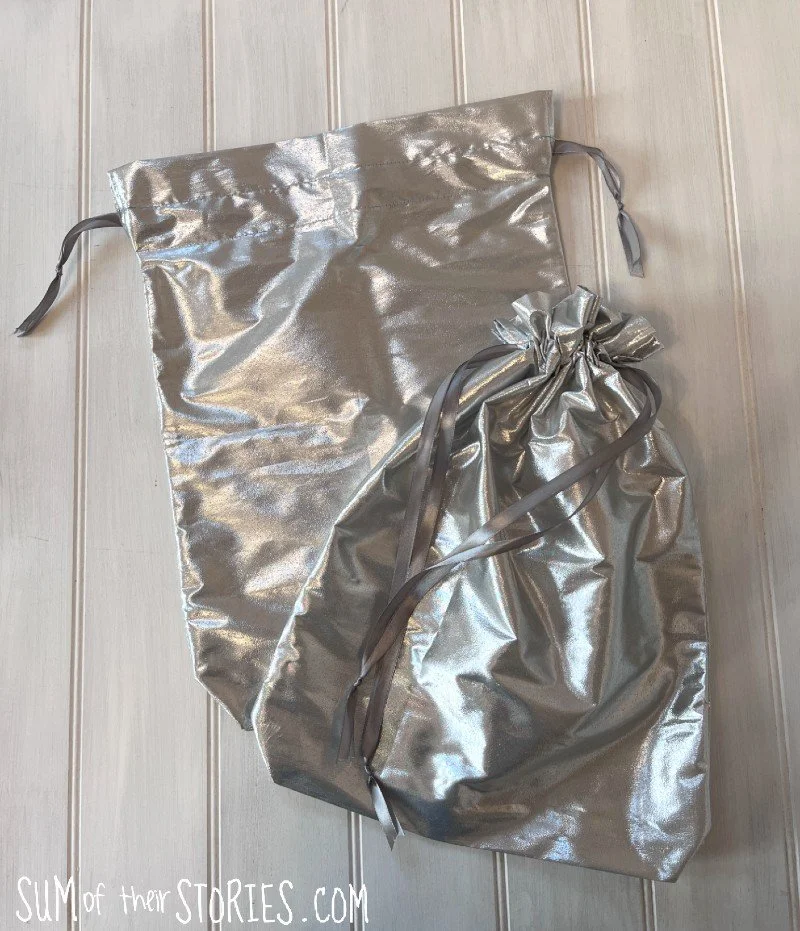
Fabric bottle gift bag
For a bottle gift bag you will need:
A strip of fabric that is 9” x the full width of the fabric. My fabric is 44” wide so my strip is 9” x 44”.
Ribbon - 2 pieces, each 23”
Sewing machine, matching thread, scissors, tape measure, pins, safety pin.
The bottle gift bag is made in the exact same way as above, the pieces are just thinner!
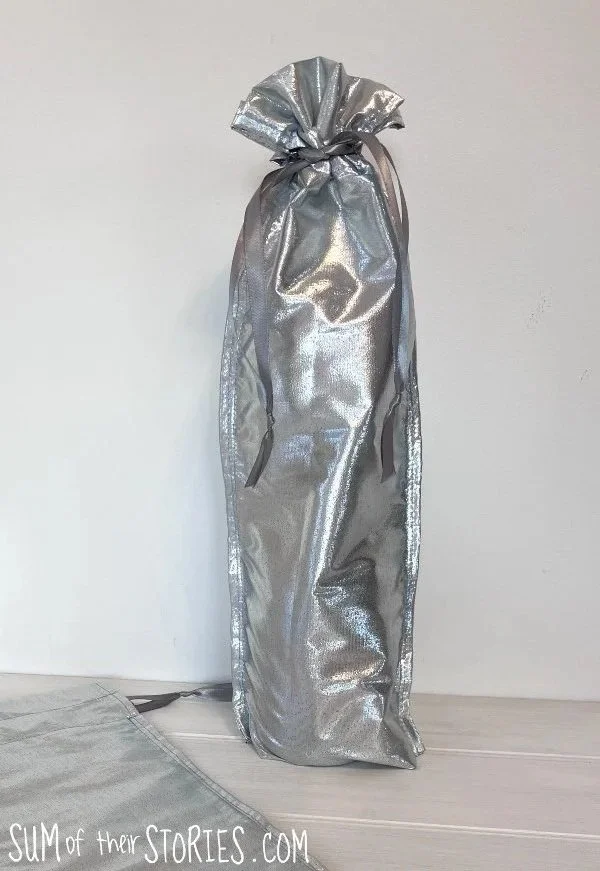
This is what those folds at the bottom of the bag do. They create a bit of a triangular gusset so the bag has some depth to it. I think it makes the gift bags more versatile.
Variations on your fabric reusable gift bag
You can omit the gusset fold at the base of the bag and just make it flat if you prefer.
You can just use 1 ribbon instead of 2. The bag is a little more difficult to pull securely but it does work. Your ribbon ends will just dangle from one side instead of both and you’ll need to hold the bag as you pull the ribbon closed.
The bags can lie completely flat so if you want to decorate plain fabric with fabric paint, something like wood printing blocks would be perfect, then you can decorate your bag once it’s finished. If you want to sew something decorative to your bag then I’d recommend doing that before you sew up the side seams.
If you’d like your bag to have a wider gusset then simply make the W fold bigger. Try placing the pin 2” from the fold, it will give your bag much more depth.
Making the gift bag with the seams on the outside
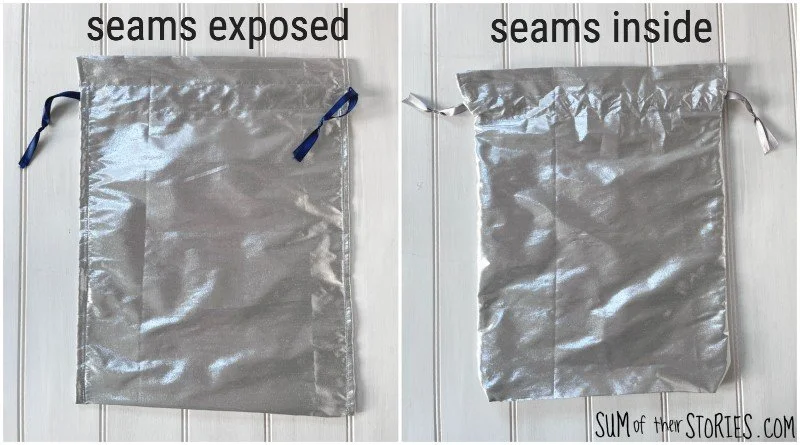
For a different look you can make your gift bags with the side seams on the outside. Scroll back up to the main tutorial to the point where there is a * . If you want the bag with the side seams exposed just switch the right and wrong sides of the fabric at every point from the * onwards.
Notes on your fabric choice for these reusable gift bags
You can use any fabric to make your own reusable fabric gift bags as long as it’s not TOO thick. The lame I used has made really fun bags that shimmer beautifully. A dressmaking fabric would be nice, like a cotton, polycotton or a lawn. Quilting cotton would work well. Inexpensive lining fabrics would be perfect. I would avoid anything thick like a denim, canvas or velvet, they would be difficult to stitch through when you have areas with lots of layer.
The height of your finished gift bags depends on the width of your fabric. My fabric was 44” selvedge to selvedge and my finished bags are 17.5” tall. If your fabric is wider your bags will be taller, and if your fabric is narrower then your bags will be shorter.
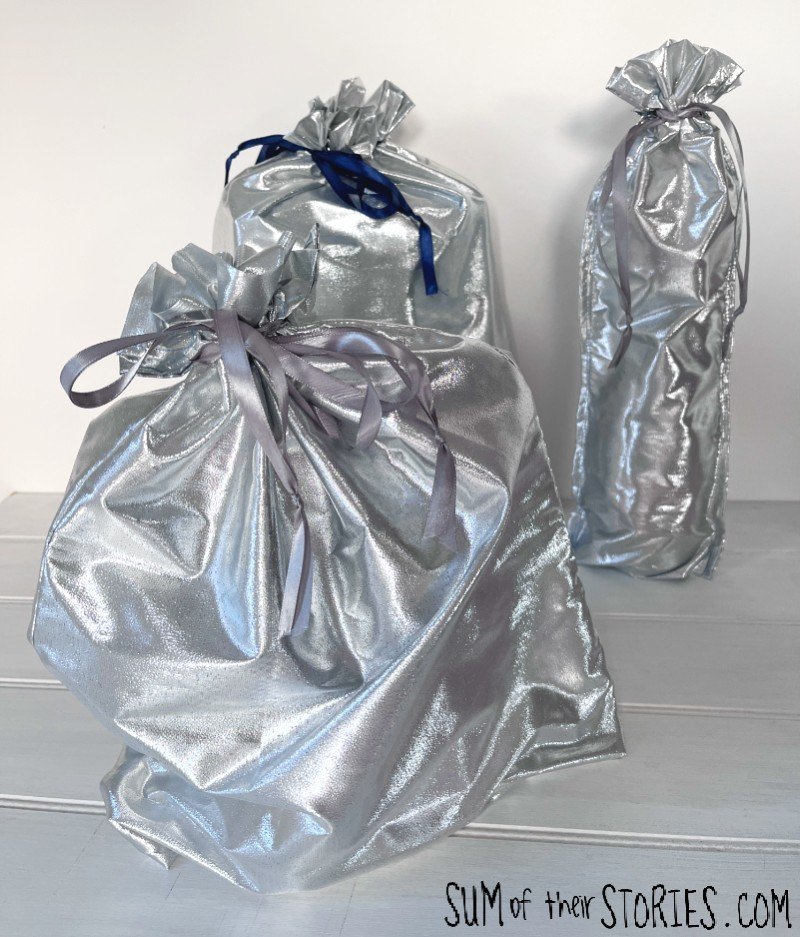
Have fun playing around with this simple drawstring gift bag idea. It’s pretty straightforward so once you’ve made a couple you can try adapting the basic pattern to make gift bags any size and style that you want.
Julie
I’ll be sharing this sewing tutorial at some of these link ups
You might like to check out some of my other bag sewing tutorials:







The easiest way to sew a fully lined drawstring bag, a really simple drawstring bag sewing tutorial